
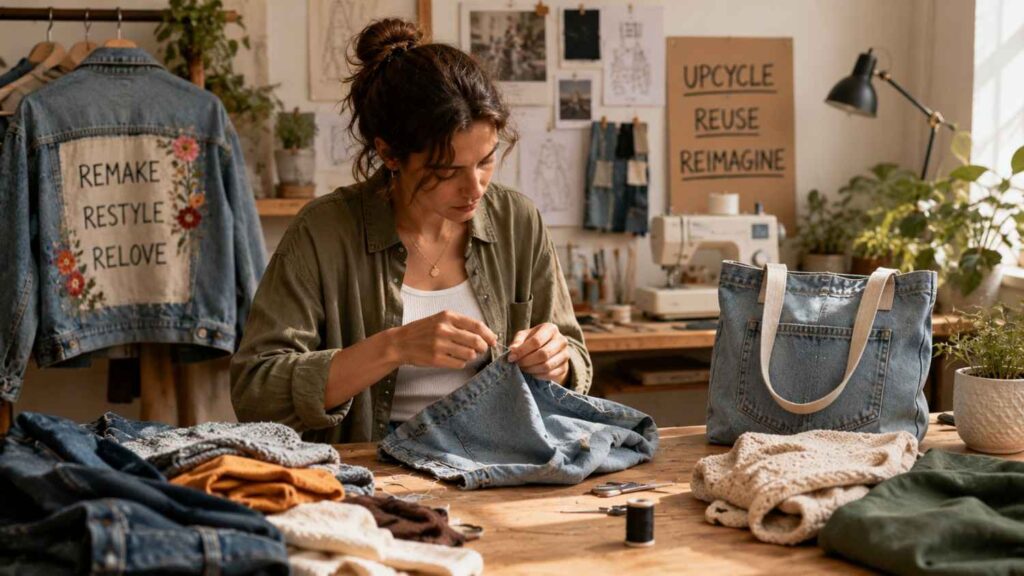
How to Upcycle Old Clothes Into New Designs: A Complete Beginner’s Guide
Learning how to upcycle old clothes into new designs can help you develop practical sewing skills, personalize your wardrobe, and extend the usefulness of materials you already own. A shirt that feels too loose, jeans with worn knees, or a dress with an outdated shape may still contain strong fabric and valuable details that can become part of a new design.
Clothing upcycling is not limited to professional designers or experienced tailors. Beginners can start with small changes such as replacing buttons, shortening a hem, adding a patch pocket, removing uncomfortable sleeves, or repairing damage with visible stitching. These projects teach basic measuring, cutting, pinning, pressing, and sewing without requiring a completely new garment pattern.
More experienced makers can move into deconstruction, paneling, patchwork, fabric manipulation, pattern alteration, and combining several garments. An oversized shirt might become a fitted blouse, while several pairs of jeans could provide enough fabric for a skirt, jacket, or durable bag.
The environmental context gives these skills additional value. The U.S. Environmental Protection Agency estimated that approximately 13 million tons of clothing and footwear entered the U.S. municipal waste stream in 2018. The agency notes that its figures do not include garments kept in circulation through donation or resale.
Upcycling alone cannot solve the environmental pressures connected with textile production and consumption. However, it can support longer garment use and reduce the need to discard material that still has practical value.
In my experience, the strongest project begins with a simple question: what specific change would make this garment useful again? Once that problem is clear, the design process becomes more focused and manageable.
Related Articles
What Upcycling Clothes Means and Why It Matters
Upcycling is the process of transforming an existing garment, textile, or component into something with improved usefulness, quality, appearance, or personal value. Unlike conventional manufacturing, which usually begins with new fabric, clothing upcycling works with material that has already been cut, sewn, worn, and shaped for a previous purpose.
This limitation can become a creative advantage. Existing pockets, zips, collars, waistbands, hems, embroidery, and faded areas can influence the new design. A skilled upcycling project does not always try to hide the history of the original garment. It may use that history as part of the final visual identity.
The process can solve several practical problems. A garment may no longer fit, but its fabric could support additional panels or a new silhouette. A stain may be covered with appliqué or a pocket. Worn knees may become reinforced decorative sections. A long dress may provide enough material for a skirt, top, and small accessory.
Upcycling is most valuable when it extends actual use. Adding decoration to a garment that remains uncomfortable or impractical does not necessarily improve its life. The transformation should address the reason the item was no longer worn.
WRAP’s textile hierarchy emphasizes durability, repair, reuse, remaking, and keeping products in circulation for longer. This framework supports a useful principle: use the least destructive method that solves the problem.
Before cutting, determine whether the garment needs repair, alteration, redesign, or complete reconstruction. A careful repair may preserve more value than an unnecessary transformation, while a major redesign may be appropriate when the garment is otherwise unlikely to be worn again.
Upcycling Versus Repairing, Altering, and Recycling
Repairing restores a garment so it can continue performing its original function. Common repairs include replacing a broken zip, sewing a loose seam, reinforcing a pocket, attaching a missing button, or darning a hole. The design usually remains largely unchanged.
Alteration changes the garment’s fit, length, or proportion. Shortening trousers, reducing a waist, adjusting sleeves, reshaping a neckline, or adding side panels are examples of alteration. The item remains the same basic garment but becomes more suitable for the wearer.
Upcycling generally involves a more substantial change in design, function, or perceived value. A shirt may become an apron, jeans may become a skirt, or several damaged garments may be combined into one patchwork jacket. The original material remains in use, but its form or purpose changes significantly.
Recycling usually breaks material down so it can become a new raw input. Textile recycling may separate fibres or process fabric into insulation, filling, industrial cloth, or new yarn. Upcycling preserves more of the original garment’s structure, fabric, hardware, and construction.
These categories often overlap. Replacing damaged sleeves with fabric from another garment can be repair, alteration, and upcycling at the same time.
Beginners should usually learn basic repair and alteration before attempting complex reconstruction. These skills build confidence with seam ripping, measuring, stitching, pressing, and fitting while reducing the risk of damaging usable material.
Choose Garments That Are Worth Redesigning
Not every old garment is a suitable upcycling candidate. Start by checking whether the fabric remains strong enough to survive cutting, sewing, washing, and future wear. Hold the garment up to the light and inspect areas that receive frequent friction, including underarms, knees, collars, cuffs, crotch seams, waistbands, and pocket edges.
Gently pull the fabric around worn sections. If it tears easily, feels unusually thin, or has widespread fibre damage, the garment may not be suitable for a wearable project. Stronger areas might still be useful for small patches, appliqué, stuffing, or accessories that do not carry heavy loads.
Next, identify valuable components. Jeans may provide pockets, belt loops, a waistband, zips, rivets, and durable panels. Button-down shirts offer cuffs, collars, sleeves, buttons, and a finished front opening. Dresses may contain large fabric areas that can become skirts, tops, linings, or coordinated accessories.
Consider the fabric’s weight, stretch, fibre content, and drape. Heavy denim works well with canvas or similarly stable fabric. Lightweight silk-like material requires finer needles and careful seam finishing. Stretch knit behaves differently from woven cotton and may need a ballpoint needle or stretch stitch.
Do not begin with a garment that has significant sentimental or financial value. Test unfamiliar techniques on less important material first.
The strongest candidate combines structurally sound fabric, enough usable area for the project, and a clear problem that the redesign can realistically solve.
Tools and Preparation Before You Start
Successful clothing upcycling depends more on preparation and control than on owning expensive equipment. A small, carefully selected toolkit can support many repairs, alterations, and beginner redesigns. Essential items usually include fabric scissors, hand-sewing needles, thread, pins or clips, a measuring tape, a seam ripper, removable marking tools, and an iron.
A sewing machine is helpful for long seams, denim, gathered sections, and projects that need repeated stitching. However, it is not essential for every transformation. Buttons, patches, decorative embroidery, small hems, visible mending, and many accessories can be completed by hand.
Preparation should begin before any seam is opened. Wash the garment according to its care label, inspect the material, measure the item and wearer, and photograph the original construction. These steps provide a reference if the garment becomes difficult to understand after deconstruction.
Existing construction should be treated as a resource. Finished hems, pockets, zips, cuffs, collars, waistbands, button plackets, and decorative stitching can save considerable time. Preserving these elements often makes an upcycled garment look more professional.
One thing I always check first is whether the planned design leaves enough fabric for adjustment. Cutting directly on the intended stitching line removes the possibility of correction. Mark the seam line, add allowance, and test the shape before making a permanent cut.
Pressing equipment is equally important. An iron flattens seams, prepares accurate folds, improves measurements, and helps the finished design look intentional. Many apparently advanced results come from careful measuring and pressing rather than complicated sewing.
| Upcycling Method | Best For | Skill Level | Main Benefit |
|---|---|---|---|
| Simple Alterations | Shirts, dresses, trousers | Beginner | Improves fit with minimal changes |
| No-Sew Upcycling | T-shirts and lightweight fabrics | Beginner | Requires little or no sewing |
| Patchwork Projects | Damaged garments and fabric scraps | Intermediate | Makes use of small fabric pieces |
| Visible Mending | Clothes with holes or worn areas | Beginner | Extends garment life while adding style |
| Garment Reconstruction | Jackets, jeans, and dresses | Advanced | Creates a completely new design |
| Fabric Accessories | Leftover fabric scraps | Beginner | Reduces waste by reusing small pieces |
Build a Basic Clothing-Upcycling Toolkit
Begin with a pair of sharp fabric scissors reserved only for textiles. Cutting paper with fabric scissors can dull the blades and make accurate cutting more difficult. Add smaller thread scissors for trimming and a seam ripper for opening stitching without cutting through useful fabric.
A flexible measuring tape is essential for body and garment measurements. A clear ruler, seam gauge, or quilting ruler helps mark straight hems, seam allowances, button placement, and panel dimensions. Use tailor’s chalk, a washable fabric pen, or another removable marking tool rather than permanent ink.
Pins are suitable for stable woven fabrics, while clips work well with thick denim, coated materials, leather-like textiles, or fabrics that retain visible pinholes. Keep several hand-sewing needles in different sizes and choose thread that matches the fabric’s weight and expected stress.
An iron and stable pressing surface should be considered basic equipment rather than optional accessories. A pressing cloth protects delicate fibres, coated finishes, embroidery, and synthetic fabrics from direct heat.
Optional tools include a sewing machine, rotary cutter, cutting mat, embroidery hoop, bias-tape maker, snaps, eyelets, fabric dye, and specialty presser feet. Purchase these only when a chosen project genuinely requires them.
Create an organized collection of salvaged buttons, zips, lace, pockets, labels, elastic, and fabric scraps. Sort the materials by type, colour, and weight so they can be reused efficiently in future projects.
A detailed beginner upcycling guide can also help you compare project difficulty, tool requirements, and garment choices before starting your first clothing transformation.
Clean, Inspect, Measure, and Plan the Design
Wash or professionally clean the garment according to its care instructions before beginning. Cleaning removes dirt, oils, odours, and surface marks that may affect marking or sewing. It also reveals shrinkage, fading, pilling, stains, and structural weakness that could change the project plan.
Inspect the garment from both sides. Mark holes, weak areas, stains, stretched sections, and useful components. Examine how the original seams are constructed and determine which areas can be opened without affecting the entire garment.
Photograph the front, back, inside, closures, pockets, and any unusual construction details. Once several seams have been removed, these images can help you remember how pieces were originally connected.
Measure the garment and the intended wearer. Record chest, waist, hip, shoulder, sleeve, rise, inseam, and length measurements where relevant. Compare these figures with a well-fitting garment rather than relying entirely on body measurements.
Draw a simple sketch of the new design. The drawing does not need to be artistic. It should show where seams will move, which pieces will be removed, and where additional fabric or fasteners may be added.
Test dyes, paints, heat settings, stitches, and adhesives on a hidden area or scrap. Fibre blends may respond unpredictably.
Finally, write the order of construction. Complete fit and structural changes before adding embroidery, patches, beads, or other decorative elements that could obstruct later sewing.
How to Upcycle Old Clothes Into New Designs Step by Step
The most reliable method for learning how to upcycle old clothes into new designs is to separate the process into planning, testing, controlled deconstruction, assembly, fitting, and finishing. Skipping one of these stages usually creates avoidable problems later.
Begin with one main objective. A project that tries to change the neckline, sleeves, waist, length, colour, closure, and fabric simultaneously becomes difficult to control. Beginners usually achieve better results when they solve one or two major problems and keep the remaining construction stable.
The process below can be adapted to shirts, dresses, jeans, trousers, skirts, jackets, and fabric accessories:
- Define the new function or silhouette.
- Inspect the original garment and identify usable features.
- Measure the garment and intended wearer.
- Mark proposed changes while the item is flat and worn.
- Test the design with pins, clips, folds, or basting.
- Open only the seams required for the transformation.
- Cut with appropriate seam allowance.
- Assemble the new design in logical stages.
- Try the item on after major structural seams.
- Finish raw edges, reinforce stress points, and press carefully.
Keep every removed component until the project is fully complete and has been tested. A pocket, cuff, zip, strip of matching fabric, or original button may solve an unexpected construction problem.
Move slowly from reversible decisions to permanent ones. Folding and pinning are reversible. Cutting is not. This principle is one of the most effective ways to reduce waste and protect usable material.
Plan, Test, and Deconstruct the Garment
Define the finished project in one clear sentence. Examples include “turn these wide jeans into a knee-length skirt,” “convert this oversized shirt into a fitted sleeveless blouse,” or “use the damaged lower section of this dress to make a cropped top.” A precise objective keeps the redesign focused.
Try on the original garment and mark proposed changes with pins or removable chalk. For fit adjustments, turn the item inside out and pin the new seam lines. Sit, bend, walk, and raise your arms to confirm that the temporary shape allows normal movement.
Use temporary basting stitches when greater accuracy is needed. Basting consists of long, removable stitches that hold a seam or fold in place for fitting. It is especially useful for side seams, sleeves, darts, waistbands, and curved panels.
Once the design has been tested, open only the necessary seams with a seam ripper. Cutting directly through construction may save time initially but often removes useful fabric and makes accurate reassembly more difficult.
Label symmetrical or similar pieces as they are removed. Mark front, back, left, right, top, and grain direction where necessary.
Press every opened seam before measuring or cutting. Flattened fabric reveals its true shape and allows more accurate placement of new pattern pieces.
Keep original components organized. Buttons, pockets, zips, cuffs, and matching fabric may be reused in the final design.
Cut, Assemble, Fit, and Finish the New Design
Mark the intended stitching line first, then add seam allowance outside it before cutting. Seam allowance is the extra fabric between the stitching line and the cut edge. Many home-sewing projects use approximately 1–1.5 centimetres, although the correct amount depends on the fabric, seam type, and design.
Cut one layer at a time when accuracy matters. For symmetrical pieces, create a paper template or use the first cut section as a guide. Avoid stretching knit fabric or fabric cut on the bias while marking and cutting.
Assemble the project in stages. Sew major structural seams first, press them, and test the fit before attaching closures or finishing difficult areas. A project is easier to correct when side seams, waistbands, or hems remain temporarily accessible.
Finish raw woven edges with a zigzag stitch, overlock stitch, binding, enclosed seam, or another suitable method. Knit fabrics may not fray heavily, but they can curl, stretch, or weaken without stable construction.
Press after every major seam. Use a heat setting appropriate for the fibre and protect delicate surfaces with a pressing cloth.
Complete topstitching, hems, buttons, zips, decorative details, and labels last. Reinforce stress points such as bag straps, pocket corners, crotch seams, waistbands, and closure ends.
The final fitting should assess comfort, movement, balance, seam strength, and whether the transformed item performs the purpose defined at the beginning.
Easy Clothing-Upcycling Ideas for Beginners
Beginner projects should use stable fabrics, straightforward shapes, and as much existing construction as possible. Reusing a finished hem, button placket, pocket, waistband, collar, or zip reduces the number of new techniques required and teaches how garments are assembled.
Choose a project according to the garment’s condition and available material. Large shirts provide broad fabric panels, while jeans offer durable sections and useful hardware. Dresses may contain enough fabric for several smaller items, and knitwear can support repair-focused projects such as darning or visible mending.
The project should also match your current skill level. A simple tote bag with secure seams may teach more than a highly ambitious jacket that remains unfinished. Completing manageable work builds confidence in measuring, cutting, stitching, pressing, and troubleshooting.
If you want additional beginner-friendly inspiration before choosing your first project, these clothing upcycling ideas showcase practical garment transformations that complement the techniques covered in this guide.
| Upcycling Project | Best Starting Garment | Skill Level | Main Tools | Key Technique |
|---|---|---|---|---|
| Cropped or sleeveless top | Oversized shirt | Beginner | Scissors, pins, needle or machine | Hemming and fit adjustment |
| Patchwork tote bag | Old jeans | Beginner | Scissors, thread, machine | Straight seams and straps |
| Denim skirt | Jeans | Beginner/intermediate | Seam ripper, scissors, machine | Deconstruction and panel insertion |
| Visible-mending design | Knitwear or denim | Beginner | Needle, thread, patch | Darning or decorative stitching |
| Gathered skirt | Long dress or bedsheet | Beginner | Elastic, scissors, machine | Gathering and waistband construction |
| Panelled jacket | Several shirts or jeans | Intermediate | Pattern, scissors, machine | Patchwork and seam matching |
| Fabric accessories | Scraps or damaged garments | Beginner | Hand-sewing tools | Small-scale construction |
Before selecting a design, consider whether the finished item will be useful. A project should suit your wardrobe, lifestyle, and available tools rather than being chosen only because it looks impressive in a photograph.
Transform Jeans and Oversized Shirts
Old jeans are excellent upcycling material because denim is durable and includes ready-made pockets, waistbands, belt loops, zips, rivets, and decorative seams. One accessible project is a tote bag made from the upper section of the jeans. The original back pockets can provide storage, while fabric from the legs can become reinforced straps.
Jeans can also become a skirt. Open the inner-leg seams with a seam ripper, arrange the front and back sections to create the desired shape, and use fabric from the removed legs to fill any triangular gaps. Pin and try on the skirt before topstitching.
Oversized shirts offer large panels and several finished details. A shirt can become a sleeveless top by removing the sleeves and finishing the armholes with bias binding or a narrow hem. It can also become a cropped boxy shirt, gathered blouse, apron, skirt, or lightweight jacket.
Preserve the original button placket whenever possible. It provides a finished closure that would take considerable time to recreate.
When reducing the size, remove small amounts evenly from both side seams. Check the shoulder and armhole fit before reshaping the body because these areas affect movement.
Use removed sleeves for ties, pockets, ruffles, cuffs, patchwork, or matching hair accessories instead of discarding them.
Redesign Dresses, Knitwear, and Fabric Scraps
A long dress can provide enough material for several transformations. If the bodice no longer fits but the skirt remains attractive, separate the sections near the waist and add an elastic or fitted waistband. The remaining bodice may become a cropped top, while smaller scraps can become ties or accessories.
A dress can also be shortened into a tunic, divided into a coordinated two-piece set, or reshaped with side panels. Preserve existing zips, darts, pockets, and finished hems whenever they support the new design.
Knitwear requires greater caution because cut edges may unravel. Small holes can be repaired through darning, duplicate stitch, embroidery, or patching. Visible mending makes the repair part of the design rather than attempting to conceal it completely.
Before cutting a jumper, test how the knit behaves and add stabilizing stitches near the proposed cut line. Loosely knitted fabric may require binding or an attached band to prevent continued unraveling.
Fabric scraps can become patch pockets, appliqué, belt loops, ties, hair accessories, reinforcement pieces, quilting blocks, or small storage items. Sort scraps by fibre, colour, and weight so compatible materials can be combined.
No-sew options include knotted T-shirt bags, tied wraps, removable collars, and accessories made from existing hems. Adhesives should be tested for flexibility, washability, and heat sensitivity before permanent use.
Advanced Techniques and Professional Finishing
Once basic measuring, deconstruction, and sewing become familiar, upcycling can develop into a more original form of fashion design. Advanced projects may combine several garments, change pattern shapes, insert new panels, alter proportions, or create surfaces through patchwork, embroidery, appliqué, and visible repair.
A professional result does not require hiding the history of the original clothing. Contrast seams, repaired areas, faded sections, and mixed materials can become intentional features. The important difference between an unfinished alteration and a strong design is control. Colours, shapes, stitch lines, and fabric weights should relate to one another clearly.
Advanced work benefits from basic pattern-making knowledge. Understanding grain direction, ease, balance, seam allowance, and pattern placement helps convert flat textile pieces into garments that fit and move properly. Commercial patterns can also provide useful shapes when reclaimed material is limited.
Fabric compatibility becomes increasingly important as complexity increases. Heavy denim may pull a lightweight fabric out of shape, while stretch and non-stretch materials may distort each other when joined without stabilization. Test sample seams before committing to the full design.
Professional finishing includes the inside of the garment. Clean seam allowances, secure thread ends, reinforced stress points, accurate pressing, and comfortable edges affect durability even when they are not visible externally.
The goal is not to make the item appear factory-produced. It is to ensure that every visible and hidden decision looks intentional, functions reliably, and supports repeated use.
| Topic | Covered Aspect |
|---|---|
| Denim Upcycling | Jeans into bags, skirts, and accessories |
| Shirt Refashioning | Oversized shirt transformation |
| Visible Mending | Decorative clothing repair |
| Patchwork Design | Combining fabric pieces creatively |
| Garment Finishing | Seam quality and durability |
| Sustainable Clothing | Reuse and garment longevity |
Use Paneling, Patchwork, Embroidery, and Visible Mending
Paneling adds new fabric sections to change size, colour, shape, or movement. Side panels can widen trousers or a dress, while a contrasting back panel can add volume to a shirt. Choose fabrics with similar weight and behaviour unless deliberate contrast is part of the design concept.
Patchwork joins smaller pieces into a larger textile surface. Arrange the pieces before sewing and photograph the final layout for reference. Join manageable sections into rows or blocks, press seams consistently, and stabilize the completed panel when it will carry weight or receive frequent movement.
Appliqué involves attaching fabric shapes onto a base garment. Turn the edges under for a clean finish, use satin stitching, or leave controlled raw edges when fraying supports the design. Secure the motif sufficiently for washing and regular wear.
Embroidery can cover stains, strengthen repairs, or create a focal point. Place stabilizer behind lightweight fabric to prevent puckering and distortion. Avoid dense stitching in areas that must stretch.
Visible mending uses contrasting thread, woven repairs, patches, or repeated stitches to make damage part of the design. It works especially well on denim, workwear, jackets, and knitwear.
Keep the composition controlled. Repeat one colour, stitch, shape, or fabric in several areas so the additions feel connected rather than accidental. A clear visual system produces a stronger result than adding every available decorative technique.
Improve Fit, Seam Quality, and Durability
Professional-looking clothing begins with balanced fit. Check whether shoulder seams sit consistently, side seams hang vertically, waistlines remain level, and hems appear balanced from the front, side, and back. Evaluate movement rather than judging the garment only while standing still.
Press seams before assessing fit because unpressed fabric can create false bulk and distortion. Clip curved seam allowances so they can spread smoothly, and trim excessive layers in thick areas. Grading a seam means cutting each layer to a slightly different width so the finished edge is less bulky.
Choose seam finishes according to the material. Zigzag or overlock stitching controls fraying, French seams enclose raw edges in lightweight fabric, and bias binding creates a clean finish around armholes, necklines, and unlined jackets.
Reinforce stress points with backstitching, bar tacks, patches, or extra rows of stitching. Bag straps, pocket corners, crotch seams, waistbands, zips, and button areas experience repeated force and need secure construction.
Topstitching should remain an even distance from the edge. Use suitable stitch length and thread weight for denim or thick fabric, and test machine tension on scraps.
Durability is central to successful upcycling. WRAP’s research on clothing longevity considers physical strength, appearance after washing, care requirements, and ease of repair.
Before declaring the project complete, clean it according to the intended care method and inspect every altered seam.
Common Upcycling Mistakes and How to Avoid Them
Most unsuccessful upcycling projects result from cutting too early, choosing unsuitable materials, underestimating fit, or adding more design features than the garment can support. These problems are usually preventable when the project moves through deliberate testing stages.
A common mistake is assuming that an oversized garment contains unlimited usable fabric. Large clothing may still include worn areas, shaped panels, darts, seams, pockets, bias sections, and grain directions that restrict how the material can be reused.
Another problem is copying a tutorial without considering fabric differences. A technique demonstrated on stable woven cotton may behave very differently on stretch jersey, loosely knitted material, satin, coated fabric, or heavy denim. The construction method should respond to the textile rather than being copied without adjustment.
Poor pressing can also make accurate sewing appear untidy. Twisted seams, bulky hems, uneven folds, and distorted panels often result from skipping the iron between construction stages.
Upcycling should not become a reason to store every unusable textile indefinitely. Material with contamination, mould, extensive fibre deterioration, or unsafe finishes may need to be handled through appropriate local textile collection or waste services.
When a garment remains wearable but no longer suits you, resale, swapping, or donation may preserve more of its original value than cutting it apart. Upcycling is most appropriate when redesign provides a genuine functional or personal improvement.
The safest approach is to begin with reversible decisions, test unfamiliar techniques on scraps, and complete structural work before decoration.
Avoid Irreversible Cuts and Incompatible Fabrics
Never make the first cut before confirming the finished length, shape, fit, and seam allowance. Pin, fold, clip, or baste the proposed change before removing material. When shortening clothing, begin conservatively because additional fabric can always be removed later.
Check the fabric grain before cutting important new pieces. Woven textiles are generally most stable when pattern pieces follow the lengthwise grain. Cutting major sections at inconsistent angles can cause twisting, sagging, or uneven drape.
Test fabric combinations by stretching, pressing, and cleaning small samples. Materials with different shrinkage rates may distort after washing. Heavy cloth can pull delicate fabric out of shape, while rigid woven panels may prevent a stretch garment from fitting correctly.
Use needles and stitches suited to the textile. A sharp universal needle may damage certain knits, while a fine needle may bend or break when sewing several denim layers. Stretch seams require enough flexibility to move with the garment.
Do not permanently attach embroidery, beads, appliqué, or hardware until the structural fit is correct. Decorative work can block seam access and make later adjustments difficult.
Keep removed material until the item has been worn and cleaned successfully. Matching scraps can repair errors, reinforce weak areas, create button loops, or replace damaged sections.
A reliable design process moves gradually from temporary tests to permanent construction.
Prevent Overdesign, Weak Construction, and Poor Fit
A successful redesign does not need to display every available technique. Combining patches, lace, embroidery, paint, distressing, hardware, several fabrics, and multiple trims can overwhelm the garment and make it difficult to style.
Choose one primary feature and one supporting detail. A patchwork panel may need only clean topstitching, while visible mending can become more effective when repeated through a controlled thread colour and stitch pattern.
Do not sacrifice structural strength for decoration. An attractive patch cannot compensate for a weak side seam, unstable waistband, uncomfortable armhole, or poorly attached strap. Complete the construction first and add surface design only after the fit and durability are confirmed.
Try the garment on repeatedly during the process. Check it after pinning, basting, sewing major seams, and adding closures. Problems are easier to correct before hems and decorative details are finished.
Include appropriate ease so the garment supports normal movement and minor body changes. Sit, bend, walk, and raise your arms during fitting rather than judging only the standing silhouette.
Evaluate the finished piece as part of your real wardrobe. If it requires several new purchases before it can be worn, the transformation may not be practical.
A professional upcycled design has a clear idea, secure construction, comfortable movement, and enough versatility to support repeated use.
Quick Answer About How to Upcycle Old Clothes Into New Designs
To upcycle old clothes into new designs, begin with a clean garment whose fabric remains structurally sound. Identify why you no longer wear it, such as poor fit, an outdated length, damaged areas, uncomfortable sleeves, or a color that no longer suits your wardrobe. Then choose one clear transformation rather than attempting several major changes at once.
You might shorten a shirt, convert jeans into a skirt or tote bag, add contrasting side panels, repair holes with visible mending, or combine fabric from several garments through patchwork. Measure and mark the design before cutting. Use pins, clips, or temporary basting stitches to test the fit and shape.
Leave sufficient seam allowance, preserve useful components such as pockets and button plackets, and assemble the project in stages. Try the garment on after major seams, press each section carefully, and finish raw edges to prevent fraying.
The most successful upcycling project improves the garment’s function, fit, durability, appearance, or personal value. It should create something you will use regularly rather than simply producing another object that remains unworn.
Frequently Asked Questions About How to Upcycle Old Clothes Into New Designs
People learning how to upcycle old clothes into new designs often have questions about tools, suitable garments, no-sew options, fabric quality, environmental benefits, and professional finishing. These concerns are especially important for beginners because an ambitious project can become frustrating when the material or technique is unsuitable.
The easiest way to begin is to choose a garment with stable fabric and a simple construction problem. An oversized cotton shirt, pair of denim jeans, basic skirt, or damaged knit can provide enough material and recognizable structure for a manageable first project.
A sewing machine is helpful but not essential. Hand sewing can support patches, buttons, embroidery, visible mending, small accessories, and simple alterations. The quality of the result depends more on accurate measuring, suitable thread, secure stitching, and careful pressing than on owning advanced equipment.
Damaged clothing can often be redesigned when the surrounding material remains strong. Small holes, stains, worn knees, and damaged pockets may become opportunities for patches, panels, appliqué, or embroidery. However, fabric with widespread weakness, mould, contamination, or severe deterioration may not be suitable for wearable projects.
Environmental value also depends on actual use. A transformed garment supports circularity when it is worn regularly and replaces the need for another purchase. Creating an object that remains unused provides less practical benefit.
The answers below provide concise guidance for the most common upcycling questions while reinforcing the planning and construction principles discussed throughout the article.
What is the easiest clothing item to upcycle?
An oversized woven cotton shirt is one of the easiest garments to upcycle because it provides relatively stable fabric, large panels, buttons, sleeves, cuffs, a collar, and a finished front opening. These existing components reduce the amount of new construction required.
Beginners can shorten the shirt, remove the sleeves, add patch pockets, reshape the side seams, or convert it into an apron or simple top. The original button placket can remain functional, while removed sleeves can become ties, pockets, ruffles, or matching accessories.
A basic T-shirt can also support simple projects, although stretch knit may curl or distort when cut. Denim is durable but can become thick around layered seams.
Choose a first project with one clear change. Shortening a shirt or adding a pocket is more manageable than completely reconstructing the shoulders, neckline, sleeves, and waist simultaneously.
Can I upcycle old clothes without a sewing machine?
Yes. Many clothing-upcycling projects can be completed with hand-sewing tools. Buttons, patches, small hems, embroidery, appliqué, darning, visible mending, and fabric accessories are all suitable for hand construction.
Use strong thread, an appropriate needle, and stitches designed for the purpose. A backstitch creates a secure seam, while a whipstitch or blanket stitch can attach patches and finish selected edges. Running stitches may be useful for gathering or temporary basting.
No-sew methods can include knots, ties, lacing, removable fasteners, and designs that reuse existing hems. Fabric adhesive may support selected decorative work, but it should be tested for flexibility, washability, and compatibility with the material.
Hand sewing takes longer than machine construction, but it provides control and requires little equipment. Beginners should start with small areas and stable fabrics before attempting long structural seams or thick denim layers.
What can I make from old jeans?
Old jeans can become tote bags, skirts, aprons, storage baskets, cushion covers, patchwork panels, tool rolls, pockets, belts, small accessories, or reinforcement fabric for other garments. Denim is particularly useful because it is durable and includes several ready-made components.
The upper section can form the body of a bag, preserving the original waistband and pockets. Fabric from the legs can become straps, gussets, patches, or panels. Several pairs of jeans can be combined to create a larger patchwork textile.
To make a skirt, open the inner-leg seams and insert denim panels into the front and back gaps. Keep enough width for walking and sitting.
Inspect the denim carefully before using it for load-bearing projects. Fabric that is severely worn, stretched, or weakened around the knees, seat, or crotch may be better suited to smaller patches or decorative applications.
Can stained or damaged clothing still be upcycled?
Yes, provided enough of the fabric remains structurally strong. Small stains can be covered with a pocket, patch, appliqué motif, embroidery, fabric paint, or strategically placed panel. A stain may also be removed entirely when shortening or reshaping the garment.
Holes can become visible-mending features through contrasting patches, darning, woven repairs, or repeated embroidery. Reinforce the area beyond the visible damage because surrounding fibres may also be weak.
Large damaged sections can sometimes be removed and replaced with fabric from another garment. This works well for shirt backs, trouser knees, sleeves, and jacket panels.
Avoid wearable projects when the textile contains mould, contamination, strong chemical residue, or widespread fibre deterioration. Fabric that tears under gentle pressure will not support durable seams.
Clean the garment first and inspect it under good lighting before deciding which sections are safe to reuse.
How do I make upcycled clothes look professional?
Professional results begin before sewing. Plan the design, measure carefully, mark accurate seam lines, and leave enough seam allowance. Test the shape with pins or basting stitches before cutting permanently.
Press every seam as construction progresses. Pressing removes bulk, improves accuracy, and helps the garment hang correctly. Finish raw edges with zigzag stitching, binding, enclosed seams, or another method appropriate for the fabric.
Use consistent topstitching and reinforce stress points such as pockets, bag straps, waistbands, zips, and button areas. Trim loose threads and ensure decorative details are attached securely.
Limit the design to a clear visual idea. Repeating one colour, fabric, or stitch creates unity.
Finally, test the garment in motion and clean it according to the intended care method. Strong interior finishing, comfortable fit, and durable seams often make a greater difference than complex decoration.
Is upcycling clothing environmentally friendly?
Upcycling can support environmental goals by keeping usable garments and materials in circulation for longer. It may reduce waste and delay the need to purchase a replacement when the transformed item becomes part of a regularly worn wardrobe.
Circular-fashion organizations emphasize repair, reuse, remaking, durability, and longer product life. These approaches preserve more of the value already contained in existing materials and garment construction.
However, environmental benefit is not automatic. A project that uses large quantities of new material, harmful chemicals, excessive energy, or produces an object that is never used may provide limited value.
The strongest outcome occurs when upcycling solves a genuine need, preserves useful fabric, and creates something durable enough for repeated use. Repair, resale, swapping, and donation may sometimes be better options when the original garment remains wearable.
Upcycling should therefore be treated as one practical part of a broader approach to responsible clothing use.
Conclusion: Start Upcycling With One Useful Transformation
Learning how to upcycle old clothes into new designs is most successful when creativity is supported by careful planning, suitable materials, and realistic construction goals. Begin with a clean garment whose fabric remains strong, then identify the specific reason it is no longer being worn.
The item may need a better fit, shorter length, repaired section, updated neckline, more useful pockets, or a completely different function. Choose the smallest effective transformation before considering a full reconstruction.
Measure and test before making irreversible cuts. Pin, fold, clip, or baste the design so you can evaluate the silhouette and movement. Preserve useful components such as pockets, cuffs, buttons, zips, collars, waistbands, and finished hems whenever they support the new design.
Beginners can start with oversized shirts, denim tote bags, simple skirts, patch pockets, or visible-mending projects. These transformations teach essential sewing skills without requiring advanced pattern-making knowledge.
Experienced makers can explore paneling, patchwork, embroidery, appliqué, pattern alteration, and combining several garments. Even advanced work should maintain a clear design purpose and use compatible materials.
Repair resources such as Patagonia Worn Wear demonstrate how care guidance and practical repair support can help keep clothing in use. The program provides repair information and links to a wide collection of care and repair guides developed with iFixit.
The strongest project is not necessarily the most dramatic. It is the item that fits comfortably, survives washing and regular wear, coordinates with your wardrobe, and gives overlooked material a meaningful new role.
The Most Important Takeaway
Upcycling should improve a garment rather than simply change its appearance. Before beginning, define whether the transformation will make the item more wearable, useful, durable, comfortable, or personally meaningful.
Start with one manageable objective and use reversible testing methods. Pinning, folding, clipping, and temporary basting allow you to evaluate the design before removing fabric permanently.
Respect the original construction. Existing pockets, hems, waistbands, button plackets, collars, and zips can reduce the amount of work required and often create the most professional details.
Complete structural changes before adding decoration. Secure seams, accurate pressing, controlled raw edges, and comfortable fit determine whether the garment becomes part of your regular wardrobe.
The best upcycled design does not need to hide its previous life. Repairs, contrasting fabric, or original garment details can remain visible when they support a coherent idea.
A successful transformation combines creative satisfaction with practical use. It should feel intentional, function reliably, and remain strong enough for repeated wearing and cleaning.
Your Next Upcycling Project
Choose one garment that you no longer wear but whose fabric remains structurally sound. Write down the reason it has been left unused. The problem might involve fit, length, damage, colour, missing pockets, or an uncomfortable design feature.
Identify the smallest transformation that could solve that problem. A shirt may need shorter sleeves, a dress may work better as a skirt, and worn jeans may provide ideal material for a tote bag or reinforcement patches.
Wash the garment, photograph its construction, take measurements, and sketch the intended result. Gather only the tools and additional materials required for that specific project.
Test the design with pins, folds, or temporary stitches before opening seams. Complete the work in stages and press each new seam before judging the fit.
Finish one project before collecting several more garments. The skills learned from planning, measuring, cutting, fitting, sewing, pressing, and troubleshooting will make future transformations easier.
Comments are closed, but trackbacks and pingbacks are open.