
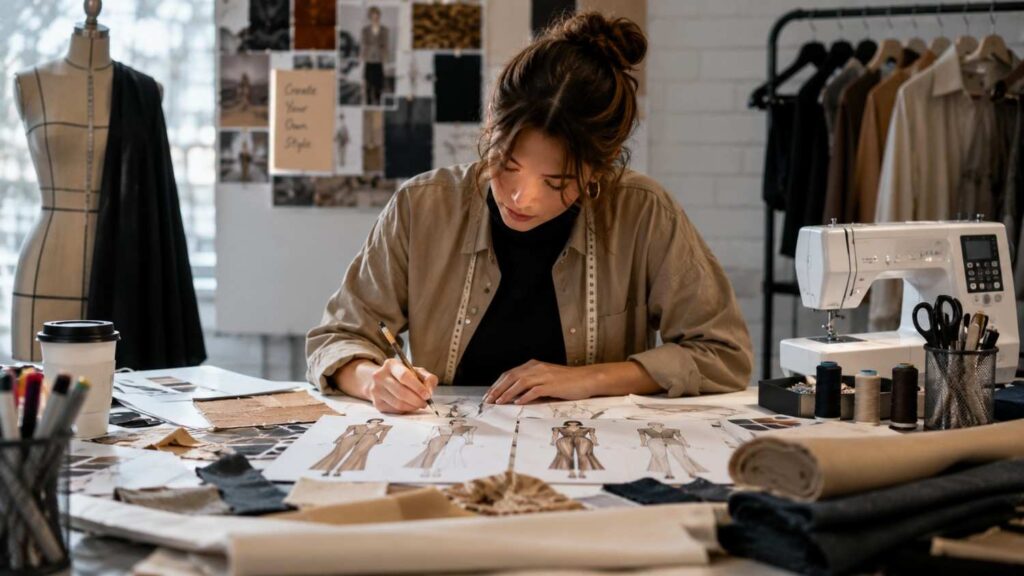
The Best Tools for DIY Fashion Design
Designing your own clothing involves much more than creating an attractive sketch. A wearable garment must be translated into accurate measurements, balanced pattern pieces, carefully cut fabric, secure seams, appropriate ease, and a professional finish. Every stage depends on tools that help the designer control shape, proportion, construction, and presentation.
The Best Tools for DIY Fashion Design are not necessarily the most expensive or technologically advanced products. They are the tools that allow you to work accurately, correct mistakes efficiently, and repeat successful processes. A transparent ruler may contribute more to an early project than advanced 3D software because incorrect pattern lines will affect the garment regardless of how impressive the original concept appears.
A practical toolkit should therefore develop in stages. Beginners need measuring, cutting, marking, hand-sewing, machine-sewing, and pressing equipment. Intermediate makers may add specialist pattern rulers, rotary-cutting systems, dress forms, fitting aids, and digital illustration software. Advanced users may benefit from parametric patternmaking, three-dimensional simulation, professional rendering, and equipment designed for frequent production.
This guide explains both physical and digital clothing design tools without requiring readers to purchase specific models. Availability, pricing, warranties, voltage requirements, and local servicing vary by region. Instead of presenting a short shopping list, each section explains what the tool does, when it becomes useful, what limitations to expect, and which specifications deserve attention.
In my experience, the strongest home fashion workspace is not the one with the most equipment. It is the one where every item supports a defined task and remains easy to access, maintain, and use safely.
What Tools Do You Need to Start DIY Fashion Design?
DIY fashion design can include original garment creation, pattern alteration, clothing repair, upcycling, textile decoration, fashion illustration, custom fitting, and digital garment development. Because those activities require different workflows, there is no single starter kit that is perfect for every designer. The right setup depends on what you intend to make during your first several projects.
A person altering ready-made clothing may need only basic measuring, marking, cutting, hand-sewing, pressing, and machine-sewing tools. Someone drafting original fitted garments will need additional pattern paper, transparent rulers, curves, tracing equipment, and materials for making test garments. A designer focused on prints or visual concepts may begin with illustration software, a graphics tablet, paints, embroidery equipment, or printing tools before purchasing a full sewing setup.
The most efficient way to plan your purchases is to divide fashion design into stages. First, you develop and communicate the idea. Second, you record body or garment measurements. Third, you draft, trace, or alter a pattern. Fourth, you cut and mark the material. Fifth, you construct and fit the garment. Finally, you press, finish, and document the completed design.
Each tool should support at least one of those stages. If you cannot identify which stage a product improves, it may be premature to purchase it. This method helps beginners avoid filling a small workspace with specialist equipment that remains unused.
The next two sections explain how to define your project type and distinguish genuine essentials from optional upgrades.
Start With the Type of Fashion Project
Begin by identifying the exact type of project you want to complete rather than shopping for a general collection of fashion equipment. A simple skirt made from a commercial pattern requires different tools from a tailored jacket drafted to personal measurements. Upcycling a shirt may involve a seam ripper, fabric marker, scissors, pins, and a sewing machine, while digital textile design may require vector software, image-editing tools, or a drawing tablet.
Write down three realistic projects you expect to complete within the next few months. Break each project into actions such as measuring, tracing, cutting, marking, pinning, sewing, pressing, fitting, and finishing. Then note the tool required for every action. Items that appear repeatedly should receive the highest purchasing priority.
This process also helps you evaluate quality. A designer planning frequent garment construction should invest in comfortable fabric shears and a dependable machine. Someone focusing on occasional repairs may not need the same level of equipment.
Avoid purchasing products solely because professional studios use them. Industrial machines, specialist pressing equipment, and advanced software are designed around workflows that may not exist in a beginner’s home studio. Buy for the work you are doing now, with modest room for growth.
Separate Essentials From Optional Upgrades
Essential tools are used across many projects and are difficult to replace with safe, accurate alternatives. A flexible tape measure, fabric scissors, pins or clips, hand needles, suitable thread, a marking tool, seam ripper, and iron belong in most physical garment-making kits. SINGER’s current beginner guidance similarly identifies fabric scissors, sewing-machine needles, thread, pins or clips, a seam ripper, and a flexible measuring tape as core supplies.
Optional upgrades become valuable when a repeated task justifies them. A rotary cutter improves certain long, straight, or layered cuts. A dress form supports draping and visual fitting. A serger trims and finishes fabric edges efficiently. A graphics tablet makes digital sketching more natural, while patternmaking software helps preserve and adjust reusable drafts.
The distinction is based on workflow, not prestige. An optional tool can become essential for a specialist. A draping-focused designer may depend on a dress form, while someone creating digital-only fashion concepts may consider illustration software fundamental.
Use a delayed-purchase rule for upgrades. When you encounter the same limitation in three separate projects, research the tool designed to solve it. This approach prevents impulse purchases while allowing your toolkit to evolve with your skills.
As your skills grow, reviewing experienced designers’ recommendations for essential fashion design tools can help you decide which upgrades are worth adding to your workspace.
| Fashion Design Stage | Primary Objective | Essential Tools | Skill Level |
|---|---|---|---|
| Planning & Sketching | Visualize clothing ideas | Sketchbook, pencils, digital illustration software | Beginner |
| Measuring & Patternmaking | Create accurate garment patterns | Measuring tape, rulers, French curve, pattern paper | Beginner |
| Fabric Cutting | Prepare fabric pieces | Fabric shears, rotary cutter, cutting mat | Beginner |
| Sewing & Construction | Assemble garment pieces | Sewing machine, needles, thread, pins, seam ripper | Beginner–Intermediate |
| Fitting & Finishing | Improve fit and garment appearance | Dress form, steam iron, pressing aids | Intermediate |
Best Measuring and Patternmaking Tools
Measuring and patternmaking tools determine whether a design can move successfully from an idea to a garment. Even excellent sewing cannot fully correct pattern pieces that are unbalanced, incorrectly shaped, or based on inconsistent measurements. For that reason, accurate measuring equipment often provides more long-term value than decorative accessories or a machine with a large number of specialised stitches.
The essential measuring system includes both flexible and rigid tools. A flexible tape records body measurements and curved garment dimensions. Transparent rulers create straight lines, square corners, seam allowances, grainlines, and parallel markings. Curved rulers help connect established points around armholes, necklines, hips, sleeves, and style lines.
Pattern paper is equally important because it provides a stable record of the design. Working directly on fabric makes revisions difficult and can waste valuable material. A paper pattern allows you to check measurements, compare adjoining seams, label construction details, preserve the original draft, and create adjusted versions.
A well-organized pattern should identify the pattern piece, size or measurement set, cutting quantity, grainline, fold line, notches, balance marks, seam allowance, and relevant construction notes. These details are not unnecessary administration. They make the pattern understandable when it is reused weeks or months later.
Advanced users may also incorporate digital pattern systems, but the same principles remain. Software can calculate positions and preserve formulas, yet it cannot decide whether the design contains appropriate ease, balance, or construction logic.
The following tools establish a reliable pattern-development workflow for beginners while remaining useful as their skills advance.
Flexible Measuring Tape, Clear Rulers, and Curves
A flexible measuring tape is designed for body contours, curved seams, and garment circumferences. It should lie smoothly against the subject without stretching, twisting, sagging, or pulling tightly into the body. Record measurements immediately and specify whether each value represents a full circumference, half measurement, or finished garment dimension.
Rigid transparent rulers serve a different function. They help draw straight lines, measure seam allowances, square corners, position buttonholes, and create parallel references. Transparency allows the user to see the pattern line beneath the ruler, which improves alignment during alterations.
A French curve or multipurpose fashion curve creates controlled transitions around armholes, necklines, hips, sleeve heads, lapels, and other shaped areas. The curve does not determine fit automatically. Instead, it helps connect correctly positioned points with a clean line that can be cut and sewn consistently.
Beginners can start with one flexible tape, a medium-length transparent ruler, a longer straight ruler, and one multipurpose curve. Check that markings are legible and use either metric or imperial measurements consistently. Mixing systems during one project increases the risk of drafting and seam-allowance errors.
Pattern Paper, Pencils, and Tracing Tools
Pattern paper should be wide enough for the garments you plan to draft and durable enough to survive repeated handling. Gridded, dot-and-cross, or alphanumeric paper can simplify alignment, but plain paper remains effective when combined with accurate rulers. Lightweight paper is convenient for tracing, while heavier paper is more suitable for durable master patterns.
Use a pencil during early drafting because lines will be adjusted. Keep an eraser and sharpener nearby, and use a fine permanent marker only after the pattern has been checked. Final lines should remain easy to distinguish from construction lines, notes, and earlier revisions.
Tracing wheels and transfer paper help copy existing patterns or move markings from paper to fabric. Clover’s current product guidance distinguishes serrated wheels used for direct marking from blunt tracing wheels intended for use with transfer paper.
Label every completed piece clearly. Include the garment name, piece name, cutting quantity, fold or grain direction, notches, and relevant seam information. Keep paper scissors separate from fabric shears because repeated paper cutting can reduce the performance of blades reserved for textiles.
Dress Form and Test Garment Materials
A dress form provides a three-dimensional surface for draping fabric, arranging style lines, checking visual proportions, pinning details, and evaluating how a design hangs. It becomes especially useful for asymmetric garments, gathered sections, bias-cut designs, sculptural silhouettes, and projects developed directly on the form rather than from a flat draft.
However, a standard form rarely reproduces every body accurately. Adjustable models change selected circumferences, but they may not match shoulder angle, posture, bust shape, back curvature, or body distribution. Designers often add padding and a fitted cover to create a closer representation of the wearer.
For beginners, inexpensive test fabric may be more valuable than purchasing a form immediately. A toile or muslin allows the maker to check ease, balance, seam placement, length, movement, and construction order on the actual body. Changes can then be transferred back to the paper pattern.
Choose test material with behaviour reasonably similar to the final fabric. A rigid woven test fabric will not accurately represent a highly stretchable knit. The goal is not to create a beautiful sample but to expose pattern and fitting problems before expensive material is cut.
Related Articles
Best Cutting, Marking, and Sewing Tools
Cutting, marking, and sewing tools transform a paper pattern into a physical garment. Accuracy at this stage is critical because small inconsistencies can multiply during construction. A distorted cut line changes the seam shape, an omitted notch makes alignment difficult, and an unsuitable needle can damage fabric or produce unreliable stitching.
A strong cutting setup begins with a stable surface. The fabric should rest without hanging heavily over an edge, which can pull it off grain or distort the pattern placement. Pattern pieces must be secured according to the material and cutting method, and the cutting tool should remain sharp enough to move through the fabric without repeated sawing or excessive pressure.
Marking should be visible during construction but removable afterward. Because textiles respond differently to chalk, heat, water, and chemicals, every marking product should be tested on a scrap before use. A mark that disappears too quickly is frustrating, but one that becomes permanent can ruin the finished garment.
The sewing machine is central to frequent garment construction, yet supporting tools remain equally important. Pins, clips, basting thread, hand needles, extra machine needles, bobbins, a seam ripper, and small thread snips help prepare, assemble, revise, and finish the work.
More features do not automatically create better results. A straightforward machine used with correct needles, thread, tension, pressing, and seam preparation can produce professional garments. The next sections explain how to select and use the main cutting and construction equipment effectively.
Fabric Shears, Rotary Cutter, and Cutting Mat
Fabric shears are the most adaptable cutting tool for garment construction. Their long blades can produce smooth lines through many woven and knit materials, while angled handles allow the lower blade to remain closer to the work surface. Comfort matters because poorly fitted handles can cause fatigue and reduce control during large cutting sessions.
Reserve fabric shears exclusively for textiles. Paper, packaging, adhesive materials, and household tasks can dull or contaminate the blades. Clean away fibres after use and store the shears in a protected location.
A rotary cutter offers a different cutting action. It works well for straight lines, repeated pieces, slippery materials, and situations where the fabric should remain flat. A self-healing cutting mat protects the table and provides a suitable surface for the blade. Fiskars describes its current mats as self-healing cutting surfaces with measurement grids and storage requirements that include keeping the mat flat and away from extreme temperatures.
Always close or retract a rotary blade immediately after cutting. Work away from your body and keep hands outside the cutting path. Many designers use both systems: shears for curves and detailed shapes, and a rotary cutter for controlled straight or layered work.
Tailor’s Chalk, Marking Pens, Pins, and Clips
Construction markings communicate information that is not visible from the cut edge alone. Darts, notches, pocket positions, button placements, pleat lines, centre points, and matching references help the garment come together accurately. Missing or unclear markings can force the maker to reconstruct information later.
Tailor’s chalk is a traditional option that works well on many fabrics, although visibility varies by colour and texture. Chalk wheels can produce finer lines. Washable or air-erasable pens offer precision, but their removal behaviour must be tested because heat, detergent, fabric finish, and storage time can affect the result.
Pins secure layers and support fitting. Clips are useful for thick materials, delicate surfaces, coated fabrics, leather-like textiles, or projects where visible pinholes would be undesirable. Select a size that holds the layers without distorting them.
A seam ripper is equally essential because corrections are part of skilled construction. SINGER’s current sewing-aid information describes seam rippers as tools for removing stitches, while its beginner kits combine them with measuring, marking, pinning, and hand-sewing supplies.
Remove stitches slowly and support the fabric. Pulling aggressively can create holes or stretch the seam area.
A Reliable Sewing Machine and Basic Accessories
A reliable beginner machine should perform straight stitching and zigzag stitching consistently, allow stitch-length adjustment, reverse securely, accept common presser feet, and provide clear threading and bobbin instructions. Decorative stitch quantity is less important than controllable speed, even feeding, accessible maintenance, and local support.
Speed control can make detailed work more manageable. Current Brother models illustrate features such as adjustable speed, drop-in bobbins, needle-threading systems, illuminated work areas, and included presser feet. Features vary by model, so buyers should compare the exact specification rather than assuming every machine from one manufacturer behaves identically.
Needles must match both fabric and thread. Keep universal, ballpoint or stretch, denim, and finer needles only when your projects require them. Replace bent, damaged, or worn needles promptly. Also maintain a supply of compatible bobbins and essential presser feet for zippers, buttonholes, blind hems, and standard seams.
Read the official manual before adjusting tension or opening the machine for cleaning. Remove lint as instructed and use oil only where the manufacturer specifically permits it. A modest machine that is correctly threaded and maintained is more valuable than an advanced machine operated without understanding its basic settings.
Best Pressing, Fitting, and Finishing Tools
Pressing, fitting, and finishing tools distinguish a carefully constructed garment from one that merely holds together. Sewing joins the pieces, but pressing controls seam shape, reduces bulk, establishes edges, and helps fabric settle into the intended form. Fitting checks whether the design supports movement and proportion, while finishing protects raw areas and completes visible details.
Pressing should occur throughout construction. Seams are generally easier to shape before they are crossed by additional seams, enclosed by linings, or covered by facings. Waiting until the garment is complete can make some areas inaccessible and may lock avoidable bulk into the structure.
Fitting should also happen in stages. A first fitting can evaluate the overall volume and balance. Later fittings can assess sleeves, closures, hems, collars, and finishing details. The garment should be tested while standing, sitting, walking, reaching, and bending. A design that looks correct in a static mirror may restrict normal movement.
Finishing tools include hand needles, thread snips, seam gauges, point turners, pressing cloths, hams, seam rolls, and equipment for closures or fasteners. Not every project requires every item, but the designer should understand what problem each tool solves.
Beginners often focus heavily on the sewing machine because it appears to perform the main construction work. In practice, pressing and hand finishing can occupy a significant part of a well-made project. Developing these habits early improves results without requiring expensive equipment.
Steam Iron and Pressing Aids
A temperature-controlled steam iron is one of the most important garment-making tools. It can flatten seam allowances, establish hems, shape darts, prepare facings, set folds, reduce puckering, and improve the accuracy of later stitching. Pressing differs from casual ironing because the iron is often lifted and placed rather than moved continuously across the surface.
Always test heat and steam on a fabric scrap. Fibre type, dye, coating, texture, and interfacing can change how a material responds. Excessive heat may create shine, flatten texture, distort stretch fibres, or damage synthetic fabric.
A pressing cloth adds protection between the iron and garment. It is especially useful on delicate surfaces, dark fabrics, fusible materials, and areas where direct heat could leave marks. A tailor’s ham supports curved zones such as darts, hips, collars, and sleeve caps. A seam roll helps press long seam allowances without imprinting their edges onto the outer fabric.
Beginners can temporarily use a tightly rolled towel for selected curved areas, although dedicated tools offer better shape and stability. Keep the pressing surface clean, and allow shaped sections to cool before moving them so the fabric can retain the pressed form.
Mirrors, Fitting Tools, and Hand-Finishing Supplies
A full-length mirror helps assess overall silhouette, proportion, hem level, garment balance, and the relationship between separate design elements. A second mirror or camera view is useful for evaluating the back, which is difficult to inspect accurately while twisting the body.
Fit garments with the shoes, foundation garments, and major layers likely to be worn with them. These choices affect posture, circumference, length, and the way fabric hangs. Mark adjustments with pins, removable thread, chalk, or small safety pins according to the textile.
Keep hand-finishing supplies together in a portable container. Useful items include sharp hand needles, basting thread, matching finishing thread, a thimble, thread snips, seam gauge, point turner, safety pins, hooks, eyes, snaps, and temporary closures.
Hand basting remains valuable even in a machine-based workflow. It can stabilise zippers, collars, slippery layers, matching checks, curved seams, and difficult hems before permanent stitching. It also allows a fitting to occur without placing numerous sharp pins against the body.
One thing I always check before finishing is whether the garment remains comfortable in motion. Correct appearance, secure construction, and functional movement should be evaluated together rather than as separate qualities.
Best Digital Tools for DIY Fashion Design
Digital fashion tools can improve idea development, technical communication, pattern revision, textile design, visual presentation, and virtual sampling. However, “fashion design software” is a broad category. An application intended for illustration does not perform the same work as patternmaking or three-dimensional garment simulation.
Vector graphics programs create scalable lines and shapes. They are useful for fashion flats, technical drawings, logos, trims, colourways, and repeat motifs. Raster applications are more suitable for painterly illustration, photo-based mood boards, texture editing, and image manipulation. Digital pattern systems create geometric garment pieces, while 3D fashion applications sew those pieces virtually and simulate their behaviour on an avatar.
Before selecting software, define the output you need. If your goal is a clean front-and-back technical flat, a vector program may be sufficient. If you want a reusable pattern that changes with measurements, a dedicated pattern application is more appropriate. If you need virtual draping, presentation imagery, or digital sampling, a 3D garment platform may justify its cost and hardware requirements.
Beginners should also consider learning resources, file compatibility, printing accuracy, and long-term access. A free program with strong documentation may offer more practical value than advanced software that overwhelms the user. Paid software may be worthwhile when it supports professional collaboration or replaces repeated manual work.
Always obtain installers from official project or manufacturer pages. Unofficial downloads may be outdated, modified, or bundled with unrelated software. The next sections compare three distinct categories rather than presenting them as interchangeable alternatives.
| Tool Category | Common Examples | Best Used For | Recommended For |
|---|---|---|---|
| Physical Design Tools | Measuring tape, scissors, sewing machine, dress form | Measuring, cutting, sewing, fitting garments | Every DIY fashion designer |
| Patternmaking Tools | Pattern paper, French curve, tracing wheel | Drafting and modifying sewing patterns | Beginners & Intermediate users |
| Digital Illustration Tools | Adobe Illustrator, Inkscape | Fashion flats, technical drawings, textile graphics | Designers creating digital concepts |
| Digital Pattern Software | Seamly2D | Measurement-based pattern drafting | Custom garment creation |
| 3D Garment Design Software | CLO | Virtual garment visualization and prototyping | Advanced fashion designers |
Adobe Illustrator and Inkscape for Fashion Flats
Adobe Illustrator is a vector graphics application used for scalable artwork, technical flats, fashion illustrations, logos, colour variations, and surface-design elements. Adobe’s official fashion-learning resources demonstrate workflows that move from sketches into refined vector designs using drawing tools, patterns, effects, and colour variations.
Inkscape is a free, open-source vector editor. Its official site highlights flexible drawing tools, Bézier curves, text tools, and broad file-format compatibility. The current official download page should be used rather than historical release pages or third-party installers.
Either program can be used to draw front and back garment flats, seam lines, topstitching, pockets, closures, colourways, and textile motifs. Vector artwork remains editable at different sizes, which is useful when preparing portfolios or specification documents.
These applications do not automatically understand garment balance, fit, seam construction, or production tolerances. The designer must decide where seams belong and whether the illustrated garment can be constructed logically.
Beginners can start by tracing a simple garment photograph or hand sketch, then recreating it with clean lines and separate layers. Use official downloads, save editable master files, and export copies in formats required by printers or collaborators.
Seamly2D for Digital Pattern Drafting
Seamly2D is an open-source patternmaking project designed around measurement-based pattern development. Instead of drawing every size as an unrelated document, users can construct points and lines using measurements and formulas. That approach can support reusable patterns that respond to different measurement sets.
The software is most valuable for people who already understand basic pattern geometry. It can calculate, preserve, and update drafted relationships, but it cannot determine whether the chosen amount of ease, dart control, sleeve balance, or seam shaping is suitable. Those decisions still depend on patternmaking knowledge and physical testing.
Begin with a simple block or garment that you can also draft manually. Reproducing a familiar pattern makes it easier to understand points, variables, curves, seam allowances, and piece generation. Keep measurement files organised and use descriptive names for formulas and pattern elements.
Printing requires careful verification. Export or tile the pattern according to the available paper size, print a calibration square, and confirm that the printer has not used “fit to page” scaling. Assemble the sheets accurately before cutting.
The project’s official community resources provide release and documentation information. Because release channels and installation instructions can evolve, obtain the current version through the official Seamly project ecosystem rather than an unrelated download site.
CLO for Three-Dimensional Garment Development
CLO combines two-dimensional pattern editing with three-dimensional garment sewing, simulation, and presentation. Designers can create or import pattern pieces, define sewing relationships, arrange pieces around an avatar, and simulate how the virtual fabric behaves. This supports silhouette exploration, visual communication, and selected digital-sampling workflows.
CLO is more demanding than basic illustration software because it brings together patternmaking, construction order, garment fit, material behaviour, and computer graphics. A user who understands physical sewing will often find the virtual sewing logic easier to interpret.
Hardware requirements deserve careful attention. CLO’s April 2026 requirements page lists current minimum and recommended specifications for supported systems and states that official installers are provided through CLO’s own website in native Windows or macOS formats. The page was updated in June 2026, making it the appropriate reference before installation.
Start with a simple garment containing a small number of pattern pieces. Learn how to place pieces, assign sewing lines, simulate, adjust fit, and interpret tension or collision problems before attempting complex layered clothing.
Virtual simulation is an evaluation tool, not a guarantee of physical production results. Real fabric may differ according to finish, construction, cutting, pressing, and manufacturing conditions. Physical samples remain important when the final goal is a wearable garment.
Tool Comparison and Step-by-Step Buying Plan
A comparison table makes the tool categories easier to evaluate, but it should not be treated as a universal shopping list. Beginner priority depends on the type of work being performed. Someone who wants to sew physical garments needs cutting, marking, construction, and pressing tools. Someone focused on illustration may begin with drawing equipment and software. A pattern specialist may invest earlier in rulers, curves, paper, and drafting applications.
The most useful comparison criterion is not the number of features. It is how directly the tool improves accuracy, efficiency, safety, or repeatability. A well-balanced pair of shears can improve every physical project. A dress form provides strong value only when the designer drapes or fits often. A sophisticated 3D application may save time for a professional workflow but create unnecessary complexity for a first sewing project.
Workspace and storage also influence the decision. Large cutting mats, dress forms, ironing boards, and desktop machines require permanent space. Portable rulers, a folding mat, laptop software, and a compact machine may be more realistic in a shared room.
Maintenance costs should be considered alongside purchase cost. Rotary blades, machine needles, mats, printer paper, software subscriptions, replacement parts, and servicing all affect long-term ownership.
The table below identifies the primary role of each tool and the specification most likely to affect its usefulness. The five-step process that follows turns the table into a practical purchasing plan for either a beginner kit or a developing home studio.
DIY Fashion Design Tool Comparison
The table separates essential, helpful, and advanced tools according to a typical beginner who intends to design and sew clothing at home. “Essential” does not mean the item must be purchased at the highest quality level. It means the function is difficult to remove from the workflow.
| Tool | Main Purpose | Beginner Priority | What to Check |
|---|---|---|---|
| Flexible measuring tape | Body and garment measurements | Essential | Clear markings, flexibility, and condition |
| Transparent rulers and curve | Pattern drafting and seam allowances | Essential | Useful lengths, readable grid, suitable curves |
| Pattern paper | Drafting, tracing, and altering patterns | Essential | Width, visibility, strength, and storage |
| Fabric shears | Cutting garment pieces | Essential | Sharpness, comfort, blade length, handedness |
| Rotary cutter and mat | Straight, repeated, or layered cutting | Helpful | Blade guard, mat size, replacement blades |
| Marking tools | Transferring construction details | Essential | Visibility, removability, fabric compatibility |
| Sewing machine | Frequent garment construction | Essential for regular sewing | Stitch quality, speed control, support, accessories |
| Steam iron | Pressing seams and shaping garments | Essential | Temperature control, steam, weight, soleplate |
| Dress form | Draping and visual fitting | Optional | Size range, stability, shape, padding options |
| Vector software | Fashion flats and surface design | Helpful | File formats, drawing tools, learning resources |
| Patternmaking software | Reusable measurement-based patterns | Intermediate | Variables, curves, export, print calibration |
| 3D garment software | Virtual fitting and presentation | Advanced | Hardware needs, simulation tools, learning curve |
Use the priority column as a starting point. Move any tool higher when it supports your chosen specialisation.
A Five-Step Tool-Buying Process
First, choose one defined project. “Learn fashion design” is too broad; “make a lined A-line skirt from a commercial pattern” is specific enough to identify tools. Second, divide the project into measuring, pattern preparation, cutting, marking, sewing, fitting, pressing, and finishing tasks.
Third, compare the required tasks with what you already own. A household iron may be suitable initially, while general-purpose scissors should not replace sharp fabric shears. Borrowing or renting selected equipment can help you evaluate specialist tools before purchasing.
Fourth, research compatibility. Confirm machine voltage, needle system, presser-foot compatibility, blade size, mat dimensions, printer scaling, software operating systems, file formats, and available servicing. Official documentation should take priority over abbreviated retailer listings.
Fifth, test the equipment during the return or evaluation period. Sew representative fabrics, print calibration squares, transfer files, check cutting comfort, and confirm that storage is practical.
For software, download only from official sites. Inkscape provides its current release through its own download page, while CLO states that official installers are distributed through its website.
Upgrade after repeated use exposes a real limitation. This keeps spending aligned with skill development rather than short-lived enthusiasm.
Quick Answer About The Best Tools for DIY Fashion Design
The Best Tools for DIY Fashion Design include a flexible measuring tape, transparent rulers, a French curve, pattern paper, fabric shears, a rotary cutter with a self-healing mat, removable marking tools, pins or clips, a seam ripper, a dependable sewing machine, and a temperature-controlled steam iron. These products support the essential stages of measuring, pattern development, fabric preparation, garment construction, fitting, and finishing.
A dress form can improve draping and visual fitting, but most beginners can start with accurate body measurements and inexpensive test garments. Digital tools are also useful when chosen for a specific purpose. Adobe Illustrator and Inkscape support vector-based fashion flats and textile motifs. Seamly2D is intended for measurement-based digital pattern drafting, while CLO combines two-dimensional pattern work with three-dimensional garment simulation. Adobe provides official fashion-illustration learning material, Inkscape describes itself as a free vector editor, and CLO publishes current system requirements for its 3D application.
Beginners should not attempt to purchase everything at once. Start with tools that improve measurement, cutting, sewing, and pressing because those skills affect nearly every physical garment. Add specialist rulers, a dress form, a serger, advanced software, or a graphics tablet only when a repeated project requirement justifies the expense.
Frequently Asked Questions About The Best Tools for DIY Fashion Design
The most common questions about DIY fashion tools concern cost, necessity, learning order, and the difference between physical and digital equipment. Beginners often assume they must purchase a professional studio before they can create a meaningful project. In reality, many foundational skills can be developed with a compact set of accurate, well-maintained tools.
The correct answer depends on the intended output. Fashion illustration can begin with paper and pencils or a vector application. Garment construction requires measuring, cutting, marking, sewing, and pressing. Patternmaking adds rulers, curves, paper, and fitting materials. Three-dimensional design requires software, appropriate computer hardware, and an understanding of how two-dimensional pattern pieces become a sewn garment.
Another important distinction is between convenience and necessity. A dress form can make draping easier, but body fittings and test garments can provide more relevant information for a custom project. A rotary cutter can improve selected cutting tasks, but sharp fabric shears remain more versatile. Paid software can support professional workflows, but free tools may be sufficient for learning vector drawing or digital pattern principles.
The answers below are designed to provide a direct starting point while acknowledging these differences. Use them alongside the detailed sections above rather than as isolated purchasing rules. When a tool appears useful, check the exact product documentation, local warranty, replacement supplies, workspace requirements, and compatibility before spending money.
What Tools Do I Need to Start Designing Clothes?
A practical starter kit includes a sketchbook, pencils, flexible measuring tape, transparent ruler, pattern paper, fabric shears, removable marking tool, pins or clips, seam ripper, hand needles, suitable thread, and a temperature-controlled iron. These tools support concept development, measurement, pattern preparation, cutting, temporary assembly, correction, and finishing.
Add a sewing machine when you intend to construct complete garments regularly. A basic model with dependable straight and zigzag stitching is usually more useful than a complicated machine chosen mainly for decorative functions.
Your first project determines whether additional equipment is required. A fitted garment may need a curved ruler and test fabric. A zipper project needs the appropriate foot. A knit garment requires suitable needles and possibly different seam settings.
Begin with one realistic design and list every construction stage. Purchase only the tools needed for those stages, then add equipment when later projects expose a repeated limitation. This produces a more coherent toolkit and prevents specialist products from consuming space before you understand their purpose.
Can I Start Fashion Designing Without a Sewing Machine?
Yes. Fashion design can begin through illustration, pattern research, hand sewing, embroidery, textile manipulation, clothing repair, styling, surface design, and selected forms of upcycling. These activities teach proportion, colour, detail, material behaviour, and construction thinking without requiring an immediate machine purchase.
Hand sewing can also complete small projects and selected garment finishes. Basting, buttons, hooks, hems, repairs, decorative stitches, and some lightweight constructions can be completed manually. The process is slower, but it develops control and helps beginners understand how stitches interact with fabric.
A sewing machine becomes valuable when projects contain long seams, repeated construction, durable topstitching, buttonholes, or time-sensitive production. It improves efficiency but does not replace pattern accuracy, fitting, pressing, or material knowledge.
Beginners who are uncertain about purchasing can take a class, borrow a machine, use a community workspace, or rent equipment where available. This allows them to test threading, speed control, noise, storage, and comfort before selecting a model.
Start learning now with the tools available, then purchase a machine when your intended projects clearly require one.
Is a Rotary Cutter Better Than Fabric Scissors?
Neither tool is universally better because they perform differently. Fabric shears are versatile, portable, and effective for curves, corners, notches, and detailed garment shapes. They do not require a dedicated cutting mat and can work on a wider range of surfaces when used carefully.
A rotary cutter keeps the fabric flat while a circular blade moves along the cutting line. It can be efficient for straight edges, repeated pieces, quilting shapes, slippery fabrics, and selected layered cuts. It requires a self-healing mat and careful blade handling. Fiskars describes current rotary-cutting mats as surfaces designed to protect the workspace and support precise cutting.
The best choice depends on the project and the user’s physical comfort. Some people find rotary cutting easier on the hand, while others prefer the feedback and control of shears. Left-handed users should confirm that the selected design is suitable.
Many experienced makers own both. Start with quality fabric shears because they are broadly useful. Add a rotary cutter when repeated straight cutting or difficult fabric handling becomes a regular part of your work.
Do Beginners Need a Dress Form?
Most beginners do not need a dress form immediately. Commercial patterns, accurate body measurements, direct fittings, and inexpensive test garments can provide enough information for early projects. This approach also teaches how flat patterns relate to a moving body.
A form becomes more valuable when the designer wants to learn draping, arrange style lines visually, position gathers or pleats, evaluate asymmetry, photograph work in progress, or develop garments repeatedly for a similar body shape. It offers continuous access to a three-dimensional surface when the wearer is unavailable.
However, a form must represent the intended wearer closely enough to be useful. Adjustable circumferences do not automatically reproduce posture, shoulder slope, bust shape, back curve, or body distribution. Padding and a fitted cover may be required.
Before purchasing, identify the task the form will perform and confirm that you have space to store and work around it. For custom garments, continue fitting on the real wearer or an accurately padded representation.
A test garment is often the better first investment because it evaluates both appearance and movement on the actual body.
What Is the Best Free Fashion Design Software?
The best free application depends on the task. Inkscape is a strong option for vector-based fashion flats, line drawings, logos, colourways, and textile motifs. Its official site describes flexible drawing tools, Bézier curves, text capabilities, and broad file-format support.
Seamly2D is more appropriate when the goal is measurement-based digital pattern drafting. It allows users to build pattern geometry rather than simply illustrate the finished garment. However, it requires an understanding of patternmaking principles.
Neither program replaces the other. Inkscape communicates what the garment looks like; Seamly2D helps construct pattern pieces that may be used to make it. A beginner interested in visual presentation should start with Inkscape. A beginner already learning flat pattern drafting may explore Seamly2D after understanding manual measurements and construction lines.
Download only through official project resources. Save editable master files, keep backup copies, and test export or printing settings before relying on the software for a major project.
Free software reduces financial cost, but learning time remains an investment. Choose one program and complete a small project before adding another.
Is CLO Suitable for Beginners?
CLO is accessible to committed beginners, but it is more complex than a sketching or vector application. Users work with two-dimensional patterns, virtual sewing, avatars, fabric properties, arrangement, simulation, and rendering. Understanding physical garment construction makes these concepts easier to interpret.
A beginner should start with a simple garment such as a basic skirt or T-shirt rather than a tailored, layered, or highly detailed design. Learn how to create or import pieces, assign sewing lines, position them around the avatar, run the simulation, and identify common collision or tension problems.
Computer capability is an important consideration. CLO’s April 2026 requirements specify supported operating systems, memory, graphics, storage, display, and network expectations. Prospective users should compare their exact computer with the current official requirements before installing or subscribing.
CLO is most worthwhile when the user wants virtual sampling, silhouette comparison, digital presentation, or integration into a broader 3D workflow. It may be unnecessary for someone focused on occasional home sewing.
Use the trial or learning resources available through official channels, and continue making physical test garments when the final output will be produced in real fabric.
Conclusion
The Best Tools for DIY Fashion Design are the products that help a designer measure accurately, communicate clearly, cut safely, construct reliably, fit thoughtfully, and finish professionally. A successful toolkit does not need to resemble a commercial studio. It needs to support the work that is actually being completed.
For most beginners, the physical foundation includes a measuring tape, transparent rulers, pattern paper, fabric shears, a removable marking tool, pins or clips, a seam ripper, hand needles, thread, a reliable sewing machine, and a steam iron. These tools support nearly every stage of garment creation and remain useful as skills advance.
Specialist equipment should be added according to repeated need. A rotary cutter and mat can improve selected cutting workflows. A dress form supports draping and visual fitting. Pressing aids improve shaped construction. Vector applications create polished flats and motifs, pattern software preserves measurement-driven drafts, and three-dimensional software supports virtual development.
The most important principle is to invest in accuracy before complexity. A technically advanced application cannot correct poor measurements, and an expensive machine cannot compensate for inaccurate cutting or inadequate pressing. Learn the underlying process, then use equipment to make that process more consistent.
Maintain your tools as carefully as you select them. Replace worn needles and blades, store rulers and mats correctly, clean the machine according to its manual, protect digital files with backups, and review software requirements before updates.
A gradual, project-led approach creates a professional workspace without unnecessary spending or clutter.
Build a Practical Starter Kit
Begin with a compact kit that supports one complete garment. Include a flexible tape, transparent ruler, pattern paper, fabric shears, removable marker, pins or clips, seam ripper, hand needles, suitable thread, and a temperature-controlled iron. Add a sewing machine when the project involves substantial construction.
Organise the tools according to workflow. Keep measuring and pattern equipment together, cutting tools protected, marking tools tested and labelled, and hand-sewing supplies in a small container. A clear system reduces time spent searching and prevents sharp tools from being damaged.
Complete several projects before expanding. During each project, record which task caused delay, inaccuracy, discomfort, or repeated rework. Those observations should guide the next purchase.
A rotary system may solve frequent long cutting. A curved ruler may improve pattern shaping. A pressing ham may support tailored seams. A graphics tablet may make digital drawing more natural.
Avoid replacing useful equipment simply because a more advanced version exists. Upgrade when the new tool provides a measurable improvement in control, speed, repeatability, or safety.
This practical starter-kit approach allows beginners to develop skills while giving experienced makers a disciplined method for evaluating new equipment.
If you plan to expand beyond beginner projects, comparing your setup with professional fashion design tools can help you prioritize future purchases without buying unnecessary equipment.
Final Recommendation
Use The Best Tools for DIY Fashion Design as a framework rather than a mandatory shopping list. Select equipment according to your projects, materials, skill level, physical comfort, workspace, budget, and access to repair or replacement supplies.
Invest first in tools that affect accuracy and safety. Reliable measurement, clean cutting, visible removable marking, stable construction, and controlled pressing influence every finished garment. Advanced features become valuable only after these foundations are consistent.
For digital work, choose one application based on the required output. Use a vector editor for flats and motifs, pattern software for measurement-based drafting, and three-dimensional software for virtual garment development. Do not purchase several overlapping applications before learning one workflow thoroughly.
Test unfamiliar methods on scraps, sample files, calibration prints, or inexpensive test garments. This protects valuable fabric and reveals limitations early.
Finally, create a maintenance routine. Sharpen or service shears when necessary, replace worn blades and needles, clean equipment according to official instructions, organise patterns, and back up digital files.
A thoughtful toolkit should gradually become less noticeable because it supports the work without interrupting it. That reliability—not the number of tools—is the clearest sign of a professional DIY fashion workspace.
Comments are closed, but trackbacks and pingbacks are open.