
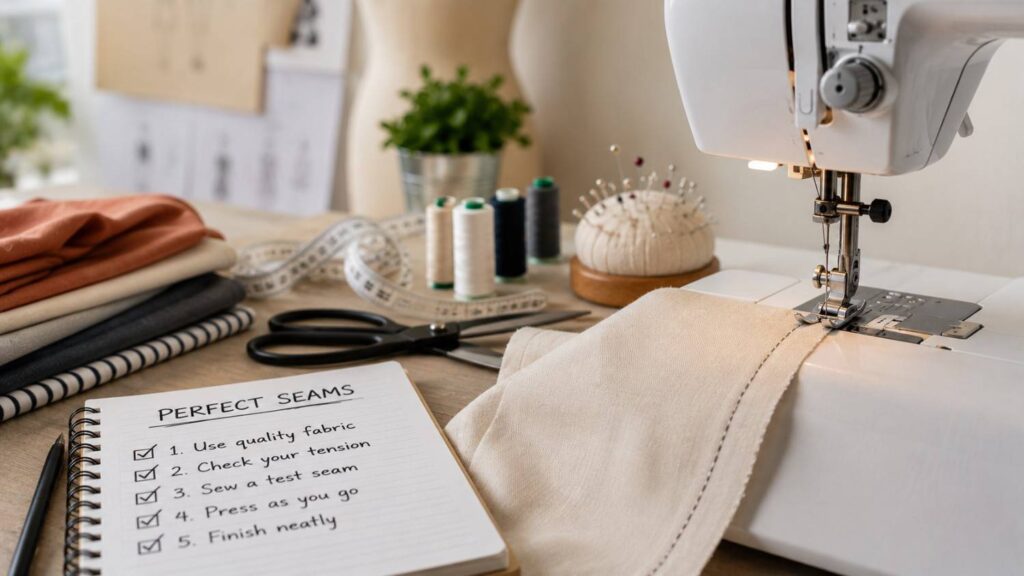
Top 5 Tips for Sewing Perfect Seams Every Time
A well-sewn seam does much more than hold two pieces of fabric together. It influences the fit, strength, comfort, drape, and finished appearance of an entire sewing project. Even a carefully selected pattern and beautiful fabric can produce disappointing results when seam allowances vary, layers shift, stitches pucker, or pressing is overlooked. By contrast, clean and accurately constructed seams help garments hang properly, allow pattern pieces to align, and give handmade items the polished appearance associated with professional construction.
Learning how to sew perfect seams is not primarily about purchasing expensive equipment or mastering advanced techniques. It is about developing a reliable process that can be repeated from one project to the next. Accurate preparation, an appropriate needle and thread, controlled fabric handling, consistent stitching, and careful pressing all contribute to better results. When one of these elements is ignored, the problem often becomes visible later in the project, when correcting it may require unpicking several construction steps.
These Top 5 Tips for Sewing Perfect Seams are designed to help beginners establish good habits while giving experienced sewists a practical framework for troubleshooting. The guidance applies to many common woven-fabric projects, including garments, bags, home décor, accessories, and craft items. Individual patterns and specialty materials may require adjustments, so always compare general advice with the pattern instructions and the manual for your specific sewing machine.
The most important principle is to test before committing to the final seam. A small sample made from the actual project fabric can reveal unsuitable tension, an incorrect needle, poor feeding, excessive stitch density, or pressing problems. Correcting these issues on a test swatch is faster and safer than discovering them after the garment or project has been assembled.
Tip 1—Prepare and Cut the Fabric Accurately
Perfect seams begin long before the presser foot is lowered. Fabric preparation and cutting determine the shape, grain, and alignment of every piece in the project. When pieces are inaccurate, off-grain, or poorly marked, even technically straight stitching may not produce the intended result. The sewist may have difficulty matching notches, joining curved areas, aligning hems, or maintaining symmetry across a garment.
Preparation should reflect the material and the way the finished project will be used. Washable fabrics may need prewashing to account for shrinkage or changes in texture, while delicate, coated, embellished, or dry-clean-only textiles require more specialized treatment. The material should then be pressed sufficiently flat for accurate cutting. Cutting through wrinkles can alter the shape of a piece, particularly along curves or narrow areas.
Pattern placement is equally important. Grainlines, fold lines, nap direction, print placement, and mirrored pieces must be handled according to the pattern instructions. Accurate marking ensures that darts, pockets, pleats, buttonholes, gathering points, and matching locations remain available once the paper pattern has been removed.
Before sewing, confirm that adjoining pieces have been cut correctly and that their relevant points match. This does not mean every raw edge will always be identical. Some designs intentionally use easing, gathering, or different curve lengths. However, the difference should come from the pattern rather than accidental cutting errors.
Taking time during preparation reduces frustration at the machine. It also protects the project from cumulative inaccuracies. A difference of only a few millimeters may appear minor at one seam, but repeated differences can affect an entire waistline, neckline, sleeve opening, bag panel, or quilted section. Careful preparation creates the stable foundation on which every later sewing step depends.
Pre-Treat and Press Before Cutting
Pre-treatment helps ensure that the finished item behaves as expected after cleaning or regular use. For washable fabric, a practical approach is to treat the uncut material in a manner similar to the way the finished project will be cared for. This may reveal shrinkage, color loss, surface changes, or distortion before significant time has been invested in construction.
The correct method depends on the fiber content, weave, finish, and manufacturer’s care guidance. Cotton and linen may respond well to washing and drying, while wool, silk, rayon, coated fabric, sequined material, and structured specialty textiles may require gentler treatment. When the fabric is expensive or unfamiliar, test a small sample first.
After pre-treatment, press the fabric to remove wrinkles without stretching it. Use an appropriate temperature and apply a pressing cloth when necessary. Allow the material to cool and rest on a flat surface before cutting. Pressing is especially important around folds created during storage, because cutting across a persistent crease can alter the dimensions or alignment of a pattern piece.
Respect Grainlines, Notches, and Markings
The grainline affects how fabric hangs, stretches, and responds to movement. On woven material, pattern pieces are generally positioned in relation to the lengthwise or crosswise grain. A piece cut noticeably off-grain may twist, pull, or hang unevenly, even when its seams are sewn accurately. For this reason, grainline arrows should be measured from the selvage or another appropriate reference point rather than positioned by sight alone.
Pattern notches and construction marks serve different purposes. Notches identify matching locations along seam edges, while dots, circles, squares, and lines may indicate darts, pockets, pleats, gathering limits, closures, or pivot points. Transfer these marks using a method that remains visible but does not permanently damage the fabric.
Check directional prints, nap, and mirrored pieces before cutting. Velvet, corduroy, brushed fabrics, and one-way prints may require all pieces to face the same direction. Accurate grain placement and marking save time during assembly because the fabric communicates where pieces should meet and how each section should be shaped.
Align Without Stretching
Once the pieces are cut and marked, align them according to the pattern instructions. For many plain seams, this means placing the right sides together and matching the raw edges. Begin with fixed reference points such as seam ends, notches, corners, and marked intersections. Secure those locations first, then distribute pins, clips, or basting stitches between them.
Avoid pulling one layer to make it match another unless the pattern specifically instructs you to ease, gather, or stretch a section. Forced alignment can create ripples, twisted seams, or uneven fullness. When one piece seems unexpectedly longer, stop and check whether the correct pieces are being joined, whether a notch was missed, or whether one layer has been accidentally stretched.
Use pins or clips in a way that controls the fabric without distorting it. Delicate or slippery fabrics may benefit from hand-basting, while materials that show permanent pinholes may require clips or pins placed within the seam allowance. Good alignment should support the seam, not create additional tension that must be corrected while sewing.
Tip 2—Keep a Consistent Seam Allowance
A seam allowance is the area between the stitching line and the cut edge of the fabric. Although this portion may eventually be hidden inside the project, its width has a direct effect on finished measurements, matching points, structural strength, and the way a seam can be pressed or finished. Maintaining a consistent seam allowance is therefore one of the most important technical skills in accurate sewing.
Patterns are drafted around particular seam lines. If a sewist repeatedly stitches inside or outside the intended line, the dimensions of the completed item change. On a fitted garment, a small variation at several side seams can noticeably alter the circumference. On a bag, cushion cover, or pieced project, inaccurate allowances can prevent panels, corners, or design lines from matching.
Consistency is easier when the sewist uses a clear visual reference and maintains a comfortable pace. Needle-plate markings are helpful, but some are narrow, difficult to see, or positioned too close to the presser foot for a particular allowance. Removable tape, a compatible seam-guide attachment, or a marked extension table can provide a longer visual pathway.
The sewist should also understand that the fabric edge is not always the best reference. Some projects require stitching along a marked seam line, especially when the allowance has been trimmed, shaped, or added manually. Curves and corners also demand a different approach from long straight seams. The fabric must be guided gradually so the intended stitching line remains consistent even when the raw edge changes direction.
Developing control over seam allowance improves more than straightness. It helps collars meet necklines, sleeves fit armholes, waistbands align with bodices, and facing edges turn cleanly. For both beginners and experienced sewists, accurate allowance control is one of the clearest indicators of careful construction.
Follow the Pattern Instead of Assuming
There is no single seam allowance that applies to every sewing project. Garment patterns often use allowances such as 1.5 centimeters or 5/8 inch, but quilting, lingerie, bags, toys, home décor, and industrial-style patterns may use different measurements. Some pattern companies include seam allowances in the printed pieces, while others require the sewist to add them.
Always review the pattern notes before cutting and sewing. Check whether the stated allowance applies to every seam or whether selected areas use narrower or wider measurements. Zipper seams, enclosed seams, necklines, hems, and decorative details may follow different instructions from the main construction seams.
When working with a pattern that excludes seam allowance, add it accurately during tracing or mark the exact stitching line. Do not rely on memory or assume that a familiar allowance will be suitable. Alterations should also be made with awareness of the seam line rather than only the raw edge.
Following the drafted seam allowance protects the designer’s intended measurements and ensures that notches, corners, and adjoining pieces meet correctly.
Use a Guide You Can See
A visible guide allows the sewist to concentrate on the movement of the fabric rather than repeatedly measuring the seam after it has been sewn. Start by identifying the correct marking on the needle plate. Confirm whether the measurement is taken from the centered needle position or another position, particularly when the machine allows the needle to move from side to side.
When the built-in markings are difficult to follow, place a strip of removable painter’s tape on the machine bed. Align the tape accurately with the needle and extend it toward the front of the machine to create a longer guide. A compatible seam-guide foot or adjustable guide can also help, especially when sewing long parallel lines.
Keep your eyes slightly ahead of the presser foot rather than staring directly at the needle. This gives you time to make small corrections before the fabric drifts significantly. Guide the edge toward the reference point using light hand pressure.
Test the chosen guide on scrap fabric and measure the resulting allowance before sewing the actual project.
Handle Curves and Corners Slowly
Curved seams require gradual control because the fabric edge changes direction continuously. Reduce the machine speed and guide only a short section at a time. Keep the intended allowance aligned with the guide while allowing the fabric to rotate naturally under the presser foot. On tight curves, it may be necessary to stop with the needle down, raise the presser foot briefly, reposition the fabric slightly, and continue.
Corners require an accurate pivot point. Mark the point when precision is important. Sew to the mark, stop with the needle inserted in the fabric, raise the presser foot, rotate the work, lower the foot, and continue along the new direction. This method creates a clean corner without a gap or rounded transition.
After stitching, curved allowances often need clipping or notching. Clip inward curves so they can spread, and notch outward curves to remove excess bulk. Work carefully and avoid cutting through the seam. Proper pressing over a tailor’s ham or shaped tool helps the curve retain its intended form.
Related Articles
Tip 3—Match the Needle, Thread, and Stitch to the Fabric
A sewing machine forms stitches through the interaction of the needle, upper thread, bobbin thread, tension system, presser foot, feed dogs, and selected stitch settings. When these elements are compatible with the fabric, the seam appears balanced and the material feeds smoothly. When they are not, the result may include skipped stitches, broken thread, damaged fibers, puckering, uneven feeding, or visible loops.
The correct setup depends on more than fabric weight. The structure of the material also matters. A tightly woven cotton, loose linen, stretch jersey, microfiber, denim, satin, and coated fabric may all require different needles or handling, even when some appear similar in thickness. Thread size and construction must also suit both the needle and the intended strength of the seam.
Machine settings should be treated as starting points rather than fixed rules. The standard straight stitch on a machine may work well for many woven materials, but lighter fabric may need a shorter stitch, heavier material may benefit from a longer one, and stretch fabric may require a stitch that can extend without breaking. Tension should produce a balanced stitch without drawing the layers together excessively.
Before changing a tension dial, complete basic checks. Insert a suitable new needle correctly, rethread the machine with the presser foot raised, confirm that the bobbin is wound and inserted properly, and remove lint from accessible areas according to the manual. Many apparent tension problems come from threading or needle issues.
A test swatch brings all of these decisions together. It allows the sewist to evaluate stitch quality, fabric response, seam strength, pressing behavior, and the appearance of the finish before working on the final pieces.
Choose the Needle for Fabric and Thread
The sewing machine needle must pass through the fabric cleanly while carrying the selected thread without excessive friction. Needle type relates to the fabric structure, while needle size relates broadly to fabric and thread weight. A universal needle may be suitable for many stable woven fabrics, but stretch, jersey, denim, leather, embroidery, metallic thread, and other applications often benefit from more specialized designs.
A needle that is too fine may bend, break, or struggle with thick thread. A needle that is too large can leave visible holes or damage delicate material. A dull or damaged point may push fibers rather than passing between or through them cleanly, resulting in skipped stitches, pulled threads, or irregular penetration.
Install a fresh needle at the beginning of an important project or whenever stitch quality becomes uncertain. Insert it in the correct direction and push it fully into position according to the machine manual.
Manufacturers such as SCHMETZ and Brother publish fabric, thread, and needle guidance. Use those resources as a starting point, then confirm the choice on project scraps.
Set Stitch Length and Tension Thoughtfully
Stitch length influences the flexibility, appearance, strength, and density of a seam. A medium straight stitch is an appropriate starting point for many stable woven fabrics, but the setting should be adjusted according to the material. Very short stitches can perforate delicate fabric, create stiffness, or make unpicking difficult. Excessively long stitches may reduce control or leave the seam less secure.
Thread tension controls how the upper and bobbin threads meet within the fabric layers. A balanced straight stitch should generally appear secure on both sides without obvious loops or excessive drawing. Before adjusting the tension, rethread the machine carefully and verify that the bobbin is inserted correctly. Test small changes rather than turning the dial dramatically.
Remember that presser-foot pressure, needle condition, thread quality, stitch density, and feeding can also affect the appearance of a seam. Treat tension as one part of the system rather than the automatic explanation for every problem.
Record successful settings, especially when working with unusual material or multiple layers.
Test on a Representative Scrap
A useful test sample should reproduce the conditions of the actual seam as closely as possible. Use the same fabric, grain direction, number of layers, thread, needle, interfacing, stabilizer, and proposed seam finish. A single layer of scrap may behave differently from a layered seam containing fusible interfacing, lining, batting, elastic, or a folded edge.
Sew several inches rather than only a few stitches. Examine the top and underside for loops, skipped stitches, uneven penetration, puckering, or thread damage. Gently pull across the seam to evaluate strength and flexibility. Press the sample using the intended method and check whether heat, steam, or pressure changes the fabric surface.
When a problem appears, alter one variable at a time. For example, replace the needle before changing the tension, or reduce stitch density before switching thread. This method makes the cause easier to identify.
Keep the final test sample with notes about the successful settings. It can become a valuable reference for future projects made from similar material.
| Sewing Tool | Primary Purpose | Best Used For | Key Benefit |
|---|---|---|---|
| Universal Sewing Needle | General sewing | Cotton, linen, polyester | Suitable for most everyday fabrics |
| Ballpoint Needle | Knits and stretch fabrics | Jersey, rib knit | Prevents skipped stitches |
| Sharp/Microtex Needle | Fine woven fabrics | Silk, microfiber | Produces precise, clean seams |
| Seam Guide Foot | Maintaining seam allowance | Straight seams | Improves stitching consistency |
| Fabric Clips | Holding thick or delicate layers | Vinyl, leather, quilts | Prevents pin marks and shifting |
| Tailor’s Ham | Pressing curved seams | Sleeves, darts, curves | Creates smoother shaping |
Tip 4—Guide the Fabric Without Fighting the Machine
The feed dogs beneath the presser foot are designed to move the fabric through the machine at a controlled rate. The sewist’s role is to support the weight of the project, keep the seam aligned with the chosen guide, and help the material approach the needle smoothly. Pulling from behind or pushing forcefully from the front interferes with this feeding system and may stretch the fabric, deflect the needle, create uneven stitches, or distort the seam.
Good fabric control begins with a comfortable workstation. The machine should rest on a stable surface at a height that allows relaxed shoulders and forearms. Adequate lighting makes needle-plate markings and fabric edges easier to see. Large pieces should be supported so their weight does not hang from the machine bed or pull the seam sideways.
Hand position also matters. Keep both hands on the fabric at a safe distance from the needle, using light pressure to maintain direction. Avoid gripping tightly, because tension in the hands often leads to abrupt corrections. Look ahead of the presser foot and respond to small changes before the seam drifts far from the guide.
Speed should match the difficulty of the section. Long straight areas may be sewn at a steady pace, while curves, corners, bulky intersections, and slippery fabrics require slower movement. Stopping to reposition the hands is a sign of control, not failure.
Advanced tools may improve feeding in specific circumstances. A walking foot or dual-feed system can help with quilts, coated fabrics, or shifting layers, while a straight-stitch plate may support delicate material on compatible machines. However, these accessories do not replace accurate preparation, suitable settings, or proper guidance.
For additional beginner sewing exercises that reinforce seam accuracy and stitching control, practical project tutorials can provide valuable hands-on practice.
Watch the Guide and Support the Project
Many beginners focus entirely on the moving needle because it appears to determine where the stitch will land. In practice, watching the seam guide produces a straighter result. The needle is too close to the point of stitching to allow gradual correction. By looking slightly ahead, the sewist can see whether the raw edge is beginning to drift and guide it back gently.
Support the fabric on the table so its weight does not pull against the presser foot. Large garments, curtains, quilts, and bags can create significant drag when they hang over the front or side of the workspace. Fold or arrange the project loosely to the left of the needle, ensuring that no section is trapped underneath.
Use both hands to guide rather than pull. One hand can help control the area approaching the presser foot while the other supports the larger body of the project. Keep fingers outside the immediate needle zone.
Reposition your hands whenever necessary. Stop with the needle down when stability is required, arrange the fabric again, and resume only when the seam can continue smoothly.
Sew Steadily and Remove Pins
A steady, moderate speed gives the sewist time to monitor alignment and respond to changes in the fabric. Sewing too quickly may feel efficient on a long seam, but it increases the likelihood of drifting, missing a notch, sewing over a pin, or losing control at the end. Slow down before curves, corners, seam intersections, and changes in thickness rather than waiting until the difficult area reaches the needle.
Pins should generally be removed before they pass beneath the presser foot. Sewing over a pin can bend or break the machine needle, damage the fabric, interfere with stitch formation, or send a broken fragment outward. Position pins so they are easy to remove without disturbing the aligned layers.
For unstable fabric, hand-basting provides more even control than widely spaced pins. Basting is especially useful around collars, zippers, curved seams, slippery layers, and matched design lines.
At the end of a conventional seam, secure the stitching as directed by the pattern. This may involve backstitching, locking stitches, tying thread tails, or crossing the seam with another construction line.
Diagnose Problems One Change at a Time
When a seam looks wrong, resist the urge to adjust several machine settings simultaneously. Begin by identifying the visible symptom and checking the simplest likely cause. Crooked stitching often relates to guidance, speed, or poor support. Skipped stitches frequently point to a damaged or unsuitable needle. Puckering may involve tension, stitch density, thread, pressing, or differences in feeding between the layers.
Use the table below as a starting point:
| Seam problem | First area to check | Practical first action |
|---|---|---|
| Crooked stitching | Guide and sewing speed | Re-mark the allowance and slow down |
| Seam puckering | Threading, tension, stitch density, or feeding | Rethread and test on scrap |
| Skipped stitches | Needle condition and type | Install a fresh, suitable needle |
| Wavy seam | Pulling, stretch, or poor support | Let the machine feed the fabric |
| Uneven layer ends | Shifting during sewing | Match key points and baste |
| Thread loops underneath | Upper threading | Rethread with the presser foot raised |
Test after each correction. A controlled process prevents unnecessary changes and makes the true cause easier to identify.
Tip 5—Press and Finish Every Seam Properly
Pressing and finishing are essential construction steps rather than optional cosmetic improvements. Stitching joins the fabric, but pressing helps the seam settle into its intended shape. It can flatten allowances, control bulk, sharpen edges, mold curves, and improve the accuracy of later steps. A project that is pressed progressively usually looks cleaner and is easier to assemble than one pressed only after construction is complete.
Pressing differs from ironing. Ironing usually involves moving the iron repeatedly across a surface to remove wrinkles. Pressing involves placing the iron on a specific area, applying suitable heat, steam, and pressure, then lifting it before moving to the next section. This controlled action reduces the risk of stretching or distorting partially constructed pieces.
The correct technique depends on the material. Cotton and linen may tolerate more heat and steam than synthetic or delicate fabrics. Wool can often be shaped effectively with steam, while velvet, coated fabric, sequins, metallic surfaces, and heat-sensitive materials require specialized care. Always test the iron settings on scrap fabric before pressing a visible area.
Seam finishing addresses the exposed raw edges inside the project. The most appropriate option depends on the degree of fraying, fabric weight, desired durability, laundering method, available equipment, and whether the seam will be visible. A lightweight blouse may benefit from a French seam, while workwear may use a flat-felled seam and a general woven garment may use an overcast or serged finish.
Trimming, grading, clipping, and notching should be completed only after the seam has been checked. These techniques reduce bulk and allow curves to turn smoothly, but they also remove fabric permanently. Accurate inspection before trimming protects the project from difficult or impossible corrections.
Press in Stages
A reliable pressing sequence begins by pressing the seam exactly as it was sewn. This helps settle the thread into the fabric and can smooth small irregularities. Next, open the seam allowances or press them to the side specified by the pattern. Use the tip or edge of the iron carefully so the surrounding fabric is not unintentionally creased.
After the allowances are positioned, press the seam from the right side. A pressing cloth can protect delicate surfaces, reduce shine, and prevent residue from reaching the iron. Curved areas should be pressed over a tailor’s ham, sleeve roll, or another shaped tool so the three-dimensional form is preserved rather than flattened.
Exploring detailed garment pressing techniques can help you refine your pressing method and achieve cleaner, more professional-looking seams on a wide range of sewing projects.
Use the lowest effective temperature and increase cautiously when necessary. Excessive heat can scorch natural fibers, melt synthetics, flatten texture, or leave permanent shine. Allow the pressed area to cool before moving it because cooling helps the shape set.
Press each major seam before crossing it with another seam. This improves accuracy and prevents inaccessible bulk later in construction.
| Fabric Type | Recommended Needle | Suggested Stitch Length | Pressing Recommendation |
|---|---|---|---|
| Cotton | Universal 80/12 | Medium | Steam press after every seam |
| Linen | Universal 90/14 | Medium | Press while slightly damp |
| Denim | Denim 100/16 | Longer stitch | Use high heat with steam |
| Silk | Microtex 70/10 | Shorter stitch | Low heat with pressing cloth |
| Knit Fabric | Ballpoint 75/11 | Slightly longer stitch | Avoid stretching while pressing |
| Lightweight Polyester | Universal 70/10 | Medium | Low to medium heat setting |
Choose the Right Seam Finish
The best seam finish protects the fabric while supporting the appearance and purpose of the project. A zigzag or overcast stitch is accessible to most sewists and works well for many general woven materials. A serger creates a compact finish quickly and is useful for frequently washed garments, although the exact stitch should still be tested for the fabric.
French seams enclose the raw edges and are especially attractive in lightweight or sheer garments. Flat-felled seams are strong, flat, and commonly associated with shirts, denim, and workwear. Bound seams cover the raw edge with binding and can create a polished interior in unlined garments, jackets, bags, or decorative projects.
| Seam finish | Best suited to | Main advantage |
|---|---|---|
| Zigzag or overcast | General woven fabrics | Accessible and practical |
| Serged edge | Frequently washed garments | Fast and durable |
| French seam | Lightweight or sheer fabric | Fully encloses raw edges |
| Flat-felled seam | Shirts, denim, and workwear | Strong and low-profile |
| Bound seam | Visible garment or bag interiors | Decorative, polished coverage |
Choose the finish before trimming, because different methods require different allowance widths.
Trim, Grade, and Clip After Checking
Trimming reduces the overall width of a seam allowance, while grading cuts layered allowances to different widths so they do not create one thick ridge. Clipping involves small cuts into an inward curve, allowing the allowance to spread when turned. Notching removes small wedges from an outward curve so excess fabric does not overlap and create bulk.
These techniques should be used only after confirming that the pieces were joined correctly, the seam is free from accidental tucks, and the stitching follows the intended line. Once an allowance has been trimmed closely, there may not be enough fabric left to resew or adjust the seam.
Use sharp scissors and stop safely before the stitching line. On very tight curves, several small clips are usually more controlled than one deep cut. Grade the allowance that will sit closest to the outside of the project more narrowly when appropriate, following the construction method.
After trimming or clipping, turn and press the area over a shaped tool. Inspect the right side for ridges, pulling, or unevenness before continuing.
Quick Answer About Top 5 Tips for Sewing Perfect Seams
The Top 5 Tips for Sewing Perfect Seams are to prepare the fabric accurately, maintain the seam allowance stated in the pattern, choose a needle and thread that suit the material, guide the fabric without pushing or pulling it, and press each seam during construction. These steps may sound simple, but each one directly affects whether adjoining pieces align correctly and whether the finished seam lies flat, remains strong, and looks professional from both sides of the project.
Begin by pre-treating the material when appropriate, pressing out wrinkles, and cutting each pattern piece accurately on the intended grainline. Transfer notches, dots, and other construction marks before removing the pattern. At the sewing machine, use the markings on the needle plate, a removable tape guide, or a compatible seam-guide foot to maintain an even distance between the stitching line and the raw edge.
Machine settings should never be treated as universal. Test the needle, thread, stitch length, and tension on a representative scrap containing the same number of layers as the final seam. Guide the fabric with relaxed hands while allowing the feed dogs to move it forward. Once the seam is complete, press it in stages and apply a finish that suits the fabric, the washing requirements, and the intended use of the item.
These practices are effective because they address the entire seam-making process rather than focusing only on the moment of stitching. A straight line alone does not create a perfect seam if the fabric was cut off-grain, the allowance is incorrect, or the layers have stretched. Consistency comes from treating preparation, stitching, inspection, pressing, and finishing as connected parts of one construction method.
The Five Principles at a Glance
The first principle is accurate preparation. Fabric should be handled, pressed, marked, and cut in a way that supports the intended shape of the project. When two pieces are not cut accurately, the sewist may be tempted to stretch or force them into alignment, which can distort the seam and affect the finished fit.
The second principle is seam-allowance consistency. Patterns are drafted around a specific distance between the stitching line and cut edge. Changing that distance, even unintentionally, changes the dimensions of the finished item. A visible guide and steady sewing speed make accuracy easier to maintain.
Third, the needle, thread, stitch length, and tension should match the fabric. Fourth, the fabric should be supported and guided without being pulled against the machine’s feeding system. Finally, every seam should be pressed and finished appropriately. Pressing shapes the construction, while a suitable seam finish helps control fraying and improves durability. Together, these five principles create a repeatable process for straighter, flatter, and more reliable seams.
The Best Beginner Practice
A useful beginner exercise is to sew several straight seams on stable, medium-weight woven cotton. Unlike slippery, stretchy, sheer, or heavily textured materials, stable cotton allows the sewist to observe the relationship between the fabric edge, the seam guide, the presser foot, and the stitching line. It also responds clearly to pressing, making improvements easy to see.
Cut pairs of equal rectangles and draw a guideline or choose a specific marking on the needle plate. Place two rectangles right sides together, align the edges, and sew at a moderate speed. Do not watch the needle continuously. Instead, keep your attention on the fabric edge as it approaches the selected guide. After sewing, measure the seam allowance at the beginning, middle, and end.
Press the seam and compare the result with earlier samples. Repeat the exercise using a gentle curve, a corner, and a section where two seams intersect. This deliberate practice develops control more effectively than rushing through a complicated project. Advanced sewists can use the same exercise when testing unfamiliar fabric, specialty thread, a new presser foot, or a recently serviced machine.
Frequently Asked Questions About Sewing Perfect Seams
Understanding the basic process is important, but many seam problems arise in specific situations. Beginners often want to know which allowance to follow, how to keep the line straight, whether every seam needs backstitching, and why fabric puckers even when the stitching appears accurate. Experienced sewists may face similar questions when working with a new material, unfamiliar machine, specialty thread, or unusual construction method.
The following answers address common People Also Ask-style questions related to the Top 5 Tips for Sewing Perfect Seams. Each response provides a practical starting point while recognizing that sewing patterns, fabrics, and machine models can require different treatment. When a pattern instruction conflicts with general advice, follow the pattern unless you have a clear technical reason to alter the construction.
Most seam problems can be solved by returning to a short sequence of checks. Confirm that the fabric was cut and aligned correctly. Verify the required seam allowance. Install a fresh needle suited to the fabric and thread. Rethread the machine according to the manual, then test the stitch on a representative scrap. Support the project and sew at a manageable speed. Finally, inspect and press the test before making further adjustments.
This method is more effective than immediately changing the tension or purchasing another accessory. Sewing machines rely on several components working together, so the first visible symptom may not reveal the actual cause. A puckered seam, for example, may result from excessive tension, dense stitching, an unsuitable needle, poor feeding, or fabric that was stretched during handling.
Use these FAQs as a troubleshooting reference, but maintain notes about your own machine and materials. Personal records of successful needles, stitch lengths, threads, and pressing methods become increasingly useful as your experience grows.
How Do I Sew a Perfectly Straight Seam?
Begin by selecting a seam guide that is easy to see. This may be a marking on the needle plate, a strip of removable painter’s tape, an adjustable guide, or a compatible seam-guide presser foot. Confirm the distance from the needle by sewing and measuring a test seam before starting the project.
As you sew, look at the fabric edge where it approaches the guide rather than staring at the needle. This forward-looking position allows you to notice drift early and correct it with small, gradual movements. Keep both hands relaxed, support the weight of the fabric, and allow the feed dogs to move the material.
Use a moderate speed until your control becomes consistent. Stop and reposition your hands instead of reaching or pulling while the machine is running. For very long seams, extend the visual guide farther across the machine bed.
Practice on stable cotton and measure the allowance at several points. Straightness improves through repeatable alignment and controlled movement rather than through speed.
What Seam Allowance Should I Use?
Use the seam allowance stated in the pattern instructions. There is no universal measurement for every project. Many commercial garment patterns use 1.5 centimeters or 5/8 inch, but independent patterns, quilts, bags, lingerie, toys, home décor projects, and specialty construction methods may use narrower or wider allowances.
Check whether the allowance is included in the printed pattern pieces. Some systems show the cutting line with the allowance already added, while others provide the stitching line and require the sewist to add the allowance before cutting. Also check for exceptions. Necklines, zippers, enclosed seams, hems, and decorative details may use different measurements within the same project.
When altering a pattern, work from the seam line whenever possible. This preserves the intended fit and matching points more accurately than measuring only from the cut edge.
Mark unusual allowances clearly and test your machine guide before sewing. Following the drafted measurement helps ensure that adjoining pieces, notches, corners, and finished dimensions align correctly.
Why Are My Seams Puckering?
Seam puckering can result from several causes, so begin with observation rather than automatically changing the tension. Check whether the puckering appears during stitching, after pressing, or only after the fabric is allowed to relax. Look at both sides of the seam for loops, tight thread, skipped stitches, or uneven feeding.
Rethread the upper thread and bobbin according to the machine manual. Install a fresh needle suited to the fabric and thread, then test a slightly longer stitch if the seam appears overly dense. Reduce tension only in small increments and compare each sample with the previous one.
Support the material and avoid stretching it as it approaches or leaves the presser foot. Lightweight or slippery layers may feed at different rates and benefit from basting, stabilizer, adjusted presser-foot pressure, or an appropriate feeding accessory.
Thread and fabric compatibility also matter. A heavy or rigid thread can distort delicate material. Test every change on layered scraps before returning to the project.
Should I Press Seams Open or to One Side?
Follow the pattern because the pressing direction often supports the construction method. Pressing a seam open distributes the allowances to both sides and can reduce bulk along garment side seams, center seams, and tailored areas. Pressing both allowances to one side may be required for quilting, enclosed construction, topstitching, structural support, or a specific seam finish.
Before choosing independently, consider what will cross the seam later. Alternating the direction of adjoining allowances can reduce bulk at intersections. In other situations, pressing toward a darker fabric prevents the allowance from showing through a lighter section. Curved seams may need to be clipped or notched before they can lie smoothly in either direction.
Regardless of direction, begin by pressing the seam as sewn. Then position the allowances and press from the wrong side before checking the right side.
Use a temperature appropriate for the material and a shaped pressing tool when working on curves, darts, sleeves, or molded garment sections.
What Stitch Length Is Best for a Normal Seam?
A medium straight-stitch setting is a practical starting point for many stable woven fabrics, but the ideal stitch length depends on the material, thread, seam purpose, and machine. Lighter fabrics often benefit from a somewhat shorter stitch, while heavier fabrics may require a longer stitch that prevents excessive perforation and allows the layers to feed more smoothly.
Avoid assuming that shorter stitches always create a stronger seam. Extremely dense stitching can damage delicate fabric, cause puckering, trap the material in the needle plate, and make corrections difficult. Very long stitches may lack control or become visible when the seam is stressed.
Create a test seam using the same number of layers as the project. Check the appearance from both sides, press the sample, and pull gently across the seam. The stitch should appear balanced and secure without drawing the fabric into ridges.
For stretch materials, use a stitch recommended for flexible fabric rather than relying on an ordinary straight stitch that may break when stretched.
Do I Need a Special Presser Foot?
A special presser foot is not essential for sewing many accurate seams. The standard presser foot supplied with the machine, combined with clear needle-plate markings or removable tape, is sufficient for a wide range of woven-fabric projects. Good preparation, an appropriate needle, correct threading, controlled guidance, and steady speed remain more important than any accessory.
However, specialty feet can make certain tasks easier. A seam-guide or edge-stitching foot may provide a physical reference for maintaining a consistent distance. A walking foot or dual-feed system can help move multiple layers more evenly in quilting, bag making, coated fabrics, or other materials that tend to shift. A narrow foot may improve visibility around tight curves.
Before purchasing a foot, confirm that it is compatible with the machine’s shank type, model, stitch width, and needle positions. Review the manufacturer’s instructions and test the accessory on scrap fabric.
Treat specialty feet as tools that support an established technique rather than substitutes for basic seam control.
How Can I Stop Layers From Shifting?
Start by matching the most important reference points, including seam ends, notches, corners, pattern marks, and design lines. Secure these areas first, then distribute pins or clips between them. When the fabric is slippery, loosely woven, curved, or likely to stretch, hand-basting can hold the layers more evenly than widely spaced pins.
Support the project so its weight does not pull one layer faster than the other. Keep the fabric flat in front of the presser foot and avoid stretching it from behind. Sew at a moderate speed and stop periodically to check whether the remaining edges still align.
Differences in feeding can also be influenced by presser-foot pressure, fabric texture, stitch length, or the number of layers. A compatible walking foot, dual-feed system, roller foot, or stabilizer may help in specific situations, but always test first.
Do not trim mismatched ends until you know why they differ. The problem may be incorrect alignment, accidental stretching, or a construction step that intentionally requires easing.
Conclusion
Sewing perfect seams is not a single isolated skill. It is the result of a connected workflow that begins with fabric preparation and continues through cutting, marking, alignment, machine setup, controlled stitching, inspection, pressing, and finishing. When each stage is completed carefully, the next stage becomes easier. When an early step is rushed, the resulting error often appears later as mismatched edges, distorted curves, uneven fit, puckering, or unnecessary bulk.
The five principles in this guide can be applied to almost any conventional sewing project. Prepare and cut accurately so the pattern pieces retain their intended shape. Follow the stated seam allowance instead of relying on assumptions. Match the needle, thread, and stitch settings to the fabric. Guide and support the project while allowing the machine to feed it. Finally, press and finish every seam in a way that suits the material and construction method.
Beginners should focus on consistency before complexity. A simple project with accurately sewn and pressed seams provides better training than an advanced project completed without control. Experienced sewists can use the same framework to evaluate unfamiliar materials, specialty equipment, new patterns, or persistent machine problems.
The best results come from testing and observation. A representative scrap can reveal whether the needle damages the fabric, the thread creates puckering, the stitch length is appropriate, or the seam finish adds too much bulk. Notes from these tests become a useful personal reference.
By applying the Top 5 Tips for Sewing Perfect Seams methodically, sewists can improve both the appearance and reliability of their work. Accuracy becomes easier with practice, and professional-looking seams become a repeatable outcome rather than a matter of luck.
Build Consistency Before Speed
Speed should develop as a result of confidence and repetition, not as the first objective. A sewist who works at a controlled pace can observe the fabric edge, maintain the seam allowance, remove pins safely, slow down before curves, and respond to changes in thickness. These habits produce more reliable results than completing a seam quickly and correcting it afterward.
Practice individual skills on scrap fabric. Sew long straight lines, gradual curves, tight curves, corners, and intersecting seams. Measure the allowance at several points and press every sample. Try the same exercise using different materials to understand how fabric weight, texture, and stability affect feeding.
Keep brief records of the needle type, needle size, thread, stitch length, tension setting, presser foot, and pressing method used for successful tests. These notes reduce setup time on future projects and help identify what changed when a problem appears.
Advanced sewists also benefit from slowing down during demanding sections. Precision around collars, welt pockets, zippers, cuffs, and matched pattern lines often depends on deliberate control rather than continuous high-speed stitching.
Apply the Five Tips to Your Next Project
Before beginning the next project, review the pattern and identify the areas where seam accuracy will matter most. Check the stated allowances, note any sections that require easing or gathering, and determine which seam finishes must be planned before cutting. Prepare the fabric and transfer every construction mark that will be needed during assembly.
At the machine, test the full setup on a representative scrap. Confirm the needle, thread, stitch length, tension, presser foot, and pressing temperature. Create a visible seam guide and arrange the workspace so the fabric can be supported without pulling.
During construction, pause after each major seam. Check the alignment, inspect both sides of the stitching, and correct mistakes before trimming or crossing the seam with another piece. Press in stages and finish the raw edges using a method appropriate for the fabric and intended use.
The Top 5 Tips for Sewing Perfect Seams become most valuable when they are treated as a repeatable checklist. With practice, each step becomes faster, more intuitive, and easier to adapt.
Comments are closed, but trackbacks and pingbacks are open.