
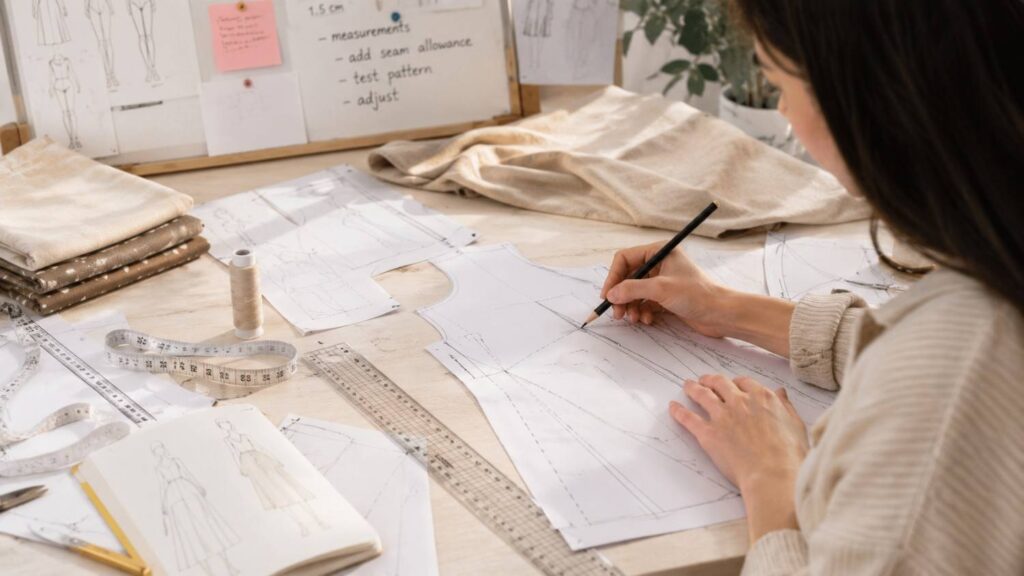
How to Create Patterns for Your Own Clothes: A Beginner’s Guide
Learning how to create patterns for your own clothes gives you greater control over fit, comfort, style, and garment construction. Instead of adjusting your body to suit commercial sizing, you can develop clothing around your actual measurements, posture, proportions, and design preferences. This skill is especially valuable for people who struggle with standard sizes, want to reproduce a favorite garment, or hope to design original clothing.
Pattern making may appear technical at first because it combines measurement, geometry, fabric knowledge, fitting, and sewing construction. However, the process becomes much easier when it is divided into clear stages. You begin by understanding the garment, selecting an appropriate drafting method, measuring accurately, and creating the main paper shapes. You then test those shapes in inexpensive fabric and refine them until the garment fits and hangs correctly.
A homemade pattern should never be viewed as a simple outline of the body. It must account for movement, fabric behavior, seam construction, closures, shaping, and the intended silhouette. A fitted woven blouse, for example, requires very different ease and shaping from an oversized knit top.
In my experience, beginners make faster progress when they start with simple garments and record every change. A basic skirt, sleeveless bodice, loose shirt, or simple pair of trousers teaches the fundamental principles without introducing too many complex details. Once those foundations are understood, the same techniques can be applied to jackets, dresses, tailored garments, and more advanced designs.
Understand the Foundations of Clothing Pattern Making
Before drafting lines on paper, it is essential to understand what a clothing pattern actually does. A sewing pattern translates a three-dimensional garment into a group of flat shapes that can be cut from fabric and assembled. Each pattern piece represents part of the finished garment, such as the front bodice, back bodice, sleeve, collar, waistband, pocket, or facing. When those pieces are drafted accurately, their seam lines connect correctly and create the planned shape around the body.
Pattern making involves more than copying body measurements. Human bodies contain curves, angles, and volume, while fabric begins as a flat surface. Darts, curved seams, gathers, pleats, panels, and stretch are therefore used to shape fabric around areas such as the bust, waist, hips, shoulders, and seat. The pattern must also include enough room for breathing and movement.
Another important foundation is balance. A balanced garment hangs correctly without pulling forward, riding up, twisting, or shifting around the body. Center-front and center-back lines should usually remain vertical, while waist, hip, and hem lines should sit level unless the design intentionally changes them.
Beginners should also understand the difference between a sewing line and a cutting line. The sewing line shows where two pieces are joined, while the cutting line sits outside it and includes seam allowance. Keeping these concepts separate makes fitting, seam comparison, and pattern alteration more accurate.
Once these foundations are clear, tools such as blocks, slopers, grainlines, darts, and notches become easier to understand and use correctly.
What Is a Pattern Block or Sloper?
A pattern block or sloper is a basic, close-fitting template developed from body measurements or fitted from an existing pattern. It contains the essential shape of the body but usually excludes decorative elements such as collars, pockets, gathers, flounces, or unusual style lines. Common foundation pieces include a bodice block, skirt block, sleeve block, trouser block, and dress block.
The terms “block” and “sloper” are often used interchangeably, although some pattern makers make a slight distinction. A sloper may refer to the most basic body-fitting foundation with minimal ease, while a block may include a small amount of ease and be prepared for repeated design development. In practical home sewing, both terms usually describe a reusable base pattern.
Once a block fits correctly, it becomes a valuable design tool. You can trace it and change the neckline, move darts, add a collar, create princess seams, extend it into a dress, add fullness, or divide it into panels. The original block should remain unchanged so it can be reused for future projects.
A well-fitted block saves time because you no longer need to begin every garment from raw measurements. However, it should be checked periodically because body measurements, posture, preferred ease, and fabric choices may change. Always label the block with the wearer’s name, date, size information, and whether seam allowance is included.
| Pattern Piece | Purpose | Commonly Used In |
|---|---|---|
| Bodice Block | Forms the foundation for tops and dresses | Shirts, blouses, dresses |
| Skirt Block | Creates fitted or flared skirt designs | Skirts and dresses |
| Sleeve Block | Develops different sleeve styles | Shirts, jackets, dresses |
| Trouser Block | Provides the base for pants and shorts | Trousers, shorts, jumpsuits |
| Collar Pattern | Shapes different collar styles | Shirts, coats, jackets |
| Facing Pattern | Finishes necklines and armholes neatly | Dresses, tops, jackets |
Understand Ease Before You Draft
Ease is the difference between body measurements and the measurements of the finished garment. Without ease, most non-stretch garments would feel restrictive and could be difficult to put on, sit in, or move comfortably. Understanding ease is therefore one of the most important parts of successful garment pattern making.
There are two primary types. Wearing ease provides the minimum additional room required for breathing and normal movement. Design ease is extra fullness added to create a particular silhouette, such as an oversized blouse, relaxed jacket, flowing dress, or wide-leg trouser. A garment may contain both types at the same time.
The required amount varies according to garment type, fabric, construction, and personal preference. A structured woven shirt needs positive ease because the fabric does not stretch. A fitted knit top may use very little ease or even negative ease, meaning the garment is smaller than the body and relies on fabric stretch.
Before drafting, decide how close the garment should fit and where movement is needed. Consider whether the wearer must raise their arms, sit for long periods, bend, or layer another garment underneath. Do not add ease randomly to every seam. Distribute it carefully so the front, back, shoulders, waist, hips, sleeves, and armholes remain balanced. A muslin test will then show whether the planned ease feels and looks appropriate.
Learn the Essential Pattern Markings
Pattern markings communicate how each piece should be cut, positioned, matched, and sewn. Even a well-drafted shape can become difficult to assemble when important markings are missing or unclear. For that reason, every finished pattern should include consistent technical information.
Begin by writing the garment name, pattern-piece name, size or wearer’s name, and version date. State how many pieces must be cut and whether they should be cut from the main fabric, lining, interfacing, or another material. If a piece is symmetrical and placed against folded fabric, clearly write “cut on fold.”
A grainline arrow indicates how the pattern should be aligned with the fabric grain. Darts require marked legs, a central fold line where useful, and an apex or endpoint. Notches identify matching positions between adjoining pieces, such as the front and back of a sleeve or the corresponding sections of a princess seam.
You should also mark center-front and center-back lines, buttonholes, button positions, pocket placement, pleat lines, gathering points, zipper stops, lengthen-or-shorten lines, and balance points where relevant. Indicate whether seam allowance is included and record its width.
Use different line styles for cutting lines, stitching lines, fold lines, and internal construction marks. Clear markings reduce mistakes during cutting and sewing, especially when a pattern contains similar-looking pieces or complex curved seams.
Gather Your Pattern-Making Tools and Measurements
Accurate pattern drafting depends more on careful technique than on owning expensive equipment. A beginner can create useful clothing patterns with a modest collection of tools, provided those tools support precise measuring, straight lines, smooth curves, and clear marking. As your skills develop, specialist rulers and drafting equipment can make the process faster, but they are not required for the first project.
You will need a large, flat working surface where paper can lie without bending or shifting. Pattern paper is ideal, although kraft paper, medical examination paper, tracing paper, or inexpensive wrapping paper can work for practice. Transparent or semi-transparent paper is particularly useful when tracing a block or comparing pattern versions.
Your measuring tools should be reliable and easy to read. A flexible measuring tape is required for the body, while rigid rulers are better for paper drafting. Keep pencils sharp so lines remain precise. Use an eraser rather than drawing over mistakes because crowded lines can cause cutting errors.
Measurements must be taken consistently. The natural waist, bust level, hip level, shoulder point, and other landmarks should be identified correctly before recording numbers. A narrow elastic tied around the natural waist can help maintain a reliable reference line.
It is also useful to create a measurement chart rather than writing numbers randomly on scrap paper. Record the date, clothing layer, preferred units, and any posture observations. These notes become valuable when comparing later fittings or updating a pattern.
Good preparation reduces drafting errors. Checking tools and measurements before drawing is much easier than correcting an entire garment after the fabric has been cut.
Essential Pattern-Drafting Tools
A basic pattern-making kit should include pattern paper, pencils, an eraser, a flexible measuring tape, a long straight ruler, paper scissors, transparent tape, and a fine-tip marker for final lines. A clear quilting ruler is helpful because it allows you to see underlying lines and create accurate parallel seam allowances.
Curved rulers improve professional accuracy. A French curve is commonly used for necklines, armholes, and smaller shaping areas, while a hip curve supports longer curves around skirts, trousers, and side seams. However, these tools should guide the shape rather than replace careful visual checking. A curve must still flow naturally into the adjoining line.
A tracing wheel and carbon paper can transfer lines between paper layers or from a garment to paper. Pattern weights keep pieces stable during tracing and cutting. An awl can mark dart points, pocket positions, or internal reference points. A set square or L-square is useful for creating accurate right angles and squared construction lines.
Keep paper scissors separate from fabric shears because paper gradually dulls cutting blades. A hole punch, pattern hooks, or large envelopes can help organize completed pieces.
Digital pattern-making software is available, but beginners usually benefit from learning manual drafting first. Working by hand develops an understanding of grain, seam relationships, curves, dart control, and balance. Software can increase speed later, but it does not replace the need to understand why a pattern works.
Take Accurate Body Measurements
Accurate measurements form the foundation of a custom pattern. Wear close-fitting clothing or the undergarments that will be worn beneath the finished garment. Bulky clothing adds unnecessary volume and may produce an oversized pattern. Stand naturally with relaxed shoulders, normal breathing, and weight distributed evenly rather than deliberately improving posture for the measurement session.
The measuring tape should lie flat against the body without twisting. It should feel secure but should not compress the skin. Keep horizontal measurements, such as bust, waist, and hip, level with the floor. A mirror or second person can help confirm alignment.
For an upper-body garment, record the full bust, high bust, natural waist, neck, shoulder length, back-waist length, front-waist length, bust-point distance, shoulder-to-bust measurement, upper-arm circumference, and arm length. For skirts and trousers, record the waist, full hip, waist-to-hip depth, crotch depth, rise, inseam, outseam, thigh, knee, and desired finished length.
Measure each important area at least twice. When repeated results differ, take the measurement again rather than averaging carelessly. Note visible posture characteristics, such as a forward shoulder, prominent shoulder blades, tilted waistline, or fuller abdomen, because these may affect pattern balance.
Create a dated measurement sheet and use the same units throughout. Mixing centimetres and inches can cause major drafting errors. Recheck measurements before beginning a new fitted garment, particularly when significant time has passed.
Choose the Best Pattern-Making Method
Several methods can be used to create patterns for your own clothes, and each has different strengths. The best option depends on the design, your experience, the equipment available, and how accurately the garment must fit. Understanding these methods allows you to choose an efficient approach instead of forcing every design through the same process.
Drafting from measurements is highly systematic. It works well for fitted garments, repeatable blocks, and people whose proportions differ from standard commercial patterns. However, it requires calculations, careful shaping, and more testing. It is usually the most valuable long-term method because a corrected block can support many future designs.
Copying an existing garment is faster and more approachable. It is useful when you own a garment with a shape you already like. This method is especially effective for simple tops, skirts, and knit garments, although hidden seams and complex construction can make accurate copying difficult.
Draping is a more visual process. Fabric is shaped directly on a form, making it suitable for sculptural, asymmetric, bias-cut, gathered, or softly draped designs. It allows immediate experimentation with proportion and volume but generally requires a dress form close to the wearer’s measurements.
Many experienced designers combine methods. They may begin with a flat block, drape a complex neckline, and then copy construction details from a finished garment. Beginners should not feel required to choose one method permanently. Instead, use the method that best solves the current design problem while maintaining accurate grainlines, balance, and seam relationships.
| Pattern-Making Method | Best For | Main Advantage | Limitation |
|---|---|---|---|
| Flat Pattern Drafting | Custom-fit garments | Precise measurements and consistent results | Requires drafting knowledge |
| Copying an Existing Garment | Beginners recreating favorite clothes | Fast and simple starting point | Hidden construction details may be missed |
| Draping | Creative and designer garments | Ideal for unique shapes and flowing fabrics | Requires a dress form and more practice |
| Pattern Block (Sloper) Method | Reusable clothing designs | Easy to create multiple garment variations | Initial fitting process takes time |
Draft a Pattern From Body Measurements
Drafting from body measurements begins with a set of horizontal and vertical construction lines. These lines establish important levels such as the shoulder, bust, waist, hip, crotch, knee, and hem. Width calculations are then applied to represent sections of the body, often using one-half or one-quarter of a circumference measurement.
For example, a bodice block may begin with the back-waist length and a quarter of the bust measurement. Additional measurements determine the neckline, shoulder slope, armhole depth, bust position, waist shaping, and dart placement. A skirt block uses the waist, hip, waist-to-hip depth, and desired length, with darts controlling the difference between the waist and hip.
The calculations provide a starting structure, but they do not guarantee a perfect fit. Bodies with the same circumference measurements can have different posture, bust distribution, shoulder angles, or front-to-back proportions. A test garment remains essential.
Draft using the stitching line first. Keep construction lines light and final outlines darker. Add a clear grainline and label each piece before moving to the next one. After the initial block is tested, correct the paper and preserve it as a master.
This method requires patience, but it offers excellent control. Once a personal block is accurate, you can develop many custom clothing patterns without repeating the full measurement process each time.
Copy a Well-Fitting Garment
Copying a garment allows you to recreate a familiar fit without taking the original item apart. Choose a garment that is not stretched, damaged, or permanently distorted through wear. Simple designs with visible seams are easier to copy than lined jackets, tailored trousers, or garments with hidden internal structure.
Place the garment on a padded or flat surface and smooth it gently without stretching. Identify each separate construction section. The front and back may look similar, but their shoulder slopes, armholes, necklines, and side seams are often different. Trace them as separate pieces.
A tracing wheel can transfer seam lines through the garment onto paper. Pins may also be placed carefully along seams to mark their positions. For curved or three-dimensional areas, copy one section at a time and rotate the garment while keeping the relevant seam flat.
After tracing, redraw the lines with rulers, add grainlines, and compare adjoining seams. A sleeve cap should correspond with the armhole, while shoulder and side seams should match at the stitching lines. Add seam allowance only after the underlying shape has been checked.
Remember that copying the outer edge does not always reproduce the original sewing line. Hems, facings, seam allowances, and folded sections may be hidden. Study the garment’s construction carefully and make a muslin before cutting valuable fabric.
Create a Pattern Through Draping
Draping is the process of shaping fabric directly on a dress form or body to create a garment design. The fabric is pinned, folded, pleated, gathered, or cut until the desired shape is achieved. Important seam lines, grainlines, darts, balance points, and design details are then marked before the fabric is removed and transferred to paper.
This method is particularly useful for cowls, asymmetric garments, bias-cut dresses, sculptural shapes, complex pleats, and designs with fluid volume. It allows you to see immediately how fabric responds to gravity and body contours. Flat drafting may require several calculations to imagine the same effect.
Begin with fabric larger than the intended pattern area and mark its grainline. Align the grain carefully on the form before shaping. Avoid stretching the material unintentionally, especially around curved or bias sections. Use enough pins to secure the shape but do not create unnecessary tension.
After marking the draped piece, remove it carefully and lay it flat. Smooth the lines, correct asymmetry where appropriate, add seam allowances, and create corresponding pieces. A paper pattern is still needed for accurate cutting and reproduction.
The dress form should closely match the wearer. If it does not, pad the form or expect additional fitting work. Use draping fabric with weight and drape similar to the final material because a stiff cotton cannot fully predict the behavior of fluid silk or stretch jersey.
How to Create Patterns for Your Own Clothes Step by Step
Creating a reliable clothing pattern is easier when the process follows a clear order. Many beginners create problems by focusing on decorative details before the main shape, fit, and construction have been established. A professional workflow begins with the design concept, moves through structural drafting, and ends with complete technical markings.
Start by deciding what the garment should do. Consider its fit, length, fabric, closure, movement requirements, and intended use. A work shirt, evening dress, activewear top, and winter coat all need different amounts of ease and structural support. These decisions influence the pattern before any lines are drawn.
Next, choose a suitable foundation. You may use personal measurements, an existing block, a commercial pattern, a copied garment, or a draped shape. Keep the initial pattern focused on the principal pieces. Do not spend time developing pockets, collars, or decorative panels until the body of the garment has been evaluated.
Draft on the stitching line and check every relationship between pieces. A pattern should be treated as a connected system rather than a collection of independent shapes. Altering one seam can affect another piece, a dart, a facing, a lining, or a sleeve.
Finally, add seam allowances, grainlines, notches, labels, and cutting instructions. Make a test garment, record all corrections, and prepare a clean final copy. Following this sequence helps prevent small drafting mistakes from becoming expensive sewing problems.
Step 1—Sketch and Analyze the Garment
Begin with a clear front-and-back sketch of the garment. The drawing does not need to be artistic, but it should show the neckline, shoulder shape, sleeve length, waist position, hemline, closures, pockets, seams, darts, pleats, gathers, and design panels. Technical clarity is more important than decorative illustration.
Analyze how the wearer will put the garment on and take it off. A fitted woven dress may require a zipper, while a loose shirt may use buttons. A stretch neckline may not need a closure, but its opening must still be large enough to pass over the head. Consider whether the opening affects a seam, facing, placket, or lining.
Identify which areas require shaping. A close-fitting bodice may need bust and waist darts, princess seams, or stretch. Trousers require crotch shaping and enough sitting room. Sleeves must allow arm movement without creating excessive fabric around the sleeve cap.
Choose the likely fabric before finalizing the sketch. A structured design may depend on firm woven fabric, while a flowing design needs drape. Fabric thickness also affects collars, facings, gathers, and seam bulk.
Write brief construction notes beside the sketch. List the probable pattern pieces and the order in which they will be assembled. This analysis exposes practical problems early and creates a useful guide for the drafting stage.
Step 2—Draft the Main Pattern Pieces
Draft the primary garment pieces before secondary details. For a simple top, these may include the front, back, and sleeve. A skirt may require front and back pieces plus a waistband. More complex garments may include side panels, yokes, collars, facings, linings, cuffs, pockets, or plackets.
Work from a block, measurements, copied garment, or draped piece. Use light construction lines to establish key levels and reference points. Keep the grainline visible throughout the process. Draw the stitching lines first so seam lengths and fitting changes can be evaluated accurately.
Create shaping through darts, curved seams, pleats, gathers, or stretch. Darts should point toward the fullest part of the body but normally stop before the apex to avoid a sharp point. When converting darts into princess seams or panels, maintain the original shaping volume.
Check symmetry where required. A center-front or center-back piece may be drafted as half and marked for cutting on the fold. Asymmetric designs should be drafted as full pattern pieces and clearly marked left or right.
Walk adjoining seams together at the stitching line. Compare shoulder seams, side seams, waist seams, armholes, sleeves, collars, facings, and panel curves. Small differences may be intentional for ease or gathering, but unexplained differences should be corrected.
Label every piece immediately. Include the garment name, piece name, cutting quantity, grainline, and temporary version number to prevent confusion during fitting.
Step 3—Add Allowances and Construction Marks
Once the stitching lines have been checked, add seam allowances around every edge that will be joined. A common home-sewing allowance is 15 millimetres or 5/8 inch, but there is no universal width. Narrow allowances may suit enclosed curves or lightweight fabrics, while wider allowances provide extra fitting room in side seams or tailored garments.
Add hem allowance separately because hems often require more depth than regular seams. Consider the garment shape when determining the amount. A straight skirt can support a deeper hem, while a strongly curved hem may need a narrower allowance, facing, or bias finish to avoid puckering.
Mark notches at useful matching points. These may identify the front and back sleeve, center of a sleeve cap, waistline intersections, pocket openings, gathering sections, or matching points on curved panels. Avoid excessive notches because too many can become confusing.
Add grainlines, center lines, fold instructions, dart markings, pleat directions, button positions, zipper stops, pocket placement, and any lengthen-or-shorten lines. State the number of pieces to cut from the main fabric, lining, and interfacing.
True the pattern after allowances are added. Fold darts, pleats, hems, and facings into their sewn positions to check that cutting edges form clean transitions. Square corners where seams meet and blend curves smoothly.
Finally, use a darker line for the finished cutting edge and remove unnecessary construction marks. The pattern should be clear enough that another experienced sewer could understand it without verbal explanation.
Test the Pattern and Correct the Fit
Testing is the stage that turns a theoretical pattern into a practical garment. Even a carefully calculated draft may behave differently on the body because measurements cannot fully represent posture, muscle distribution, shoulder angle, bust position, or movement. For this reason, professional pattern development normally includes at least one test garment.
A test version allows you to evaluate both fit and design. A pattern may fit the body but still have an unflattering neckline, pocket position, sleeve width, or garment length. It is less costly to make those decisions in inexpensive fabric than after cutting the final material.
The test garment should reproduce the important structure of the final design. Include the main seams, darts, closures, sleeves, collar, or waistband when they influence fit. Decorative finishing can usually be omitted. Mark horizontal and vertical reference lines because they reveal imbalance more clearly than the outer silhouette alone.
Fit should be evaluated dynamically. Do not only stand in front of a mirror. Sit, walk, bend, raise your arms, and perform movements expected during normal wear. A garment that looks smooth while standing may feel restrictive when sitting or reaching.
Record every adjustment. Photographs from the front, side, and back can help identify changes that are difficult to see while wearing the muslin. Transfer corrections systematically to the paper and retest when major areas have changed.
Accurate fitting takes time, but it is one of the main advantages of creating custom clothing patterns.
Sew a Muslin or Toile
A muslin or toile is a test version of the garment made before the final fabric is cut. The term “muslin” is commonly used in home sewing, while “toile” is frequently used in professional fashion and couture contexts. The purpose is the same: to evaluate the pattern, fit, proportion, balance, and construction.
Choose test fabric that behaves similarly to the final material. For a stable woven garment, plain cotton muslin, calico, or inexpensive sheeting may work. For a knit design, use a knit with comparable stretch and recovery. A stiff woven test fabric cannot accurately predict a draped crepe garment, and a highly elastic knit cannot test a stable jersey pattern.
Transfer important lines onto the fabric, including center front, center back, bust, waist, hip, grainline, darts, pocket placement, and design seams. These markings reveal whether the garment is twisting, tilting, or sitting out of balance.
Use a long machine stitch so seams can be adjusted easily. Leave wider allowances in fitting areas such as side seams, shoulders, and center back where appropriate. Do not finish raw edges unless fraying prevents accurate fitting.
Include closures temporarily with pins, basting, a test zipper, or hook-and-loop tape. Press the muslin lightly before fitting because unpressed seams can distort the silhouette and make problems appear worse than they are.
Diagnose Fit Problems Carefully
Fit problems should be interpreted through fabric behavior rather than corrected by randomly taking in or releasing seams. Wrinkles, drag lines, twisting, gaping, and uneven balance provide clues about where the pattern lacks or contains excess length or width.
Horizontal strain lines often point toward an area needing more width or length. Vertical folds may indicate excess width, although they can also result from incorrect balance. Diagonal drag lines generally point toward the source of tension, such as a full bust, prominent shoulder blade, high hip, or forward shoulder.
Check vertical reference lines first. Center front and center back should usually hang straight. Then examine horizontal lines at the bust, waist, hip, knee, and hem. If they tilt, the garment may need additional length on one side or a change in shaping.
Assess mobility as well as appearance. Raise the arms, sit, walk, bend, and rotate the torso. A close-fitting garment still needs enough room to perform its intended function.
Make one significant correction at a time. Pin out excess fabric evenly, release tight seams, or mark where additional length is required. Avoid overfitting by removing every small wrinkle. Fabric must move, and a perfectly smooth standing fit may become uncomfortable during activity.
Record each change with pins, marker, notes, and photographs so it can be transferred accurately to the pattern.
Transfer Corrections to the Paper Pattern
Every correction made to the muslin must be reflected in the paper pattern. Altering only the test garment leaves the original drafting problem unresolved and makes the final cutting stage unreliable. Work methodically and consider how each change affects related pieces.
Begin by marking the adjustment clearly on the muslin. If fabric has been pinned out, trace the new seam or dart line. If additional room is needed, cut or release the muslin and insert fabric to determine the required amount. Measure the change rather than estimating it.
Transfer the correction to the corresponding paper piece. A side-seam adjustment may need to be divided between the front and back, while a shoulder change may affect the neckline, armhole, sleeve, facing, and collar. Altering a waist seam may also require changes to the skirt, bodice, lining, or waistband.
Redraw altered lines with smooth transitions. Reposition notches, grainlines, dart points, button placements, and pocket markings when necessary. Walk every affected seam again to ensure adjoining pieces still match.
When a correction changes length or width significantly, make another muslin. A second test is not wasted effort; it confirms that the solution works and has not created a new issue elsewhere.
Once the pattern is accurate, trace a clean master copy. Label it with the date and version number, and store the earlier draft separately for reference.
Use Grainlines and Fabric Behavior Correctly
A well-fitted paper pattern can still produce a disappointing garment if the pieces are cut in the wrong direction or from unsuitable fabric. Grainline and fabric behavior influence how clothing hangs, stretches, twists, recovers, and responds to movement. These factors should be considered during drafting, not only during cutting.
Woven fabric is created from lengthwise and crosswise yarns. The lengthwise grain usually runs parallel to the selvedge and is commonly more stable. The crosswise grain runs perpendicular to the selvedge and may contain slightly more give. The bias lies diagonally across both grains and has greater flexibility and drape.
Knit fabrics behave differently because their structure is formed from loops rather than intersecting woven threads. Their stretch percentage, recovery, weight, and direction of greatest stretch must be considered. Two fabrics described as jersey may produce very different results in the same pattern.
The pattern’s grainline should support the intended hang and movement. A trouser leg cut off-grain may twist around the leg. A bodice with uneven grain placement may pull toward one side. A bias-cut skirt may drape beautifully but can grow in length during hanging and wear.
Before cutting, test the fabric. Stretch it in different directions, drape it over the body or a form, and observe whether it recovers. Consider shrinkage, thickness, transparency, fraying, and pressing behavior.
Matching the pattern to the fabric is a central part of professional garment development.
Mark and Position the Grainline
Every major pattern piece should include a grainline unless its position is already defined by a center line placed on the fold. A standard grainline is usually shown as a long arrow running in the intended lengthwise direction of the fabric. On most garments, this arrow is positioned parallel to the selvedge.
When laying out a pattern, measure from one end of the grainline arrow to the selvedge. Then measure from the other end. Adjust the pattern until both distances are equal. This confirms that the piece is genuinely parallel rather than aligned by eye.
Center-front and center-back lines are often placed on the straight grain. Sleeves generally follow a grainline running from the center of the sleeve cap toward the wrist. Trouser grainlines commonly pass through or near the center of the leg so the fabric hangs evenly.
Some designs use the cross grain or bias intentionally. Bias pieces are generally positioned at approximately 45 degrees to the straight grain, giving them greater drape and flexibility. However, bias fabric can stretch during cutting and sewing, so it should be handled carefully and allowed to settle before hemming.
Mark the grainline early in the drafting process. Do not add it as an afterthought, because the pattern shape may depend on its orientation. When a design contains stripes, checks, or directional prints, add matching and placement lines so the visual pattern remains balanced across seams.
Match the Pattern to the Intended Fabric
A clothing pattern and its fabric must function as a coordinated system. The same paper pattern can look structured, relaxed, fitted, or oversized depending on fabric weight, drape, stretch, thickness, and recovery. For this reason, fabric recommendations should be based on behavior rather than fibre name alone.
Stable woven fabrics, such as poplin, denim, or canvas, support crisp seams and structured silhouettes. They usually require enough positive ease because they do not stretch around the body. Fluid woven fabrics, including crepe or rayon blends, fall closer to the body and may reveal different fitting issues.
Knit fabrics require analysis of stretch percentage and recovery. A fabric may stretch easily but fail to return to its original shape, causing necklines, elbows, or knees to grow. Patterns designed for knit fabric often contain reduced or negative ease, so replacing the fabric with a stable woven will not work without redrafting.
Thickness affects seam allowance, collar structure, gathers, pleats, and hems. Bulky fabric may require reduced layers, wider curves, different closures, or larger turn-of-cloth allowances. Transparent fabric may need lining, French seams, or carefully planned facings.
Before finalizing a pattern, make a small test sample. Sew a seam, press it, stretch it, and observe the result. When switching to a substantially different fabric, prepare another muslin because previous fitting corrections may no longer behave in the same way.
Common Pattern-Drafting Problems and Solutions
Pattern-drafting errors are normal, particularly while learning. The goal is not to avoid every mistake on the first attempt but to identify problems early and correct them systematically. Most issues can be traced to inaccurate measurements, poor grain alignment, insufficient ease, unmatched seam lengths, unclear markings, or fabric that does not suit the pattern.
One common mistake is focusing only on circumference. Bust, waist, and hip measurements are important, but length and balance measurements are equally necessary. A garment can have enough width and still pull because the front bodice, back length, shoulder slope, or crotch depth is incorrect.
Another frequent problem is altering a single pattern piece without checking related pieces. Changing an armhole affects the sleeve. Altering the neckline may affect the facing or collar. Moving a waist seam can affect adjoining bodice, skirt, lining, and waistband pieces.
Beginners also tend to judge pattern accuracy at the cutting edge rather than the stitching line. Because seam allowances add different amounts around curves and corners, two cutting edges may appear different even when their sewing lines match. Seam comparison should therefore be completed at the intended stitch line.
Clear version control prevents confusion. Label every draft, muslin, and final pattern with a date or number. Do not combine pieces from different versions without checking them.
The following troubleshooting guidance addresses common symptoms and provides practical solutions that can be tested before cutting final fabric.
Pattern Troubleshooting Table
| Problem | Likely Cause | Recommended Solution |
|---|---|---|
| Garment feels tight throughout | Measurements were used without adequate wearing ease | Add width where movement is required and test again |
| Neckline or armhole forms a point | Curves were not trued across adjoining seams | Join pieces at the stitching line and redraw a smooth curve |
| Side seams do not match | Seams were compared at the cutting edge | Walk the stitching lines from notch to notch |
| Sleeve twists around the arm | Grainline, sleeve orientation, or notches are incorrect | Recheck the grainline and confirm front and back sleeve markings |
| Waistline or hem tilts | Front-to-back balance or length distribution is incorrect | Mark horizontal balance lines and correct the pattern length |
| Neckline or armhole gaps | Excess length, incorrect dart control, or stretched fabric | Pin out the excess and transfer it into a dart or seam adjustment |
| Trousers pull at the crotch | Crotch depth, extension, or body balance is incorrect | Evaluate front and back crotch separately and adjust gradually |
| Pattern pieces are hard to assemble | Notches or construction labels are missing | Add matching points and clear sewing instructions |
| Final garment differs from the muslin | Test fabric had different weight, stretch, or drape | Use a more comparable test fabric |
| Pattern changes after repeated use | The master copy has been cut or altered | Preserve a clean original and trace working versions |
Use the table as a diagnostic starting point rather than an automatic formula. Similar wrinkles can have different causes, so evaluate the entire garment and make one controlled change at a time.
Preserve a Reusable Master Pattern
A corrected pattern should be treated as a valuable working asset. Instead of cutting or altering the only copy, transfer the final shape to durable paper, pattern card, or another stable material. This clean version becomes the master pattern from which future variations are traced.
Include complete identification on every piece. Record the garment name, wearer’s name, pattern-piece name, number to cut, fabric type, grainline, version number, date, and whether seam allowance is included. Add brief fitting notes, such as “forward shoulder adjustment included” or “designed for medium-stretch jersey.”
Store pieces in a way that protects their shape. Large professional patterns are often hung from hooks after being punched near the edge. Home patterns can be rolled, stored flat in folders, or placed in large envelopes. Avoid folding through armholes, necklines, crotch curves, or other important shaping areas.
When creating a new design, trace the master rather than drawing directly on it. Label the tracing immediately and record the intended changes. This practice prevents accidental damage and allows you to return to a reliable foundation when an experiment is unsuccessful.
Keep muslin photographs and fitting notes with the pattern. Over time, this creates a personal pattern library that documents your proportions, preferred ease, successful fabrics, and construction methods. Such a library can significantly reduce the time needed to develop future custom garments.
Quick Answer About How to Create Patterns for Your Own Clothes
Learning how to create patterns for your own clothes begins with understanding that a sewing pattern is a technical plan for turning flat fabric into a three-dimensional garment. You can create that plan by drafting from body measurements, modifying a fitted pattern block, tracing a garment that already fits well, or draping fabric directly on a dress form. Each method can produce professional results when measurements, grainlines, ease, seam relationships, and construction markings are handled accurately.
For most beginners, the most reliable process is to start with a simple garment, such as a straight skirt, loose top, basic bodice, or elastic-waist trousers. Take precise body measurements, draw the main pattern shapes on paper, and add enough wearing ease for comfortable movement. After the basic shape is established, mark darts, notches, grainlines, fold lines, closures, seam allowances, and cutting instructions.
Before using expensive fabric, sew a test garment called a muslin or toile. This allows you to identify tight areas, excess fabric, uneven hems, twisting seams, or poor balance. Transfer every fitting correction back to the paper pattern, smooth the altered lines, and confirm that adjoining seams still match.
The most important principle is to treat the first draft as a working version rather than a finished pattern. Careful testing and correction are what transform a rough draft into a dependable custom clothing pattern that can be reused, modified, and developed into future designs.
Frequently Asked Questions About Creating Clothing Patterns
Beginners often have practical questions about the difficulty, tools, measurements, testing, and technical steps involved in pattern drafting. The answers below address common search queries while clarifying several misconceptions.
Creating a sewing pattern does not require professional fashion-school equipment, but it does require patience and a willingness to test. A first draft should be viewed as a prototype. Even commercial and professional patterns pass through sampling and correction stages before they are considered ready for production.
The simplest projects help learners understand grainlines, seam allowance, balance, ease, and construction without introducing too many technical challenges at once. A rectangular gathered skirt, loose top, simple knit shirt, or basic sleeveless bodice can provide a useful starting point.
It is also important to distinguish copying a garment for personal learning from commercially reproducing another designer’s work. You can study construction and create garments for personal use, but selling exact copies or reproducing protected designs may raise intellectual-property concerns depending on local laws and the nature of the design.
Many pattern questions do not have a single universal answer. Seam allowance, ease, dart placement, and fabric choice vary according to the garment and construction method. Instead of memorizing one number, learn why the feature is needed.
The following detailed answers provide a practical foundation for making better decisions during the pattern-development process.
Can beginners make their own sewing patterns?
Yes, beginners can make their own sewing patterns, provided they start with manageable designs and accept that fitting is part of the process. Pattern drafting becomes difficult when a first project includes advanced tailoring, complex closures, multiple linings, unusual draping, and highly fitted areas at the same time.
A simple elastic-waist skirt, loose woven top, basic T-shirt, apron, or sleeveless bodice is more suitable. These projects allow you to practice measuring, creating grainlines, adding seam allowance, matching seams, marking notches, and sewing a muslin without becoming overwhelmed.
Beginners may also start by modifying an existing commercial pattern. Changing the neckline, length, sleeve, pocket, or fullness helps build pattern-making skills while retaining a tested foundation. Copying a simple garment that fits well is another useful introduction.
Accuracy is more important than speed. Use a sharp pencil, measure twice, label every piece, and walk adjoining seams before cutting fabric. Keep notes about mistakes and corrections because these become valuable learning resources.
Do not expect the first pattern to fit perfectly. Professional results usually come from drafting, testing, fitting, correcting, and testing again. With each project, you will understand body shape, fabric behavior, and construction more clearly.
What is the easiest clothing pattern to draft?
One of the easiest garments to draft is a rectangular gathered skirt with an elastic or drawstring waist. Its basic shape can be created using waist or hip measurements, desired fullness, and finished length. It contains few curves and does not require precise dart placement, sleeve fitting, or complex closures.
A simple straight skirt is another useful beginner project, although it introduces more shaping. The difference between the waist and hip must be controlled through side seams and darts. This makes it a good next step after a gathered design.
Loose sleeveless tops can also be approachable, but the neckline, shoulder slope, bust room, and armhole require more attention. A basic knit T-shirt may appear simple, yet stretch percentage and neckline construction can create challenges.
The easiest pattern is therefore not always the garment with the fewest pieces. It is the design that uses stable fabric, limited shaping, simple construction, and enough ease to tolerate small inaccuracies.
Choose a project you are motivated to wear, but avoid very expensive fabric for the first version. Draft the pattern, make a muslin, and evaluate both fit and proportion. Once the simple design works, create variations by changing the length, fullness, pockets, waistband, or hem shape.
Can I make a sewing pattern from existing clothes?
Yes, you can create a sewing pattern from an existing garment without taking it apart. This method is particularly useful when the garment already fits well and has a relatively simple construction. T-shirts, basic tops, skirts, pyjama trousers, and uncomplicated dresses are suitable examples.
Begin by examining the garment carefully. Identify every seam, facing, fold, dart, pocket, waistband, and closure. Lay one section flat at a time and trace the underlying stitching line rather than simply copying the outer edge. A tracing wheel, pins, or careful measurements can help transfer hidden seams.
Front and back pieces should be traced separately because their necklines, armholes, shoulder slopes, and shaping usually differ. Sleeves must also be identified as front and back through notches or shape.
Once the main outlines are transferred, redraw the curves smoothly, add grainlines, and walk all adjoining seams. Reconstruct hidden seam and hem allowances instead of assuming they are equal everywhere.
The copied garment may have stretched through wear, particularly if it is made from knit fabric. Compare left and right sides and correct obvious distortion. Always make a test garment because the new fabric may behave differently from the original. Copying provides a strong starting point, but it still requires technical checking.
Do I add seam allowance while drafting?
It is generally more accurate to draft, alter, and compare a pattern using the stitching line first. The stitching line represents the actual finished seam position, making it easier to check body measurements, ease, dart intake, and adjoining seam lengths. Seam allowance can then be added after the pattern shape has been confirmed.
Adding allowances too early can make alterations confusing, especially around curves, darts, corners, and intersecting seams. For example, two sleeve seams should be compared along their stitching lines, not their cutting edges. The cutting edges may differ because of curve direction or allowance width.
The amount of seam allowance depends on the construction method. A wider allowance may be useful for fitting side seams, while enclosed seams, necklines, or tightly curved areas may use narrower allowances. Hems often require a separate depth.
Some pattern makers prefer working with seam allowance included, particularly after the block has been tested. Either system can work when it is used consistently and clearly labelled.
Write “seam allowance included” or “seam allowance not included” on every pattern. Record the width where it changes. Use a transparent ruler or seam-allowance guide to maintain an even distance from the stitching line, and true all corners after the allowance has been added.
Why do I need to make a muslin?
A muslin allows you to test a pattern before committing expensive or limited fabric. It shows how the garment fits, hangs, moves, and relates proportionally to the body. Measurements and paper calculations can produce a strong starting point, but they cannot fully represent posture, movement, fabric behavior, or individual preferences.
The muslin helps identify tightness, excess fabric, uneven balance, gaping, twisting, misplaced darts, unsuitable neckline depth, incorrect sleeve width, and uncomfortable garment length. It also allows you to test whether the wearer can sit, bend, raise their arms, and move normally.
Design decisions can also be evaluated. A pocket may be technically correct but visually too low. A neckline may fit but feel too open. A sleeve may balance the garment poorly. These issues are easier to change in test fabric.
A muslin does not always need finished seams, linings, pockets, or buttonholes. Include only the elements required to evaluate structure and fit. However, collars, sleeves, waistbands, and closures should be tested when they influence the garment.
Skipping the muslin may save time initially, but it can create more work later. A short testing stage often prevents irreversible cutting mistakes and produces a more professional final result.
How do I know whether two pattern pieces will fit together?
To determine whether two pattern pieces will sew together correctly, compare their stitching lines from one matching point to the next. This process is often called “walking the seam.” Place the pieces together at the starting notch or seam intersection and rotate one edge along the other while keeping the stitching lines aligned.
Do not compare only the cutting edges because seam allowances can distort the apparent length, particularly around curves. Measure from notch to notch, excluding dart intake, pleats, or seam extensions where appropriate.
Some seams intentionally differ. A sleeve cap may contain a small amount of ease, while gathered, pleated, or eased sections will be longer than the piece they join. These differences should be planned and marked clearly rather than appearing accidentally.
Check shoulder seams, side seams, waist seams, sleeves, armholes, collars, necklines, facings, cuffs, and panel seams. Curved seams should also be examined for smooth transitions at their endpoints.
When one seam is too long, avoid automatically trimming it. Determine whether the excess comes from an inaccurate measurement, changed curve, misplaced notch, or untransferred fitting adjustment. Correct the source rather than hiding the problem during sewing.
After confirming the lengths, add or update matching notches so the pieces remain aligned during construction.
Do I need a dress form for pattern drafting?
A dress form is helpful but not essential for creating patterns. Flat drafting from measurements, tracing a garment, modifying a commercial pattern, and fitting a muslin can all be completed without one. Many home sewists successfully develop custom clothing patterns using a table, mirror, and assistance from another person.
A dress form becomes particularly useful for draping, checking garment balance, positioning design lines, arranging pleats, evaluating collars, and viewing the garment from multiple angles. It also allows the designer to work hands-free while pinning and marking fabric.
However, a standard form may not accurately represent the wearer’s measurements, posture, bust shape, shoulder angle, or body distribution. A form that differs significantly can create misleading results. It may need padding at the bust, waist, hips, shoulders, abdomen, or back to approximate the intended body.
A custom form made from body measurements can improve accuracy, but final fitting should still be completed on the wearer because a rigid form cannot reproduce breathing, sitting, arm movement, or natural posture changes.
Beginners should not delay learning because they do not own a dress form. Start with flat methods and test garments. Invest in a form when draping or frequent garment development makes it genuinely useful.
Conclusion
Learning how to create patterns for your own clothes is a gradual process that combines measurement, observation, technical drawing, fabric knowledge, and fitting. The most successful patterns are rarely produced through a single perfect draft. They are developed through a controlled sequence of planning, drafting, testing, correcting, and documenting.
Begin with a simple garment that allows you to understand the core principles. Take accurate body measurements, decide how much wearing and design ease the garment needs, and choose a drafting method suited to the project. Draft the main stitching lines before adding seam allowances, and treat every pattern piece as part of a connected system. Shoulder seams, sleeves, facings, waistlines, collars, and panels must work together rather than being developed in isolation.
Clear technical markings are equally important. Grainlines, notches, darts, fold lines, cutting quantities, and construction information make the pattern easier to cut and sew accurately. Before using the final fabric, sew a muslin in material with similar behavior. Evaluate the garment while standing and moving, and transfer every correction back to the paper pattern.
Once the final pattern fits, preserve a clean master copy and trace it for future variations. Over time, this approach creates a personal library of dependable blocks and custom patterns.
With consistent practice, you will become faster at recognizing fit problems, controlling garment shape, and adapting designs to different fabrics. More importantly, you will gain the confidence to turn your own clothing ideas into wearable, well-constructed garments.
Comments are closed, but trackbacks and pingbacks are open.