
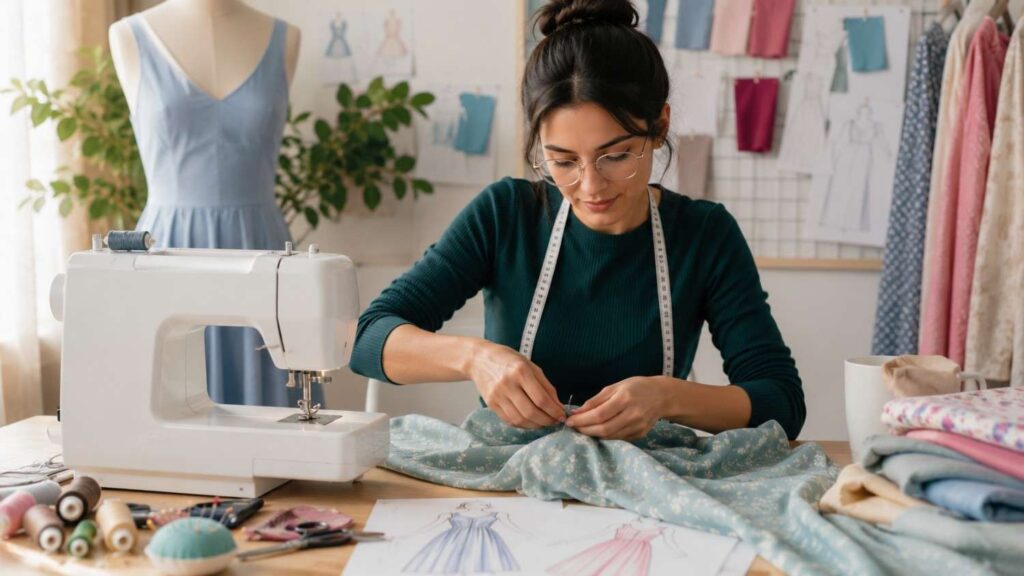
Step-by-Step Guide to Sewing a Dress
Learning how to sew a dress is one of the most rewarding milestones in garment making. A handmade dress allows you to choose the fabric, silhouette, length, fit, and finishing details rather than accepting the limitations of ready-to-wear clothing. It also teaches several fundamental sewing skills in one practical project, including pattern interpretation, fabric preparation, accurate cutting, seam construction, fitting, pressing, and edge finishing.
The process may initially appear complicated because a dress involves more than joining two pieces of fabric. The success of the finished garment depends on decisions made at every stage. An unsuitable fabric can change the way the design hangs. Inaccurate measurements can create fitting problems. Poor cutting can make seams difficult to match, while skipped pattern markings can cause confusion during assembly.
The good news is that dressmaking becomes much easier when the project is divided into a logical sequence. You do not need to master every advanced garment-construction technique before beginning. You need a suitable pattern, manageable materials, careful preparation, and the patience to complete each step accurately.
This step-by-step guide to sewing a dress explains the full workflow in clear, practical language. It is designed to help beginners understand not only what to do, but also why each stage matters. More experienced sewers can use the guide as a reliable preparation, fitting, and quality-control checklist for future dress projects.
Gather the Tools and Materials for Sewing a Dress
A professional-looking garment begins with suitable tools and materials. Although an experienced sewer may own a large collection of specialist equipment, a beginner does not need to buy everything at once. The priority is to gather reliable essentials that support accurate measuring, cutting, marking, stitching, and pressing.
Start by reviewing the pattern envelope or digital pattern instructions. The materials list should identify the recommended fabric types, required fabric quantity, notions, interfacing, thread, closure, and any optional design elements. Purchase a little extra fabric when working with checks, stripes, one-way prints, directional motifs, or material with a visible nap, because these fabrics require careful pattern matching and layout.
Your sewing machine should be clean, threaded correctly, and capable of producing a balanced straight stitch. Test it before beginning the garment. A simple machine is sufficient for most beginner dress patterns, provided it works consistently. You will also need an iron because pressing is an essential construction process rather than an optional final touch.
Organize the tools before cutting so the project can move smoothly from one stage to another. Keep fabric scissors exclusively for fabric, as paper can dull the blades. Test marking tools on a scrap to confirm that the marks will disappear without staining or damaging the material.
Good preparation reduces frustration and protects the fabric from preventable mistakes. Once the correct pattern, tools, thread, needles, and notions are available, you can focus on developing sewing accuracy instead of interrupting the project to find missing supplies.
Choose a Beginner-Friendly Dress Pattern
The right pattern can make the difference between an enjoyable first dress project and an unnecessarily difficult one. Look for designs described as beginner, easy, simple, or learn-to-sew. These patterns usually include fewer pieces, straightforward seams, clear illustrations, and uncomplicated finishing methods.
A loose shift dress, sleeveless A-line dress, elastic-waist dress, or simple pull-on style is often easier than a closely fitted garment. Avoid beginning with patterns that require boning, complex collars, extensive lining, multiple buttonholes, tailored lapels, or highly structured sleeves. These features are valuable to learn later, but combining too many unfamiliar techniques in one project can make troubleshooting difficult.
Examine the technical drawing rather than relying only on the styled cover photograph. The technical drawing shows the seam lines, closures, darts, pockets, panels, and back construction more clearly. Check whether the pattern includes a zipper, buttons, elastic, sleeves, gathers, or facings so you understand which skills will be required.
The pattern envelope also lists recommended fabrics. These recommendations are important because the design may depend on a specific amount of drape, stretch, body, or stability. A pattern drafted for a flowing rayon may not perform well in a stiff upholstery-weight cotton.
For a first project, I recommend choosing a design you would genuinely enjoy wearing but that contains only one or two new techniques. This approach keeps the project motivating while allowing you to build skills gradually.
Prepare Your Essential Dressmaking Tools
A basic dressmaking kit should help you measure accurately, cut cleanly, transfer pattern information, sew controlled seams, correct mistakes, and press the garment into shape. Essential tools include a flexible measuring tape, fabric scissors or a rotary cutter, sharp pins or clips, a seam gauge, marking tools, hand-sewing needles, a seam ripper, and a dependable iron.
Use high-quality all-purpose polyester thread unless the fabric or pattern requires something more specialized. The thread should coordinate with the fabric and pass smoothly through the machine. Old or poor-quality thread can break, shed lint, or create inconsistent tension.
The sewing machine needle must suit the fabric. Universal needles are commonly used for stable woven materials, while ballpoint or stretch needles are intended for many knitted fabrics. Fine fabrics generally require finer needles, whereas heavier materials need stronger sizes. Replace a damaged, bent, or dull needle before beginning because it may cause skipped stitches, fabric pulls, thread breakage, or uneven seams.
Optional tools can improve efficiency. Pattern weights are helpful when using a rotary cutter, a pressing cloth protects delicate surfaces, a point turner helps shape corners, and a tailor’s ham supports curved areas such as darts and bust seams.
Keep frequently used tools within reach, but avoid cluttering the cutting or sewing surface. An organized workspace makes it easier to concentrate on alignment, seam allowance, and fabric handling, which are far more important than sewing quickly.
| Fabric Type | Best For | Difficulty Level | Main Advantages | Things to Watch |
|---|---|---|---|---|
| Cotton Poplin | Beginner dresses | Easy | Stable, easy to cut and sew | Wrinkles easily |
| Quilting Cotton | Practice projects | Easy | Holds shape well, affordable | Slightly stiff for some styles |
| Linen Blend | Casual dresses | Easy to Moderate | Breathable and comfortable | Creases during wear |
| Chambray | Everyday dresses | Easy | Lightweight with good structure | May fray if seams are unfinished |
| Rayon/Viscose | Flowy dresses | Moderate | Soft drape and comfortable | Slippery and shifts while cutting |
| Satin | Formal dresses | Advanced | Smooth and elegant finish | Difficult to control and prone to slipping |
Take Measurements and Select the Correct Pattern Size
Selecting the correct sewing pattern size requires a different approach from buying ready-to-wear clothing. Retail sizing varies widely between brands, and the number printed inside a commercial garment may not correspond to the number on a sewing pattern. For that reason, always begin with current body measurements.
Take measurements over close-fitting clothing or the undergarments you intend to wear beneath the dress. Stand naturally without holding your breath or pulling the abdomen inward. The measuring tape should sit comfortably against the body without sagging or compressing the skin. Keeping the tape level is particularly important when measuring the bust and hips.
Once the measurements are recorded, compare them with the body-measurement chart supplied by the pattern company. Do not choose a size solely because it resembles your usual clothing size. Also review the finished-garment measurements, which may appear on the pattern envelope, instruction sheet, or printed pattern pieces. These figures show the approximate dimensions of the completed garment at key points.
Understanding ease is essential. Wearing ease provides enough room for breathing and movement, while design ease creates the intended silhouette. A loose dress intentionally contains more ease than a fitted sheath. Choosing a size based only on the finished measurement can therefore be misleading unless you understand the style.
Many people fall between pattern sizes. This is normal and does not mean the pattern is unsuitable. You can blend gradually between sizes at the bust, waist, and hips. Accurate size selection at this stage reduces the need for major alterations after the dress has already been assembled.
Measure Your Bust, Waist and Hips
Begin with the three measurements used by most dress patterns: bust, waist, and hips. For the full bust, position the tape around the fullest part of the chest, keeping it parallel to the floor across the back. The tape should remain level and should not slip upward between the shoulder blades.
Measure the natural waist at the narrowest part of the torso or where the body naturally bends when leaning to one side. Do not assume that the natural waist matches the waistband position of your usual trousers. Tying a narrow piece of elastic around the waist and moving gently can help it settle at the correct level.
Measure the hips around the fullest part of the seat, which may sit lower than expected. Keep the feet relatively close together and check that the tape remains horizontal. Depending on the design, you may also need the high bust, back waist length, shoulder width, upper arm circumference, or desired finished length.
Ask another person to help with back and shoulder measurements when possible. If measuring alone, stand in front of a mirror and check the tape from several angles.
Record every measurement immediately rather than relying on memory. Bodies change over time, so repeat the process before beginning a new fitted garment. Accurate measurements are not only about achieving a close fit; they also help ensure that darts, waist seams, armholes, and shaping details sit in the intended position.
Compare Body and Finished-Garment Measurements
After recording your measurements, identify the closest corresponding size on the pattern’s body-measurement chart. For many dresses, the bust is the most important starting point because the shoulders, neckline, and armholes are more difficult to alter than the waist or hips. However, the best selection method may vary depending on the design and the pattern company’s fitting guidance.
Next, review the finished-garment measurements. Subtract your body measurement from the corresponding finished measurement to estimate the amount of ease. For example, a dress with considerably more room at the bust may be designed for a relaxed silhouette rather than a close fit.
Examine photographs and technical drawings to understand how the garment is intended to sit on the body. A fitted dress should not be enlarged until it hangs like a loose tunic, while a relaxed design should not be reduced so much that it loses its intended shape or becomes difficult to move in.
When your bust, waist, and hip measurements correspond to different sizes, blend gradually between the appropriate cutting lines. Avoid abrupt angles because they can distort side seams and change the balance of the garment.
Also compare the pattern length with your preferred dress length. Lengthen-or-shorten lines indicate where adjustments can be made without changing the shape of the hem or other design features. Checking both width and length before cutting is far easier than attempting to add missing fabric after construction has begun.
Prepare the Pattern and Fabric Before Cutting
Fabric and pattern preparation directly affect the accuracy of every later construction stage. Cutting immediately after bringing the fabric home may seem efficient, but it can lead to shrinkage, distorted pieces, mismatched seams, or an incorrectly sized garment.
Begin by reviewing the fabric-care information. Prepare the uncut material using the same general washing and drying method you expect to use for the finished dress. If the fabric will normally be machine washed and dried, pre-treat it accordingly. If it requires hand washing or professional cleaning, follow the most suitable preparation method for that material.
After prewashing, straighten the fabric gently and press out folds, wrinkles, and creases. Pattern pieces cannot be cut accurately from wrinkled material because the fabric will change shape when flattened later. Check whether the cut ends are reasonably square and whether the selvages lie together without twisting.
The paper or digital pattern also needs preparation. Read the entire instruction booklet before cutting. Highlight the steps that involve unfamiliar methods and identify which pattern pieces are required for the version you have selected. Multi-view patterns often include optional sleeves, collars, pockets, or skirt variations that use different pieces.
If using a printed pattern, press the paper carefully with a dry, low-temperature iron when necessary. For a digital pattern, confirm that the test square prints at the correct scale before assembling the pages.
Preparation may feel slower than sewing, but it prevents many of the most difficult garment-making problems. A flat fabric, complete pattern, and clear understanding of the instructions create the foundation for accurate cutting and organized construction.
Prewash, Dry and Press the Fabric
Prewashing allows the fabric to undergo possible shrinkage, colour release, texture change, or softening before it is cut into fitted pieces. Without this step, the completed dress may become shorter, narrower, or distorted after its first wash.
Treat the fabric in a way that reflects realistic future care. If you plan to wash the finished dress in cool water and air-dry it, prepare the fabric using a similar method. Some sewers choose a slightly more cautious prewash to ensure that any potential shrinkage happens before construction.
Finish the raw cut edges before washing when the fabric is likely to fray heavily. A line of zigzag stitching, overlocking, or temporary edge stitching can prevent excessive thread loss and tangling. Keep in mind that some fabrics require specialist handling, so consult the care label or a reliable fabric reference when working with wool, silk, embellished textiles, or unusual blends.
After drying, press rather than merely smoothing the material by hand. Use the correct iron temperature and test steam on a small area. Avoid stretching the fabric, particularly along diagonal or bias areas.
Inspect the fabric for flaws, stains, faded sections, print irregularities, or changes in texture. Mark any damaged areas so pattern pieces can be positioned around them. This inspection is particularly important when the available yardage is limited or the fabric contains a directional design.
Prepare and Understand the Pattern Pieces
Before placing the pattern on the fabric, determine exactly which pieces are needed for your chosen design variation and size. Commercial patterns often combine several dress options in one package, so cutting every printed piece can create confusion and unnecessary work.
Study the instruction sheet and match each required pattern number with its name. Typical pieces may include a front bodice, back bodice, skirt front, skirt back, sleeves, pockets, facings, collar, waistband, or lining. Mark the selected size clearly before cutting the paper pattern.
Learn the purpose of the main symbols. The grainline arrow controls how the piece aligns with the fabric threads. A fold line indicates that an edge should be placed directly on the fabric fold. Triangular notches help match adjoining seams. Circles, squares, and dots may show pocket placement, gathering limits, sleeve positions, or construction stopping points. Dart lines create three-dimensional shaping around areas such as the bust or waist.
Check for lengthen-or-shorten lines before altering the outer edges. These lines allow the pattern to be adjusted while preserving the intended proportions and seam shapes.
If the pattern is valuable or likely to be reused, trace the selected size onto pattern paper rather than cutting the original. Tracing also makes it easier to blend between sizes and record fitting adjustments. Label every traced piece with its name, size, grainline, cutting quantity, and relevant construction marks.
Cut and Mark the Dress Pieces Accurately
Cutting is one of the stages where patience produces a visible improvement in the finished dress. Even an accurately drafted pattern cannot compensate for fabric pieces that have been distorted, cut off-grain, or trimmed inconsistently.
Choose a large, clean, well-lit surface where the fabric can lie fully supported. Allowing part of the material to hang heavily over the edge of a small table can pull the grain out of alignment. If floor cutting is necessary, ensure the surface is clean and that you can work without shifting the fabric.
Follow the pattern’s cutting layout for the selected fabric width, size, and design variation. The layout is designed to use the available material efficiently while maintaining the correct grain direction. However, patterned fabrics may require adjustments so stripes, checks, or motifs align attractively across the garment.
Use either sharp dressmaking scissors or a rotary cutter. Scissors should remain in contact with the cutting surface as much as possible, while a rotary cutter should be used with a suitable mat and stable ruler where needed. Cut smoothly rather than making many small, jagged movements.
Do not forget mirrored pieces. When fabric is folded, cutting one pattern piece often creates a left and right version. If the fabric is cut in a single layer, the pattern may need to be turned over for the second piece.
Once cutting is complete, keep the pattern attached until all markings have been transferred. Organize the pieces by section so that fronts, backs, sleeves, facings, and pockets remain easy to identify during construction.
Follow the Cutting Layout and Grainline
The grainline printed on a pattern piece usually needs to sit parallel to the fabric selvage. This alignment ensures that the finished garment hangs and stretches in the way intended by the designer. When a piece is cut off-grain, seams may twist, hems may hang unevenly, and the garment may pull toward one side.
To position the piece accurately, measure from one end of the grainline arrow to the selvage and pin or weight that point. Measure from the other end and adjust it until both distances are equal. Recheck the first measurement after moving the second point.
Place any “cut on fold” edge directly against the fabric fold without leaving a gap or allowing the edge to cross over it. A gap creates a wider piece than intended, while overlapping the fold makes it narrower.
Directional prints, florals, stripes, velvet, corduroy, and fabrics with nap require additional planning. All pieces may need to face the same direction so the colour or surface texture appears consistent. Large motifs should be positioned intentionally rather than landing awkwardly across the bust, waist, or centre front.
Check the layout twice before cutting. Confirm the correct size line, required number of pieces, fabric direction, and whether the pattern is facing upward or downward. This brief review prevents some of the most costly sewing mistakes, particularly when working with limited or expensive material.
Transfer Every Important Pattern Mark
Pattern markings communicate how separate pieces should be shaped, matched, gathered, folded, and assembled. Skipping them may save a few minutes during cutting but can create significant confusion at the sewing machine.
Transfer dart legs and points accurately because they determine the placement and angle of the garment’s shaping. Mark notches at seam edges so the correct sections can be matched. Indicate pocket positions, buttonholes, pleat lines, gathering points, centre lines, zipper stops, and sleeve-placement symbols as required.
Choose a marking method appropriate for the fabric. Tailor’s chalk, washable fabric pens, removable pencils, tracing wheels, thread tracing, and tailor’s tacks are common options. Always test the chosen tool on a scrap. Some marks may become permanent when exposed to heat, while others may disappear too quickly or show through fine fabrics.
Use small snips within the seam allowance for certain notches, but avoid cutting deeply enough to weaken the seam. Tailor’s tacks or thread tracing are safer for delicate, loosely woven, or expensive fabrics.
Mark the wrong side of the fabric when possible so the symbols remain visible during construction without appearing on the finished surface. After removing the paper pieces, label similar components with removable notes. Left and right sleeves, pocket bags, facings, and mirrored panels can look nearly identical but may not be interchangeable.
Step-by-Step Guide to Sewing a Dress: Construction Order
Once the pieces are cut and marked, construction should follow a controlled sequence. A dress is not usually assembled by joining the largest pieces first. Smaller shaping details, stabilizing steps, and internal components often need to be completed before the main seams are closed.
Read several steps ahead in the instructions before sewing. This habit helps you understand why a seam is being left open, where a zipper will be installed, or when an edge should remain unfinished. It also prevents accidental construction choices that make later stages difficult.
Begin by applying interfacing to facings, collars, waistbands, or closure areas as directed. Staystitch curved or bias edges when required to prevent stretching. Complete darts, pleats, tucks, gathering, or princess seams before joining the larger bodice and skirt sections.
After each seam, inspect the stitching and press the fabric. Pressing sets the stitches, flattens seam allowances, shapes curves, and prevents small inaccuracies from accumulating. Use a pressing cloth and appropriate temperature for sensitive fabrics.
Baste uncertain areas before permanent sewing. Basting uses long, easily removable stitches to hold pieces temporarily. It is especially useful for testing fit, inserting zippers, matching waist seams, setting sleeves, and aligning patterned fabric.
The table below presents a general workflow. Your chosen pattern remains the primary authority because specific designs may require a different order.
| Stage | Main Action | Check Before Continuing | Problem Prevented |
|---|---|---|---|
| 1 | Apply interfacing and staystitching | Pieces remain flat and correctly shaped | Stretched necklines |
| 2 | Sew darts, pleats or gathers | Marks match and shaping is symmetrical | Uneven fit |
| 3 | Join bodice or main panels | Seams align at notches | Twisted construction |
| 4 | Add sleeves, pockets or skirt | Left and right pieces are correctly placed | Reversed components |
| 5 | Test the fit | Dress can be worn comfortably | Major alterations after finishing |
| 6 | Insert zipper or closure | Opening is even and functional | Rippling or misalignment |
| 7 | Finish neckline and raw edges | No visible puckering or loose threads | Unfinished appearance |
| 8 | Mark and sew the hem | Hem hangs evenly after pressing | Uneven dress length |
Sew Darts and Other Shaping Details
Darts convert flat fabric into a three-dimensional shape that follows the contours of the body. They commonly appear at the bust, waist, back shoulder, or skirt waist. Accurate dart construction is important because uneven dart lengths or angles can make the dress appear unbalanced.
Transfer the dart legs, centre line, and point clearly. Fold the fabric with right sides together so the marked dart legs meet exactly. Pin from the wide end toward the point, checking that the fold remains smooth and that no fabric has twisted underneath.
Begin sewing at the wider edge and follow the marked line toward the point. Gradually narrow the seam until the final stitches run very close to the folded edge. A sudden angle at the point can create a bubble or dimple on the right side.
Depending on the fabric and pattern instructions, secure the point by shortening the stitch length, sewing off the edge, or leaving thread tails to tie by hand. Heavy backstitching directly at the point can add bulk.
Press the dart in the direction stated by the pattern, usually downward for bust darts and toward the centre for many waist darts. Use a tailor’s ham to support the curved shape rather than flattening it against the ironing board.
Join the Bodice, Skirt and Main Seams
After completing the shaping details, begin joining the main garment sections. Place the fabric right sides together and match the notches, raw edges, dart ends, waistlines, and other reference marks. Pinning only at the ends is rarely sufficient; distribute pins along the seam so the layers remain aligned.
Use the seam allowance specified by the pattern. Do not assume that every company uses the same width. A seam guide on the machine bed, removable tape, or an adjustable seam guide can help maintain consistency.
Start with a secure stitch and sew at a controlled speed. Watch the seam guide rather than focusing only on the needle. Allow the feed dogs to move the fabric without pulling from the front or back, as pulling can stretch the seam and cause uneven stitches.
After sewing, check for puckers, skipped stitches, accidental folds, or mismatched intersections. Correct problems before finishing the seam allowance. Press the seam flat as sewn, then press it open or toward the direction given in the instructions.
When joining a bodice to a skirt, match the centre front, centre back, side seams, darts, and notches first. Ease any minor differences smoothly between these anchor points. If the pattern includes gathers or pleats, distribute the fullness evenly and keep it away from zipper openings unless directed otherwise.
Add Sleeves, Pockets and Closures
Sleeves, pockets, and closures require careful placement because small alignment errors are noticeable on a finished garment. Follow the pattern’s sequence closely, especially when a pocket or sleeve is easier to attach before a side seam is closed.
For patch pockets, press the seam allowances accurately and confirm that both pockets sit at the same height and angle. For in-seam pockets, match each pocket piece to its placement marks, sew it to the garment edge, and press it outward before joining the side seam around the pocket bag.
Sleeves may be attached while the garment is flat or inserted after the underarm and side seams are sewn. Match the sleeve notches carefully because the front and back curves are different. Ease the sleeve cap without creating unintended gathers unless the design specifically includes them.
When installing a zipper, stabilize the opening if the fabric stretches easily. Mark the stopping point and align important horizontal seams across both sides. Baste the zipper before permanent stitching so you can test its position, movement, and appearance.
Use the correct presser foot for a standard, invisible, or concealed zipper. Keep the stitching even and avoid sewing so close to the teeth that the slider catches. Test the closure several times before finishing the seam allowances or attaching nearby facings.
Finish the Neckline, Seams and Hem
Finishing methods affect the appearance, comfort, durability, and washability of a handmade dress. A garment may fit correctly and have straight seams, but exposed raw edges, bulky facings, or an uneven hem can make it look incomplete.
Choose each finish according to the fabric and the construction method. Lightweight fabrics need low-bulk techniques, while loosely woven materials require enough protection to prevent fraying. A finish that works well on cotton poplin may be unsuitable for sheer chiffon, thick denim, or a delicate satin.
Complete fitting adjustments before permanently finishing seam allowances whenever possible. Overlocked or closely trimmed seams are more difficult to alter. However, some edges must be finished earlier because they will become enclosed later in the construction process.
Press throughout the finishing stage. Curved necklines, facings, bindings, and hems depend on accurate pressing to sit smoothly. Avoid moving the iron back and forth aggressively. Lift and place it, using steam or a pressing cloth when appropriate.
Check both the outside and inside of the dress. A professional finish does not require the interior to resemble a factory-made garment, but the seam allowances should be secure, comfortable, and suitable for repeated wear.
Work slowly around visible areas such as the neckline, armholes, zipper opening, and hem. These sections attract attention and are often difficult to correct after trimming, clipping, grading, or topstitching. Careful finishing turns technically correct construction into a garment that looks intentional and refined.
Finish the Raw Seam Allowances
Raw fabric edges may fray during washing and wearing, so most dress seams need an appropriate finish. The correct option depends on the material, equipment, seam location, and desired interior appearance.
A zigzag stitch is widely accessible and works well for many stable woven fabrics. Sew close to the raw edge without pulling the fabric. An overlocker or serger trims and encloses the edge efficiently, but test the settings first because excessive tension can cause rippling.
Pinking shears cut a saw-toothed edge that reduces fraying in some tightly woven materials. This method is simple but may not provide enough protection for loose weaves or frequently washed garments. Bound seams use bias binding to enclose the allowances and create a clean interior, although they add time and some bulk.
French seams enclose the raw edges within a second seam and are useful for certain lightweight or sheer fabrics. However, they are not ideal for every curved or bulky area. Flat-felled seams are strong and durable but are more commonly associated with shirts, workwear, and casual garments.
Finish the seam allowances only after confirming that the seam is correctly stitched and that no fitting adjustment is needed. Press the finished allowances in the direction specified by the pattern and check that the chosen method does not show through on the garment’s outer surface.
Complete the Neckline or Facing
Necklines can be finished with a facing, binding, lining, collar, or folded band. A facing is a separate piece shaped to match the neckline. It turns to the inside and supports the edge without creating visible external stitching in many designs.
Apply interfacing to the facing when directed. Join the facing pieces, finish the outer edge, and press the seams before attaching the facing to the dress. Match shoulder seams, centre points, notches, and closure edges carefully.
After sewing the neckline seam, trim or grade the seam allowances to reduce bulk. Clip inward curves and notch outward curves where necessary, taking care not to cut through the stitching. These small cuts allow the seam allowance to spread or overlap when turned.
Understitching helps prevent the facing from rolling to the outside. To understitch, press the seam allowance toward the facing and sew close to the seam line through the facing and allowances. This stitching is hidden inside the garment.
Turn the facing inward and press the neckline over a curved surface when possible. Secure the facing discreetly at shoulder seams, side seams, or other internal points so it does not lift during wear.
Before final pressing, check that the neckline lies flat against the body without stretching, puckering, or gaping. Avoid aggressive ironing, as curved and bias-cut edges can distort easily.
Level and Sew the Hem
The hem should be marked only after the main construction and fitting adjustments are complete. A dress can hang differently once the side seams, zipper, sleeves, or skirt panels are assembled, so relying entirely on the original cut edge may produce an uneven result.
Allow the dress to hang before levelling the hem, especially when the skirt is full, circular, flared, or partially cut on the bias. Bias areas can stretch under their own weight. The required hanging period depends on the fabric and design, but the key principle is to let the shape settle before trimming.
Try on the dress with the undergarments and shoes you expect to wear. Stand naturally on a level surface while another person measures from the floor when possible. Mark the desired length at regular intervals.
After removing the dress, connect the marks smoothly and check the shape before cutting. Apply the hem allowance specified by the pattern. Curved hems often need a narrower finish because wide allowances are difficult to turn without puckering.
Press the first fold accurately, then press the second fold or apply the required binding or facing. Machine stitching is practical for casual dresses, while hand stitching can create a less visible finish on formal garments.
Complete a final press without flattening gathers or damaging the fabric. Check the hem from all sides while the dress is hanging to confirm that it remains level.
Check the Fit and Correct Common Sewing Problems
Fitting is an expected part of dressmaking rather than a sign that the project has failed. Commercial patterns are drafted from standardized measurements, while real bodies vary in posture, proportion, shoulder angle, bust shape, torso length, and the relationship between waist and hip measurements.
Plan at least one fitting before completing the neckline, inserting permanent linings, trimming seam allowances closely, or sewing the final hem. Baste the side seams and closure when necessary so the dress can be tried on without committing to permanent stitching.
Evaluate the garment from the front, back, and sides. A full-length mirror is helpful, but photographs can reveal issues that are difficult to see while turning or looking over one shoulder. Stand naturally rather than forcing the body into a posture that makes the dress appear smoother.
Look for horizontal and diagonal drag lines. These lines often point toward an area that is too tight, too short, or incorrectly shaped. Excess vertical folds may indicate too much width, while a waist seam that rises or drops can suggest a length or balance issue.
Make one controlled adjustment at a time. Changing several areas simultaneously makes it difficult to identify which correction solved or created the problem. Pin or baste the alteration, test the fit again, and transfer successful changes to the paper pattern for future use.
After the fit is confirmed, inspect the stitching quality and internal construction. Correcting small issues before the final finishing stage prevents them from becoming permanent weaknesses or visible distractions.
Test the Fit Before Final Finishing
To test the fit, temporarily close the zipper opening or baste the relevant seam. Wear the intended undergarments because a different bra or shaping garment can change the bust level, waist position, and overall fit.
Check the shoulder seams first. They should sit close to the natural shoulder line without pulling toward the neck or falling down the upper arm. Examine the neckline for gaping, tightness, or unevenness. Move the arms gently to confirm that the armholes allow comfortable motion without cutting into the body.
Review the bust area for drag lines, flattened shaping, or excess fabric. The dart point should generally aim toward the fullest part of the bust without ending directly on it. Check that the waist seam or waist shaping sits at the intended level.
At the hips, sit down and walk several steps. The dress should provide enough ease for movement without pulling the side seams forward or backward. Confirm that the centre front and centre back remain vertical.
Evaluate the overall length only after the upper fit is satisfactory. Raising a shoulder or adjusting a waist seam can change the hem position.
Use pins to indicate small changes, but do not fit the dress so tightly that movement becomes restricted. A garment that looks smooth while standing still may be uncomfortable in everyday use. Comfort, balance, and the intended design should guide the final decision.
Troubleshoot Puckering and Skipped Stitches
Puckered seams may be caused by several factors, including unsuitable tension, excessive presser-foot pressure, stretched fabric, an incorrect needle, poor thread quality, or fabric layers feeding at different rates. Begin troubleshooting with a scrap made from the same fabric and number of layers as the garment seam.
Check the needle first. Replace it if it is bent, dull, damaged, or inappropriate for the material. Confirm that it is inserted correctly and fully. Rethread the machine with the presser foot raised so the thread enters the tension system properly.
Review the stitch length. Very short stitches can create excessive thread concentration and cause lightweight fabrics to draw up. A slightly longer stitch may produce a smoother seam. Hold the thread tails when beginning if the machine tends to pull fine fabric into the needle plate.
Do not pull the material while sewing. Guide it gently and allow the feed dogs to move it. For difficult layers, a walking foot, stabilizer, tissue paper, or reduced presser-foot pressure may help, depending on the machine and fabric.
Skipped stitches commonly indicate a needle problem, incorrect threading, or a mismatch between the needle and fabric. Test one change at a time. Once the scrap stitching is balanced and smooth, remove the defective garment seam carefully and resew it without stretching the fabric.
Complete a Final Quality Check
The final quality check should examine both appearance and function. Begin by trimming loose thread tails without cutting into the seams. Inspect every visible stitching line for skipped stitches, accidental tucks, uneven topstitching, or areas where the seam has opened.
Operate the zipper, buttons, snaps, or other closure several times. The closure should move smoothly without catching fabric, separating under gentle tension, or creating obvious ripples. Confirm that hooks, eyes, and buttons are secure.
Check the neckline and armholes while the dress is hanging. Facings should remain inside, bindings should lie flat, and clipped curves should not create visible points. Examine pocket placement and confirm that both sides appear balanced.
Turn the dress inside out. Raw edges should be protected, seam finishes should remain intact, and no long thread loops should be visible. Check high-stress areas such as the waist seam, zipper base, pocket openings, and underarms for secure stitching.
Try on the dress one final time. Sit, walk, raise the arms, and bend gently. Confirm that the garment remains comfortable and that the hem does not shift noticeably.
Finish with a careful press using the correct temperature. Press seams, darts, neckline edges, sleeves, and the hem without creating unwanted shine or flattening design details. A thoughtful final inspection helps ensure that the dress is ready for regular wear rather than merely complete at the sewing machine.
| Sewing Stage | Key Task | Why It Matters | Common Beginner Mistake |
|---|---|---|---|
| Pattern Selection | Choose a beginner-friendly design | Makes construction easier | Selecting an advanced pattern |
| Measuring | Take accurate body measurements | Improves overall fit | Using ready-to-wear clothing size |
| Fabric Preparation | Prewash and press fabric | Prevents shrinkage after sewing | Cutting fabric without washing |
| Cutting | Follow grainline and transfer markings | Ensures accurate assembly | Ignoring notches and dart markings |
| Construction | Sew pieces in the recommended order | Creates proper garment structure | Skipping pressing between seams |
| Fitting | Try on before installing final finishes | Allows easy adjustments | Hemming before checking fit |
| Finishing | Finish seams and neckline | Improves durability and appearance | Leaving raw edges unfinished |
| Final Press | Press the completed dress | Gives a professional finish | Wearing or storing without pressing |
Quick Answer About Step-by-Step Guide to Sewing a Dress
Sewing a dress successfully begins with choosing a design that matches your current skill level. For a first project, select a clearly written commercial pattern with relatively few pieces, simple seams, and limited fastening details. Stable woven fabrics such as cotton poplin, chambray, or a manageable linen blend are generally easier to measure, cut, pin, and sew than slippery or highly elastic materials.
Before cutting anything, take accurate body measurements and compare them with the pattern company’s size chart. Prewash, dry, and press the fabric according to its expected care method. Lay out the pattern pieces carefully, keeping each grainline parallel to the selvage unless the pattern states otherwise. Transfer every notch, dart, fold line, and placement mark because these symbols guide the construction process.
During sewing, follow the pattern’s order rather than assembling pieces based only on appearance. Complete shaping details first, join the main sections, test the fit, and add the closure before finishing difficult-to-alter areas. Press each seam as you work, rather than waiting until the entire garment is assembled.
Finally, finish the raw edges, complete the neckline, check the fit again, and level the hem while wearing the intended shoes. This structured process makes sewing a dress for beginners far more manageable and also produces a cleaner, more professional result.
Frequently Asked Questions About Sewing a Dress
Beginning dressmakers often face the same practical concerns about patterns, fabric, time, sizing, and finishing. Clear answers to these questions can prevent unrealistic expectations and help readers choose a project that matches their current abilities.
The most important principle is that there is no single dressmaking method suitable for every pattern or fabric. A loose cotton shift, fitted lined sheath, stretch-knit dress, and full evening gown require different construction techniques. General guidance should therefore be combined with the instructions supplied by the selected pattern.
Beginners also benefit from distinguishing between necessary skills and optional refinements. Accurate measuring, careful cutting, consistent seam allowances, secure stitching, and regular pressing are essential. Advanced seam finishes, couture hand sewing, pattern matching, and complex fitting adjustments can be developed gradually.
It is also useful to plan for mistakes. A seam ripper is a normal sewing tool, not evidence of failure. Even experienced dressmakers remove stitches, rebaste zippers, alter seams, and test several finishing methods before choosing the most suitable one.
The following answers address common search questions while keeping the advice practical and realistic. They are intended to help readers begin confidently without underestimating the importance of preparation. When pattern-specific instructions differ from general guidance, the pattern should usually be followed because its construction order reflects the way that particular garment was drafted and designed.
Can a Complete Beginner Sew a Dress?
Yes, a complete beginner can sew a dress, provided the project is selected carefully. The easiest first dress is usually made from a stable woven fabric and uses a pattern with clear instructions, relatively few pieces, and limited fitting requirements.
Look for a loose shift, simple A-line design, elastic-waist dress, or pull-on style. Avoid making the first project unnecessarily difficult with slippery fabric, extensive lining, boning, complex collars, multiple buttonholes, or a highly fitted bodice.
Before beginning, practise sewing straight and curved seams on fabric scraps. Learn how to thread the machine, wind the bobbin, control seam allowance, reverse or secure stitching, and press a seam properly. These basic skills are used repeatedly during garment construction.
Read the complete pattern instructions before cutting. Mark unfamiliar terms and review them in advance. Work slowly, verify each step, and baste areas such as side seams or zippers when you are uncertain.
A first dress does not need to be technically perfect to be successful. It should be wearable, comfortable, and useful as a learning experience. Choosing an achievable pattern allows the beginner to build confidence while developing transferable garment-sewing skills.
What Is the Easiest Fabric for a Beginner Dress?
Stable woven fabrics are generally the easiest option for a beginner dress because they remain relatively flat during cutting and do not stretch significantly while sewing. Cotton poplin, chambray, quilting-weight cotton, lightweight denim, and some linen-cotton blends are common beginner-friendly choices.
However, the best fabric must also suit the pattern. A design intended for a flowing material may look stiff and bulky in quilting cotton, while a structured dress may lose its shape in a very soft rayon. Always review the fabric recommendations before purchasing material.
Avoid highly slippery satin, delicate chiffon, loose open weaves, velvet, and extremely stretchy knits for a first project. These fabrics are not impossible to sew, but they often require specialized needles, stabilizing methods, careful cutting, or experience controlling multiple layers.
Consider the print as well as the fibre. Solid colours or small non-directional prints are easier to lay out than stripes, checks, border prints, or large one-way motifs. Pattern matching increases fabric requirements and requires more precise cutting.
Before committing to the project, test the fabric by folding, pinning, stitching, pressing, and finishing a scrap. This small sample reveals how the material behaves and allows the machine settings to be adjusted safely.
How Long Does It Take to Sew a Dress?
The time needed to sew a dress depends on the complexity of the pattern, the fabric, the required fitting changes, and the sewer’s experience. A simple dress may be completed over a focused day or several shorter sessions, while a fitted, lined, or formal design can require considerably more time.
Preparation often takes longer than beginners expect. Prewashing, pressing, assembling a digital pattern, selecting a size, making adjustments, planning the layout, cutting, and transferring markings may occupy a substantial part of the project.
Construction time also varies. Darts and basic seams can be completed relatively quickly, but sleeves, collars, facings, linings, zippers, buttonholes, pattern matching, and hand-sewn hems require additional care. Fitting adjustments may involve basting, trying on the garment, removing stitches, and resewing sections.
It is more useful to divide the project into stages than to rush toward a fixed completion time. For example, prepare the pattern and fabric in one session, cut and mark in another, construct the main garment next, and complete fitting and finishing separately.
Working in shorter, focused sessions often improves accuracy. Fatigue can lead to reversed pieces, missed markings, uneven seams, or cutting errors. A well-made dress completed gradually is more valuable than a rushed garment that requires extensive correction.
Can I Sew a Dress Without a Pattern?
It is possible to sew certain dresses without a commercial pattern. Loose garments can be created from rectangles, basic body measurements, draping methods, or by tracing an existing dress with a similar fit. However, working without a pattern still requires planning and an understanding of ease, seam allowance, grain direction, shaping, and construction order.
Tracing an existing garment is more reliable when the original dress is simple, fits well, and can be laid relatively flat. The traced shape must still be adjusted to include seam allowances, facings, hems, closures, and separate front and back differences.
A commercial beginner pattern is usually the more dependable choice for a first dress. It provides drafted pieces, size guidance, fabric quantities, grainlines, notches, markings, seam allowances, and illustrated instructions. These features reduce guesswork and teach standard garment-construction methods.
Pattern-free projects can be enjoyable after the sewer understands how flat shapes relate to the body. They are particularly suitable for relaxed kaftans, gathered dresses, elastic-waist styles, and simple sundresses.
For fitted garments, using a tested pattern or properly drafted block is strongly recommended. Small inaccuracies around the bust, shoulders, neckline, armholes, and waist can significantly affect comfort and balance.
How Much Fabric Do I Need to Make a Dress?
The amount of fabric required depends on the pattern size, dress length, sleeve style, skirt fullness, fabric width, print direction, and layout. The most reliable answer is found in the yardage or metre chart supplied with the pattern.
Check whether the fabric is sold in the same width listed in the chart. A pattern may provide separate requirements for common widths such as 115 centimetres and 150 centimetres. Narrower fabric generally requires more length because fewer pieces fit side by side.
Directional prints, stripes, checks, large motifs, border designs, velvet, corduroy, and fabrics with nap often require additional material. Pieces need to face the same direction or be positioned carefully for visual matching. Lengthening the skirt or sleeves also increases the requirement.
Do not forget separate materials for lining, contrast panels, interfacing, binding, or pockets when the pattern specifies them. It is also wise to allow a reasonable margin for fabric shrinkage, uneven cut ends, pattern matching, and minor cutting errors.
Before buying, identify the exact design view and size range you plan to make. Use the chart for that version rather than estimating from another dress. When uncertain, bring the pattern information to a knowledgeable fabric retailer and confirm the required quantity before the fabric is cut.
Should I Make a Toile Before Cutting My Main Fabric?
A toile, also called a muslin or test garment, is a trial version made from inexpensive fabric with properties similar to the final material. It allows you to examine the fit, proportions, balance, and design before cutting valuable fabric.
A toile is especially useful for fitted bodices, unfamiliar pattern companies, expensive materials, formal dresses, or garments that require substantial alterations. It can reveal whether the bust darts point correctly, the waist sits at the right level, the shoulders fit, the neckline gaps, or the skirt provides enough movement.
The test version does not always need complete finishing. You can omit pockets, hems, facings, and decorative details unless they affect the fit. Mark the centre front, centre back, waistline, and grainlines on the toile so balance problems are easier to identify.
Use a longer basting stitch and leave generous seam allowances where adjustments may be required. Pin, mark, or stitch the changes directly on the test garment, then transfer the successful corrections to the paper pattern.
For a loose beginner dress made from inexpensive fabric, a full toile may not be necessary. Measuring the pattern pieces and basting the main seams may provide enough information. The decision should reflect the garment’s complexity, fabric cost, and desired level of fit accuracy.
How Do I Prevent Dress Seams From Fraying?
Dress seams can be protected with zigzag stitching, overlocking, pinking, binding, or enclosed construction methods. The most suitable finish depends on how much the fabric frays, how frequently the dress will be washed, the weight of the material, and the equipment available.
A basic zigzag finish is practical for many woven fabrics. Stitch close to the raw edge without causing the allowance to curl. An overlocker creates a fast and durable finish but should be tested to ensure that the tension and cutting width do not distort the seam.
Pinking shears may be sufficient for tightly woven fabrics that fray only slightly. Bias-bound seams provide a neat interior and are useful for unlined jackets or dresses where the seam allowances may be visible. French seams fully enclose raw edges and work well for selected lightweight fabrics.
Finish the edges after fitting whenever possible. Closely trimmed or overlocked seams are more difficult to let out. Some construction methods require earlier finishing, so continue to follow the pattern sequence.
Always test the proposed finish on a scrap that includes a sewn seam. Wash or handle the sample if durability is important. The best seam finish should prevent fraying without adding excessive stiffness, bulk, or visible ridges to the outside of the dress.
Conclusion
Completing a handmade dress requires more than operating a sewing machine. The quality of the finished garment depends on selecting an achievable pattern, choosing suitable fabric, taking accurate measurements, preparing the materials properly, cutting on the correct grain, transferring all markings, and following a logical construction order.
For beginners, the most reliable approach is to reduce unnecessary difficulty. A simple pattern and stable woven fabric make it easier to focus on essential dressmaking skills such as maintaining seam allowance, sewing darts, matching notches, pressing seams, inserting a basic closure, checking the fit, and finishing raw edges.
Do not treat fitting, basting, pressing, or unpicking as wasted time. These processes allow mistakes to be corrected before they become permanent. They also separate careful garment construction from simply joining fabric pieces as quickly as possible.
Advanced sewers can follow the same workflow while introducing more complex fabrics, fitted silhouettes, linings, tailored details, couture finishes, or pattern alterations. The level of difficulty may change, but the principles of preparation, accuracy, and controlled construction remain consistent.
This Step-by-Step Guide to Sewing a Dress provides a repeatable system that can be used for many future projects. Each completed garment will improve your understanding of fabric behaviour, pattern shapes, fit, and sewing-machine control.
Begin with realistic expectations, test unfamiliar techniques on scraps, and complete one stage at a time. With careful preparation and practice, a flat length of fabric can become a comfortable, durable, and professionally finished dress.
Comments are closed, but trackbacks and pingbacks are open.