
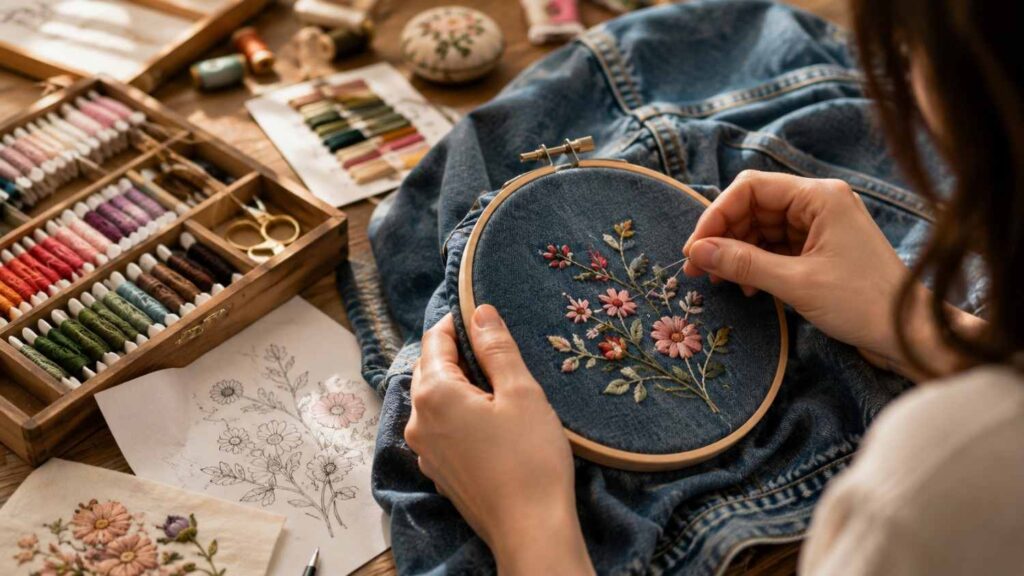
How to Add Embroidery to Your Clothes
Learning how to add embroidery to your clothes is one of the most practical ways to personalize garments without completely redesigning or reconstructing them. A plain T-shirt can gain a small floral detail near the chest, jeans can be decorated around a pocket or leg, and a denim jacket can become a much larger canvas for lettering, botanical patterns, symbols, or decorative visible mending. Embroidery is also useful for refreshing clothing that feels ordinary or outdated, helping you create something personal from a garment you already own.
Hand embroidery is particularly accessible because the basic equipment is simple. DMC’s embroidery guidance centers on thread, a stitchable fabric or finished item, a suitable embroidery needle, a hoop, scissors, and a method for transferring a design. Beginners do not need dozens of specialty tools or advanced sewing experience before getting started. What matters more is learning how fabric behaves, controlling thread tension, choosing an appropriate stitch, and understanding when a garment needs additional support from stabilizer.
Working on clothing does introduce challenges that are less important when embroidering decorative fabric for framing. Garments stretch, bend, rub against the body, pass through washing cycles, and encounter repeated wear. Your stitches therefore need to look attractive while remaining secure and comfortable. The best results come from planning the design before stitching, choosing an appropriate location, keeping the garment close to its natural shape, and building the motif gradually. The following guide explains each step so both beginners and more experienced embroiderers can approach clothing customization with greater confidence.
What You Need Before You Start Embroidering Clothes
A successful embroidery project begins with choosing tools that suit the garment rather than buying every embroidery supply available. For basic hand embroidery on clothing, you need embroidery floss or another suitable thread, an embroidery or chenille needle, sharp scissors, a hoop, and a way to transfer your design. DMC’s embroidery resources identify essentially the same core toolkit, while SINGER’s beginner embroidery guidance also emphasizes appropriate needles, thread, hoops, and fabric preparation. These tools provide enough flexibility for most simple clothing projects.
A beginner-focused guide to embroidery onto clothing can also help when choosing a simple design and getting familiar with the basic materials before starting your first garment project.
The garment itself should influence what you add to your toolkit. Stable denim can often support a small hand-embroidered motif without additional backing, while stretchy jersey may move considerably as you stitch. A thin blouse may need support to prevent distortion, and a dense machine-embroidered design can require much more stabilization than a simple hand-stitched outline. Understanding this relationship between fabric and stitching is more important than purchasing expensive supplies. The objective is to keep the material stable enough for clean stitches without making the finished garment unnecessarily stiff.
For a first project, I recommend working on a small, accessible area rather than attempting a large design across an entire jacket or shirt. A pocket corner, shirt cuff, chest motif, collar point, or section of a denim leg offers enough room to practice while keeping the project manageable. Small designs also let you learn how thread tension, fabric thickness, and stitch length interact. Once you can produce smooth outlines and secure thread endings consistently, you can move confidently into larger or more densely stitched designs.
Essential Tools for Hand Embroidery on Clothing
The basic hand-embroidery kit should include embroidery floss, a needle with an eye large enough for the chosen thread, a hoop, small sharp scissors, and a removable transfer tool. DMC’s embroidery materials commonly use six-strand floss, which is particularly versatile because the strands can be separated. Fewer strands create finer lines, while additional strands produce thicker, more visible stitches. This lets you adjust the visual weight of a design without changing to an entirely different thread product.
Needle selection matters because forcing thick floss through an eye that is too small can damage the thread and make stitching unnecessarily difficult. The needle should also pass through the garment comfortably without creating an oversized hole. Denim may require a sturdier needle than a lightweight cotton shirt, while delicate fabrics may need a finer point. Keep a few sizes available if you plan to embroider different types of clothing rather than relying on one needle for every material.
An embroidery hoop is equally useful because it supports the fabric while you work. DMC recommends positioning the material so it remains taut and smooth inside the hoop, which makes stitch placement more consistent. The hoop should comfortably surround the design without forcing you to stitch against the wooden or plastic ring. For clothing, remember that taut does not mean aggressively stretched. Support the garment in a natural position, particularly when working with knit fabric that could distort when pulled.
| Embroidery Supply | Primary Purpose | Best Use | Important Consideration |
|---|---|---|---|
| Embroidery Hoop | Keeps fabric supported and taut | Most hand-embroidery projects | Avoid stretching garments unnaturally |
| Embroidery Floss | Creates decorative stitches | Outlines, fills, lettering, details | Adjust the number of strands for stitch weight |
| Embroidery Needle | Carries thread through fabric | Hand embroidery on garments | Choose an eye large enough for the thread |
| Sharp Embroidery Scissors | Cuts thread cleanly | Starting and finishing stitches | Keep blades away from completed stitches |
| Removable Fabric Marker | Transfers the design | Simple motifs and outlines | Test removability on hidden fabric first |
| Tear-Away Stabilizer | Temporarily supports fabric | Woven garments and selected projects | Remove according to manufacturer instructions |
| Cut-Away Stabilizer | Provides longer-term support | Stretchy fabrics and dense embroidery | Useful when fabric needs continued stabilization |
| Water-Soluble Stabilizer | Controls surface movement and supports details | Stretchy or difficult-to-hoop garments | Dissolves or washes away according to product instructions |
When Should You Use Embroidery Stabilizer?
Embroidery stabilizer becomes useful whenever the garment lacks enough structure to remain stable during stitching. Stretchy knits, thin fabric, loose weaves, delicate materials, dense designs, and machine embroidery are common situations where additional support can improve the result. Stabilizer works by limiting unwanted movement, helping stitches remain in place instead of pulling the fabric inward or allowing it to shift beneath the needle.
Different stabilizers serve different purposes. Tear-away stabilizer provides temporary support and can be removed after the stitching is complete. Cut-away stabilizer remains behind the embroidery and is commonly used where long-term support is important, especially on stretchy knits. Water-soluble stabilizers dissolve according to their product instructions and can be useful when backing or topping material needs to disappear. Brother also offers adhesive-backed water-soluble options intended to reduce movement on difficult-to-hoop or stretchy projects.
Hand embroidery often needs less stabilization than dense machine stitching, but the same principles apply. A small backstitched flower on denim may require no backing at all, while a filled design on a soft T-shirt can benefit significantly from stabilizer. If you are unsure, test the design on a similar scrap of fabric. If stitches pull the material out of shape, sink into the fabric, or cause rippling, additional stabilization is likely to improve the finished appearance.
How to Prepare Your Clothes and Transfer the Design
Preparation determines whether embroidery looks intentionally integrated into a garment or appears crooked, puckered, and uncomfortable. Before transferring a pattern, inspect the clothing from both sides. Check whether a lining, pocket bag, thick seam, zipper, button, or multiple layers will prevent you from passing the needle easily through the chosen area. It is much easier to change placement before drawing the pattern than after stitching has started.
Garment condition also matters. DMC recommends preparing embroidery fabric according to its care requirements and prewashing when shrinkage is possible. This is especially relevant for new cotton clothing or untreated fabric that may change dimensions during washing. If you stitch first and the garment later shrinks, the embroidery can wrinkle or distort. Existing clothing that has already been washed repeatedly may be more stable, but it should still be clean and pressed enough for accurate pattern placement.
Before committing to the final design position, look at the garment as it will actually be worn. Clothing changes shape on the body. A motif that appears perfectly centered when a shirt is lying flat may sit too low or shift toward a seam once worn. Pin a paper version of the pattern to the clothing, try the garment on, and check the placement in a mirror. This extra step is especially useful for chest motifs, jacket backs, pockets, and trouser legs where visual balance matters.
Choose the Right Placement and Design Size
The best embroidery placement balances appearance, stitchability, and comfort. Good beginner areas include jacket pockets, shirt cuffs, collar points, upper chest areas, denim legs, and sections of fabric located away from bulky seams. These locations are easier to reach from both sides and generally provide enough flat space to control a hoop. Brother even produces small machine-embroidery hoops designed for areas such as cuffs and collars, reflecting how frequently these garment zones are decorated.
Avoid highly flexible areas for dense designs unless you understand how the fabric will behave. Knees, elbows, waistbands, and other sections that bend or stretch repeatedly can place more stress on embroidery. A small running-stitch motif may work comfortably there, but a large satin-filled design can make the area stiff or distort when the garment moves. Areas that rub directly against the skin also benefit from tidy backs and minimal bulky knots.
Design scale should match both the garment and your skill level. A small two-inch flower can be completed quickly and teaches several important techniques without overwhelming a beginner. Larger motifs require more consistent tension and more planning around thread changes, stabilizer, and hoop repositioning. Before starting, consider the finished proportion from a normal viewing distance. Embroidery should appear intentionally sized for the garment rather than looking like a small patch accidentally placed on a large empty area.
Transfer Your Embroidery Pattern Carefully
Pattern transfer gives you a temporary roadmap for stitching, so the method should create clear lines without permanently marking the garment. DMC’s embroidery guidance includes soluble markers and transfer materials among standard tools for positioning designs on fabric. Simple patterns can often be drawn directly with a removable fabric pen, while more detailed motifs may be traced or transferred with specialist paper or water-soluble material.
Always test the transfer method on a hidden area or similar scrap first. Some marking products behave differently depending on fiber content, fabric color, heat, and washing conditions. A line that disappears easily from white cotton may behave differently on dyed denim or synthetic material. Never assume that a product labeled temporary or washable will vanish perfectly from every garment without testing.
Keep transferred lines as fine and economical as possible. Thick marks can remain visible between stitches or require more thread coverage than necessary. Mark the outer shape, major internal lines, centers, and important reference points instead of coloring in entire sections. If the final design will be filled with satin stitch, you usually need only the boundary. Good transfer work should guide your stitching without becoming part of the finished visual result.
How to Add Embroidery to Your Clothes by Hand
Once the garment is prepared and the design is transferred, the embroidery itself should proceed in a controlled sequence. Place the fabric in your hoop so the design remains centered and easy to access. DMC recommends gently tightening the fabric until it is smooth and supported. The goal is a firm working surface, not maximum stretch. This distinction becomes particularly important with T-shirts and other knit garments that can deform when pulled.
For another practical overview of the process, this guide on how to embroider clothes by hand covers the basic steps for adding decorative stitching to garments.
Thread your needle with the number of strands appropriate for the design and start from the back of the garment. Clothing experiences regular friction and washing, so thread endings need to be secure. DMC generally teaches neat thread-finishing methods that avoid unnecessary knots, but its guidance also notes that finished items such as clothing may justify a small knot because they undergo repeated handling. Whatever method you use, avoid leaving large tangled knots that could rub against the skin or catch during wear.
As you stitch, focus on consistency rather than speed. Pull each stitch until the thread rests neatly against the fabric, then stop. If the surrounding material begins folding inward, your tension is too strong. Check both sides of the garment regularly. The front tells you whether the design is developing evenly, while the back reveals long thread jumps, loops, and tangles that may cause practical problems later. Working slowly at the beginning saves considerable correction time at the end.
Step 1 – Hoop the Garment Without Stretching It
Begin by loosening the outer ring and separating it from the inner ring. Position the inner hoop behind the area you want to embroider and place the garment over it in its natural, relaxed shape. Fit the outer ring on top and press the two sections together. Tighten gradually rather than immediately turning the screw as far as possible, because the fabric may need small adjustments to remain smooth and correctly aligned.
DMC recommends keeping embroidery fabric taut in the hoop, but clothing requires an important additional consideration: you should not artificially stretch flexible fabric simply to make it feel tight. If a T-shirt is stretched significantly while you stitch, the embroidery may contract and wrinkle after the garment is removed from the hoop. The same problem can occur with ribbing, jersey, and other elastic materials.
When working with stretch fabric, let stabilizer provide much of the support rather than relying on tension from the hoop. Smooth the fabric without extending it beyond its normal dimensions, then check that the transferred design still appears correctly proportioned. If the motif has become wider, taller, or distorted compared with the original pattern, release the hoop and reset the garment before stitching.
Step 2 – Start with Simple, Controlled Stitches
Begin your design with the structural elements that establish its shape. Outlines, stems, lettering, and major borders are good places to start because they make it easier to evaluate whether the pattern is sitting correctly on the garment. DMC’s beginner embroidery instruction includes running stitch, backstitch, stem stitch, satin stitch, lazy daisy, and French knots, giving beginners enough techniques to complete many simple clothing motifs without learning complicated decorative stitches.
As you stitch, maintain moderate tension. The floss should lie flat enough that it does not form loose loops, but it should not pull the garment inward. Imagine placing the thread onto the fabric rather than tightening it around the fabric. This mental shift is useful when learning because beginners often assume tighter stitches will look neater, when excessive tension is actually a common cause of puckering.
Work in logical sections and avoid unnecessarily long thread carries across the back. If one flower is several inches away from another, ending the thread and restarting nearby is usually tidier than stretching a long strand behind the garment. Long floating threads can catch on fingers, jewelry, or the wearer’s body. A relatively neat reverse side also makes embroidered clothing more comfortable and easier to maintain.
Step 3 – Secure, Finish, and Inspect the Embroidery
When you finish a section, secure the thread on the reverse before trimming it. One common method is to weave the needle beneath several existing stitches so the tail becomes anchored without creating a large knot. DMC recommends this style of finishing for many embroidery projects, while also acknowledging that clothing exposed to repeated washing and wear may justify small secure knots depending on the project.
If stabilizer was used, remove it according to the type rather than simply pulling everything away. Tear-away material should be removed carefully so you do not distort nearby stitches. Cut-away stabilizer is normally trimmed while leaving support behind the design. Water-soluble stabilizer must be handled according to its manufacturer’s removal instructions. Aggressive removal can damage otherwise successful embroidery.
Finally, inspect the garment in normal use rather than only while it is lying flat. Hang it or try it on and look for puckering, loose areas, unwanted thread showing through the front, or uncomfortable knots on the reverse. If transfer lines remain visible, remove them using the method recommended for the marker or transfer product. A few minutes of careful finishing often makes the difference between embroidery that looks homemade in an unfinished way and embroidery that looks intentionally handcrafted.
Best Embroidery Stitches for Clothes
You do not need an advanced stitch library to create attractive embroidery on clothes. A small group of dependable stitches can produce lettering, outlines, floral motifs, geometric patterns, leaves, decorative borders, and small filled areas. SINGER’s beginner embroidery resources highlight foundational techniques such as backstitch, satin stitch, French knots, chain stitch, and split stitch, while DMC provides step-by-step diagrams covering these and many additional stitches.
For beginners, the best embroidery stitches for clothes are usually those that are easy to control and do not produce long, vulnerable threads on the reverse. Backstitch is particularly practical because it forms strong-looking continuous lines. Running stitch is simple and versatile for borders or visible-mending effects. Satin stitch creates solid color, while lazy daisy and French knots introduce decorative texture without requiring complicated construction.
Your stitch choice should also reflect how the garment will be used. A densely embroidered area may become stiff, while a loose design made from outlines and small accents can move more naturally with clothing. Delicate garments generally benefit from lighter stitching, while denim can support bolder thread and more substantial designs. I recommend building designs from two or three stitch types rather than using every technique you know. Limited stitch variety often produces a cleaner, more intentional visual style.
Backstitch for Outlines and Lettering
Backstitch is one of the most useful embroidery stitches for clothes because it creates a clean, nearly continuous line. DMC describes it as an essential flat stitch for outlines, making it particularly useful for names, initials, line drawings, geometric shapes, plant stems, and borders. It is also relatively easy to learn because each new stitch connects back toward the end of the previous one.
Stitch length affects how smooth the result appears. Long backstitches can work well on straight lines, but curved shapes usually need shorter segments. If you are stitching a small handwritten word or rounded flower petal, shorten each stitch as the line turns. This reduces the angular appearance that can develop when a curve is constructed from large straight sections.
Backstitch also works well on garments because it does not require large areas of dense thread. That makes it a good choice for T-shirts, delicate woven shirts, and places where you want decoration without significantly stiffening the fabric. For a beginner project, try outlining a small leaf, name, star, or flower with backstitch before introducing filled areas. The technique develops control over stitch length and tension while producing an immediately recognizable result.
| Embroidery Stitch | Best Use on Clothing | Design Examples | Beginner Suitability | Main Benefit |
|---|---|---|---|---|
| Backstitch | Outlines and lettering | Names, initials, stems, line art | Excellent | Creates clean continuous lines |
| Satin Stitch | Small filled areas | Petals, leaves, monograms | Easy to moderate | Produces solid blocks of color |
| Running Stitch | Simple lines and borders | Minimalist motifs, visible mending | Excellent | Quick and lightweight |
| French Knot | Small decorative details | Flower centers, dots, eyes | Easy | Adds raised texture |
| Lazy Daisy | Petals and small leaves | Flowers, floral motifs | Easy | Creates decorative shapes quickly |
| Stem Stitch | Curved lines and stems | Vines, branches, floral outlines | Easy to moderate | Follows curves smoothly |
Satin Stitch for Small Filled Shapes
Satin stitch creates a smooth, solid area by placing parallel stitches directly beside one another. DMC recommends it for filled shapes such as petals, leaves, and monograms. The technique produces a polished surface and is particularly effective when you want one part of a design to appear bold and visually substantial rather than simply outlined.
On clothing, satin stitch is easiest to manage in relatively small areas. Long satin stitches are more vulnerable to snagging because they remain exposed across the fabric surface. Large filled sections can also stiffen the garment and make tension problems more noticeable. Breaking a large shape into smaller stitched regions or choosing a different fill technique may create a more durable result.
Keep the thread direction consistent and avoid pulling each stitch tightly. If the edge of the shape begins curling inward or the surrounding material wrinkles, relax your tension. For very neat edges, outline the shape first and then place satin stitches from one side to the other. This gives you a clear boundary and helps maintain a smooth contour. Satin stitch rewards patience; rushing usually creates gaps, uneven angles, or overlapping threads.
Related Articles
French Knots, Running Stitch, and Lazy Daisy for Details
French knots are small raised stitches that add texture with very little space. DMC uses them as decorative details that can be scattered individually or grouped more densely. On clothing, they work beautifully for flower centers, berries, eyes, dots, stars, and tiny accents that would be difficult to fill with longer stitches.
Running stitch is even simpler. The needle moves repeatedly up and down through the fabric, creating a dashed line. It can be used for decorative borders, visible mending, geometric patterns, or informal outlines. Because it is quick and flexible, running stitch is an excellent way to practice consistent spacing before attempting more structured techniques.
Lazy daisy stitch forms petal- or leaf-like loops and combines naturally with both running stitch and French knots. A beginner floral motif might use backstitch for stems, lazy daisy stitches for petals, and French knots in the center. This combination looks detailed without requiring advanced techniques. Using several simple stitches together often creates more visual interest than trying to master one highly complex decorative stitch before you are comfortable controlling thread tension.
How to Embroider Different Types of Clothing Fabric
Different fabrics respond to embroidery in different ways, so the technique that works perfectly on a denim jacket may need adjustment on a T-shirt or lightweight blouse. Stable woven fabrics resist stretching and generally make stitch placement easier. Knits can expand in several directions, delicate fabrics may show needle holes or hoop marks, and thick materials can make hand stitching physically harder. Understanding these differences helps prevent unnecessary frustration.
DMC recommends preparing fabric according to its normal washing and care requirements before embroidery, while Brother’s embroidery materials demonstrate how backing and stabilizer choices can change according to fabric structure. Tear-away stabilizer can provide temporary support for many woven garments, whereas cut-away or adhesive products can be more useful when stretch must be controlled. Water-soluble material can serve as either backing or topping depending on the specific project and product.
For beginners, denim and medium-weight woven cotton are generally the easiest places to start. T-shirts are perfectly possible, but they require more attention to hooping and stabilizer. Sweatshirts can support bold embroidery but may also compress under dense stitching. Very delicate fabric should be approached carefully because large needles, dense satin stitch, or aggressive hoop tension can leave permanent marks. The goal is always to match the stitch density and support system to the fabric rather than forcing one method onto every garment.
| Clothing Type | Beginner Difficulty | Suggested Approach | Stabilizer Consideration |
|---|---|---|---|
| Denim jeans/jackets | Easy to moderate | Hand embroidery with sturdy needle | Optional for small designs |
| Woven cotton shirt | Easy | Hoop gently and stitch normally | Useful for dense motifs |
| T-shirt/jersey knit | Moderate | Keep fabric relaxed while hooping | Often helpful |
| Sweatshirt | Moderate | Use controlled tension | Helpful for dense embroidery |
| Delicate fabric | Advanced | Small, lightweight motifs | Test support first |
Embroidery on Jeans and Denim Jackets
Denim is one of the most forgiving materials for clothing embroidery because its woven structure provides a sturdy base. Jacket pockets, upper backs, cuffs, chest areas, and trouser legs all offer useful design space. The material can support visible thread well, making bright floss, floral motifs, lettering, celestial symbols, and visible-mending-inspired patterns particularly effective.
Thickness is the main challenge. Denim seams can contain several layers of tightly woven fabric, making them difficult to pierce repeatedly by hand. Avoid positioning a first project directly across heavy flat-felled seams, belt loops, pocket corners, or other bulky intersections. Moving a design even half an inch away from a thick seam can make stitching much easier and reduce stress on both your hands and needle.
Because denim is stable, small designs may not need stabilizer at all. However, larger filled motifs can still benefit from backing if the material begins distorting. Keep the reverse side reasonably smooth, particularly when embroidering jeans where stitches may touch the legs during wear. If the finished design will experience frequent washing, secure thread ends carefully and follow the garment and floss care instructions instead of assuming all denim embroidery can handle aggressive laundry cycles.
How to Embroider a T-Shirt Without Puckering
T-shirts are more challenging because jersey knit stretches and recovers as the garment moves. If the shirt is pulled tightly into a hoop and stitched while stretched, the embroidered section can shrink inward when the fabric is released. This creates the characteristic rippling or puckering beginners often see around T-shirt embroidery. The solution is to support the knit without distorting its natural dimensions.
Place the shirt in the hoop while keeping the fabric close to its relaxed shape. A suitable stabilizer behind the design can help prevent movement. Brother’s machine-embroidery guidance for T-shirts uses cut-away stabilizer behind the knit, tear-away support beneath the hoop, and water-soluble film on top, illustrating the degree of control dense machine embroidery can require. Hand embroidery is usually lighter, but backing remains valuable for many designs.
Choose a compact motif and avoid overly tight thread tension. Backstitch, running stitch, lazy daisy, and small areas of satin stitch are easier to control than very large filled sections. If the fabric begins pulling inward while you work, stop and inspect your tension before continuing. It is much easier to correct the first few stitches than to discover significant puckering after completing an entire design.
Can You Use a Machine to Embroider Clothes?
Yes, embroidery machines can decorate finished garments with monograms, names, logos, motifs, decorative borders, and complex programmed designs. SINGER describes machine embroidery as an automated approach that can create consistent detailed stitching more quickly than hand embroidery. The fundamental creative goal is similar, but the workflow is different because the machine requires a digital design, suitable hooping, compatible thread and needle, and appropriate stabilization.
Machine embroidery is particularly useful when repeatability matters. If you want the same logo on several shirts or need identical names and motifs across multiple garments, a machine can provide consistency that is difficult to reproduce by hand. It can also stitch dense designs far more quickly. The trade-off is additional equipment, setup, software or design-file knowledge, and the need to understand how machine stitch density interacts with different fabrics.
Hand embroidery remains more accessible for one-off customization because the basic equipment is inexpensive and flexible. You can change stitch direction, thread color, and design details at any moment without modifying a programmed file. Machine embroidery is therefore not automatically an upgrade from hand embroidery; it is a different method suited to different goals. Choose it when speed, consistency, detailed repeatability, or professional-style monograms are priorities, and use hand embroidery when individuality and manual control matter more.
Stabilize and Hoop Machine-Embroidery Projects Correctly
Machine embroidery places many stitches into fabric quickly, so stabilization is essential. SINGER’s beginner embroidery guidance emphasizes learning how to choose and use stabilizers such as tear-away, cut-away, and water-soluble types. Without adequate backing, the fabric can shift under the machine, causing outlines to misalign, filled areas to ripple, and designs to pucker after the garment is removed from the hoop.
Brother’s stabilizer products illustrate how different backing systems serve different fabrics. Iron-on stabilizer can support materials that need additional structure, while adhesive-backed water-soluble stabilizer can help control difficult-to-hoop areas or stretchy garments. Knitwear and T-shirts often need cut-away support because the backing continues stabilizing the stitches after embroidery is complete.
Whenever possible, test the complete setup before embroidering a valuable garment. Use fabric with similar stretch, thickness, and fiber content and stitch the same design with the intended thread and stabilizer. Machine designs can behave very differently depending on stitch density and garment structure. A successful test confirms whether the fabric remains flat, the design registers correctly, and the backing feels acceptable after finishing.
Hand Embroidery vs. Machine Embroidery
Hand embroidery is best understood as a flexible craft process in which every stitch is placed manually. SINGER describes it as highly customizable but slower than machine embroidery. The equipment requirements are modest: a hoop, thread, needle, scissors, fabric, and design-transfer method are enough for many projects. This makes hand stitching ideal for beginners, creative experimentation, personalized gifts, and one-of-a-kind garment details.
Machine embroidery emphasizes speed and repeatability. Once a design is prepared and the garment is correctly hooped and stabilized, the machine can reproduce complex stitching with consistent spacing and density. This makes it useful for names, logos, uniforms, repeated motifs, and larger quantities of customized clothing. However, the machine cannot compensate for incorrect stabilizer, poor hooping, or a design that is too dense for the fabric.
Neither method is universally better. Hand embroidery offers greater spontaneity and visible craftsmanship, while machine embroidery offers efficiency and consistency. Some advanced makers combine both approaches, using a machine for the main motif and adding hand-stitched details afterward. The right choice depends on your budget, available equipment, number of garments, desired aesthetic, and how much direct control you want over the stitching process.
Quick Answer About How to Add Embroidery to Your Clothes
To learn how to add embroidery to your clothes, begin with a garment that is easy to handle, a small design, embroidery floss, a suitable needle, sharp scissors, and a hoop that fits comfortably around the area you want to decorate. Stable woven fabrics such as denim or medium-weight cotton are especially beginner-friendly because they resist stretching while you stitch. DMC recommends using a hoop to keep fabric supported and evenly taut, which makes it easier to produce consistent stitches without distorting the material.
Next, transfer your design with a removable fabric marker, water-soluble transfer method, or another technique appropriate for the garment. If the fabric is stretchy, thin, loosely woven, or difficult to control, add embroidery stabilizer behind the design. Stabilizer helps reduce movement and can be particularly valuable for T-shirts, sweatshirts, delicate fabrics, and machine embroidery. Brother’s embroidery guidance demonstrates how cut-away, tear-away, adhesive, and water-soluble stabilizers can support different garment types and embroidery methods.
Finally, start with simple stitches such as backstitch, running stitch, satin stitch, lazy daisy, or French knots. Pull the thread firmly enough for stitches to lie neatly against the fabric but not so tightly that the garment puckers. Secure the thread carefully on the reverse, remove any temporary stabilizer according to its instructions, and wash the finished garment according to the requirements of both the clothing fabric and embroidery thread.
Frequently Asked Questions About How to Add Embroidery to Your Clothes
Learning how to add embroidery to your clothes naturally raises practical questions because garments are more demanding than decorative fabric. Beginners often want to know whether they can stitch directly onto finished clothing, whether a hoop is truly necessary, and how much stabilizer they need. Others are concerned about puckering, washable designs, or whether stretch fabrics can be embroidered successfully without specialized equipment.
The most useful principle is to evaluate the garment before choosing the method. Stable denim may need nothing more than a hoop and needle, while a lightweight jersey T-shirt can benefit greatly from temporary or permanent backing. Stitch choice matters too. Short, controlled stitches generally behave better on clothing than very long loose threads, while excessive tension can distort even sturdy fabric.
The answers below address the most common beginner questions in concise, practical terms. They are based on the same principles used throughout this guide: keep the garment in its natural shape, support unstable fabric, control thread tension, secure the reverse side neatly, and follow the care requirements of both the clothing and embroidery materials. These fundamentals matter more than any single brand of needle, hoop, or thread.
Can you embroider directly onto clothes?
Yes, many finished garments can be embroidered directly by hand. Stable woven materials such as denim, canvas-like cotton, and medium-weight shirts are particularly straightforward because they resist stretching while you work. You can transfer the design, place the garment in a hoop, and stitch through the finished fabric without dismantling the clothing.
The main consideration is access. Before beginning, check that you can reach the reverse of the design area and that pockets, linings, seams, or multiple layers will not trap your needle. Embroidering through both a pocket and the garment beneath it by accident can permanently stitch those layers together.
Stretchy or delicate clothing may still be embroidered directly, but stabilizer can make the process considerably easier. Brother lists shirts, jackets, blouses, and other garments among applications for its embroidery stabilizers. The purpose is not to prevent direct stitching; it is to support fabric that might otherwise shift or distort.
Do I need an embroidery hoop for clothes?
A hoop is not mandatory for every form of hand embroidery, but it is extremely useful for beginners. DMC recommends using an embroidery hoop because maintaining a supported, even surface makes stitch spacing and tension easier to control. The hoop also keeps your non-stitching hand from constantly stretching the fabric manually.
The important point is to hoop the garment correctly. Stable woven fabric can usually be tightened until smooth and firm. Stretch fabric should remain close to its natural shape rather than being pulled outward. If you distort a T-shirt in the hoop, the embroidery can wrinkle when the garment returns to normal.
Some experienced embroiderers stitch certain fabrics without hoops, particularly when using visible-mending techniques or working in difficult areas. Beginners usually achieve more consistent results with one. Choose a hoop large enough for the design and reposition it carefully if the motif extends beyond the available working area.
What is the easiest stitch for embroidery on clothes?
Backstitch is one of the easiest and most useful choices. DMC describes it as an essential flat stitch for creating continuous outlines, making it ideal for lettering, names, line art, stems, geometric shapes, and simple illustrations. Once you learn to control stitch length, the technique can follow both straight and curved lines effectively.
Running stitch is even simpler because the needle repeatedly travels up and down through the fabric to create a dashed line. It works well for borders, decorative seams, visible mending, and minimalist motifs. Many beginners practice running stitch first and then move to backstitch when they want a continuous line.
After those two techniques feel comfortable, add lazy daisy, French knots, and small areas of satin stitch. These stitches create petals, texture, and filled shapes without requiring advanced embroidery knowledge. A complete decorative motif can often be produced from only three or four beginner stitches.
How do you stop embroidery from puckering?
Puckering usually develops when the fabric moves too much during stitching or when the thread is pulled too tightly. DMC’s hooping guidance emphasizes keeping the material supported while avoiding excessive stitch tension. Each stitch should rest against the fabric rather than cinching the material inward.
Proper hooping is the first solution. Keep woven fabric smooth and evenly taut. With stretchy knit fabric, maintain the garment in its natural dimensions and use stabilizer when necessary instead of creating stability by stretching the shirt. If the design begins looking smaller or the fabric starts gathering around its edges, stop before adding more stitches.
Stabilizer provides another layer of control. SINGER and Brother both emphasize backing for machine embroidery, and the same concept can help many hand-embroidered garments. Dense designs generally need more support than light outlines. Testing a small area before completing the full motif can reveal whether your fabric and thread tension are working together properly.
Can you embroider a stretchy T-shirt?
Yes, a stretchy T-shirt can be embroidered successfully, but it requires more preparation than denim or stable cotton. The main challenge is preventing the knit from stretching while you stitch. Place the garment in the hoop without pulling it wider than its natural shape and consider adding stabilizer behind the motif.
Brother’s T-shirt machine-embroidery guidance uses cut-away backing on the knit, additional tear-away stabilization, and water-soluble topping for dense machine designs. Hand embroidery generally creates fewer stitches and may need less support, but a suitable backing can still help a small motif remain flat and consistent.
Choose designs with controlled stitch density. Outlines, small flowers, lettering, and simple decorative motifs are easier for a first T-shirt project than a large area of solid satin stitching. Pull each stitch gently and check the garment outside the hoop periodically if you suspect distortion is developing.
Can embroidered clothing be washed?
Yes, embroidered clothing can usually be washed, but the safest method depends on the garment fabric, embroidery thread, stabilizer, embellishments, and transfer materials used. DMC recommends following the care requirements of both the fabric and thread when cleaning finished embroidery. The most delicate component should generally determine the overall care method.
Secure thread ends carefully before washing because loose tails can work free through repeated movement. Clothing embroidery may justify more robust securing methods than framed needlework because garments experience friction, stretching, and laundering. If stabilizer remains behind the embroidery, confirm that it is designed to stay in the garment and tolerate the intended cleaning process.
Gentle washing can help protect delicate hand embroidery. Avoid harsh handling of raised stitches, long satin stitches, French knots, or areas with beads and other embellishments. If you are unsure about a newly completed garment, test conservative care first instead of immediately using the hottest or most aggressive wash cycle.
Conclusion
Learning how to add embroidery to your clothes is less about mastering dozens of stitches and more about understanding a few reliable principles. Start with an accessible garment, a manageable design, suitable floss, the right needle, sharp scissors, a hoop, and an appropriate transfer method. Stable fabrics such as denim are especially beginner-friendly, while stretch garments usually need more careful hooping and may benefit from stabilizer.
The technical habits matter as much as the creative design. Keep the garment close to its natural dimensions, avoid pulling thread excessively tight, and inspect the reverse as you work. Use backstitch and running stitch for clean outlines, add satin stitch for compact filled areas, and introduce French knots or lazy daisy stitches when you want texture. If the fabric moves or begins puckering, solve the support problem before continuing rather than trying to correct distortion after completing the entire motif.
Once these fundamentals are comfortable, clothing embroidery becomes highly versatile. You can personalize pockets, repair worn areas with visible mending, decorate collars, create embroidered T-shirts, transform denim jackets, or combine hand and machine techniques. Begin with one small project and treat it as practice rather than expecting perfection. Each finished garment will teach you more about thread tension, fabric behavior, stitch choice, and design placement, making the next customization easier and more refined.
Comments are closed, but trackbacks and pingbacks are open.