
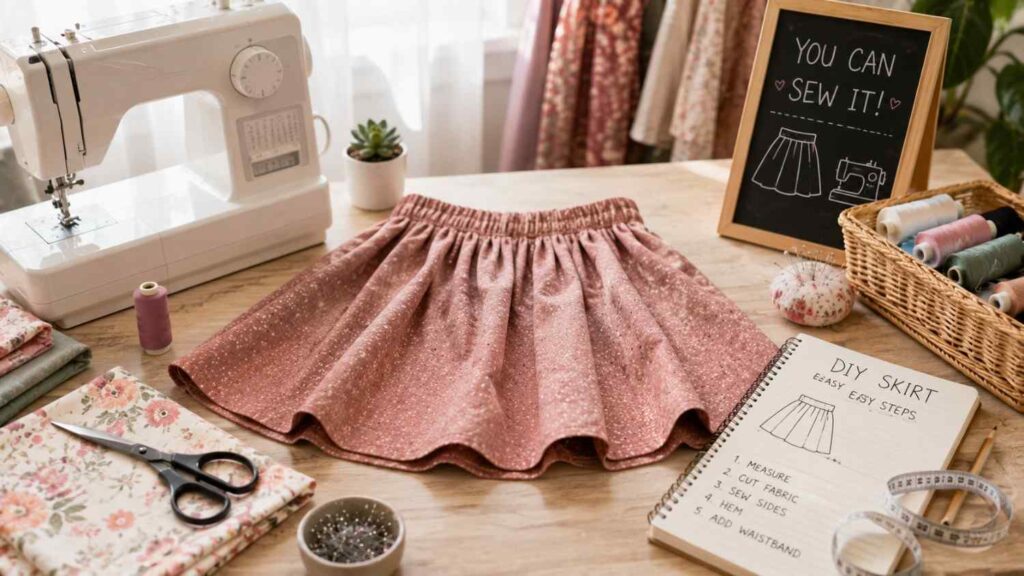
How to Sew a Skirt: A Beginner’s Guide
Learning how to sew a skirt is an excellent way to begin garment making because the project combines useful sewing skills with a relatively simple shape. Unlike a fitted shirt, tailored trousers, or structured jacket, a basic gathered skirt does not require sleeves, collars, buttonholes, complex curves, or advanced fitting adjustments.
This beginner skirt sewing tutorial uses a rectangular design with an elastic waistband. It can be made without a commercial pattern because the dimensions are calculated from your body measurements. The method also avoids a zipper, making it suitable for someone who has practised basic straight stitching but has not yet completed a full garment.
The finished skirt can be customized through fabric, length, fullness, hem depth, and elastic width. A lightweight cotton can create a casual summer skirt, while chambray or soft linen can produce a more structured everyday garment. The same basic construction method can later be adapted with pockets, tiers, decorative topstitching, or a lining.
Successful sewing depends more on preparation than speed. Accurate measurements, careful cutting, a consistent seam allowance, and regular pressing will make a greater difference than decorative details. Test your machine settings on scrap fabric before sewing the actual pieces, and keep a seam ripper nearby for corrections.
Your first skirt does not need to look factory-made. The purpose is to produce a comfortable, wearable garment while learning how fabric behaves and how separate construction stages work together.
What You Need Before You Start Sewing
A successful skirt project begins before the first seam is stitched. Suitable tools, appropriate fabric, matching thread, and the correct needle can make a simple project feel controlled and enjoyable. Poor preparation, by contrast, can cause puckered seams, skipped stitches, uneven cutting, or unnecessary frustration.
You do not need a fully equipped professional sewing room. A reliable machine capable of producing a straight stitch, sharp fabric shears, a measuring tape, pins or clips, thread, elastic, and an iron are enough for this project. A seam ripper is also essential. Even experienced sewists remove and resew stitches, so correcting a seam should be viewed as part of the process rather than a failure.
Fabric choice has a major influence on difficulty. Stable woven fabric holds its shape while measuring and cutting, allowing the beginner to concentrate on construction. Slippery satin, chiffon, and highly stretchy jersey can move, curl, or distort, making them less suitable for a first garment.
The fabric should also suit the design. A gathered skirt needs enough softness to form comfortable folds at the waistband. Very stiff material may create excessive volume, while extremely thin fabric may require a lining.
Before starting, clean the machine, insert a suitable needle, wind the bobbin, and test the stitch on a folded scrap. Confirm that the fabric feeds smoothly and that the stitches look balanced on both sides.
Essential Sewing Tools and Supplies
The sewing machine should be able to produce a consistent straight stitch and, ideally, a zigzag or overcast stitch for finishing raw edges. A basic mechanical machine is sufficient. You do not need decorative stitches or computerized features to complete the skirt.
Use a universal needle suited to the fabric weight. A medium-sized universal needle is often appropriate for cotton poplin, chambray, or lightweight linen blends, but heavier denim or delicate fabric may require a different needle. Brother recommends matching the needle and thread to the material because an unsuitable combination can contribute to skipped stitches, damaged fabric, or broken thread.
You will also need:
- All-purpose polyester thread
- Flexible measuring tape
- Sharp fabric shears or a rotary cutter and cutting mat
- Pins or sewing clips
- Tailor’s chalk or a removable fabric marker
- Seam ripper
- Safety pin or elastic-threading tool
- Iron and ironing board
- Waistband elastic
- Ruler or seam gauge
- Fabric
Do not use paper scissors on fabric because they can crush or drag the fibers. Keep the iron nearby throughout the project. Pressing after each construction stage helps seams lie flat and makes later folds more accurate.
Choosing Beginner-Friendly Fabric and Elastic
Stable woven fabrics are the most manageable choice for a first skirt. Cotton poplin, quilting cotton, chambray, cotton lawn, lightweight denim, soft twill, and linen blends generally remain flat during measuring and cutting. They also respond well to a standard straight stitch.
The best fabric weight depends on the desired silhouette. Lightweight cotton produces softer gathering and movement, while medium-weight twill creates a more structured shape. Very stiff fabric may become bulky around the elastic casing, especially when the skirt is cut with considerable fullness.
Check whether the fabric is transparent by holding it against the light. A pale or lightweight material may require a lining or slip. Also consider print direction. Stripes, checks, one-way florals, and border prints require additional planning and may need more fabric for matching.
Choose elastic that feels supportive without being rigid. A width of approximately 25–40 mm, or 1–1½ inches, is practical for a beginner waistband. The casing should be slightly wider than the elastic so it can move through the channel without folding.
Before cutting, wrap the elastic around your waist and adjust it until it feels secure but comfortable. Do not assume the elastic length should equal the body measurement because different elastic types stretch and recover differently.
How to Measure and Cut Your Skirt
Accurate measuring and cutting create the foundation for the entire garment. Even excellent stitching cannot fully correct fabric pieces that were cut off grain, measured too narrowly, or shortened without allowing for the waistband and hem.
For a basic gathered skirt, you need three body measurements: the waist position where the elastic will sit, the fullest hip measurement, and the desired finished length. The hip measurement is particularly important because the skirt must pass over the hips when there is no zipper.
The total panel width should be greater than the hip measurement. This extra width provides both wearing ease and gathering. Lightweight fabric can handle more fullness, while medium-weight fabric usually looks better with a more moderate ratio. A beginner-friendly starting point is approximately 1.5 times the hip measurement, although you can use more for a fuller silhouette.
The cutting length must include the finished skirt length, the fabric needed for the elastic casing, and the hem allowance. Forgetting either allowance will produce a skirt shorter than intended.
Fabric preparation is equally important. Wash and dry the material according to the care method you plan to use for the finished garment. Prewashing helps account for possible shrinkage before the seams and hem are fixed.
After washing, press the fabric flat and align it carefully. Identify the selvage and lengthwise grain before marking the panels. Cutting on grain helps the skirt hang more evenly and reduces unwanted twisting.
Take the Correct Waist, Hip, and Length Measurements
Wear close-fitting clothing or undergarments while measuring so bulky garments do not increase the numbers. Use a flexible tape and stand naturally without holding your breath or pulling the stomach inward.
Measure the waist at the exact position where you want the elastic to sit. This may be the natural waist, slightly below it, or at a higher position depending on the intended style. Keep the tape level and comfortably close to the body without tightening it.
Measure the hips around the fullest part of the seat. Check the measurement in a mirror or ask someone to confirm that the tape remains parallel to the floor. This dimension determines the minimum width needed for the skirt to pass over the body.
Measure the finished length from the planned waistband position down to the desired hem. Add the casing and hem allowances afterward.
For example:
- Desired finished length: 65 cm
- Casing allowance: 5 cm
- Hem allowance: 4 cm
- Total cutting length: 74 cm
Record every number instead of relying on memory. If you plan to wear the skirt with particular shoes or at a specific height on the waist, test the length in front of a mirror before cutting.
Calculate, Prepare, and Cut the Fabric
Begin by calculating the total skirt width. Multiply the hip measurement by the desired fullness ratio. If the hips measure 100 cm and you want moderate gathering, a total fabric width of approximately 150 cm provides a 1.5-to-1 ratio. Add seam allowances if cutting separate panels.
You may cut one large rectangle and place the seam at the center back, or cut two equal rectangles and sew side seams. Two panels are often easier to arrange on standard-width fabric and make it simpler to add side-seam pockets later.
Prewash, dry, and press the fabric before cutting. Fold it with the selvages aligned and smooth out wrinkles without stretching the material. The lengthwise grain runs parallel to the selvage and should normally run vertically down the finished skirt.
Mark the pieces using tailor’s chalk or a removable fabric marker. Use a ruler to keep the corners square and the edges straight. Measure twice before cutting.
When working with a directional print, make sure every panel faces the same way. Match prominent stripes or checks where practical. Cut slowly with long, smooth strokes rather than lifting and chopping at the fabric repeatedly.
After cutting, transfer any useful markings, including the top edge, side seams, or casing opening. Keep the panels flat until you are ready to sew them.
How to Sew a Skirt Step by Step
Once the fabric pieces are prepared, the project moves into construction. Work in a logical order and press after each important stage. Pressing is different from ironing: rather than sliding the iron continuously, lift and lower it to shape seams and folds without stretching the fabric.
Maintain the same seam allowance throughout the side seams. If you calculated the project using a 1.5 cm or 5/8-inch allowance, guide the raw edge along the corresponding machine marking. An inconsistent allowance can make one side tighter, create uneven panel widths, or affect the final hem.
Test the stitch on a doubled scrap of the same fabric. A straight stitch length of approximately 2.5 mm is a practical starting point for many medium-weight woven fabrics. Adjust it when the fabric puckers, feeds poorly, or requires a longer stitch.
Complete the side seams before forming the waistband. This creates a fabric tube and allows the casing to continue smoothly around the top. Finish raw edges before they begin to fray excessively.
When creating the casing, leave enough room for the elastic to move freely but not so much that it twists easily. Check the elastic before closing the opening and distribute the gathers evenly around the waist.
Hem the skirt only after the waistband is complete and the garment has been tried on. The final wearing position affects where the lower edge falls, so fitting before hemming produces a more accurate length.
| Material/Tool | Purpose | Recommended for Beginners | Article Section |
|---|---|---|---|
| Woven Cotton | Easy fabric handling | ✔ Yes | Choosing Beginner-Friendly Fabric |
| Linen Blend | Breathable and stable | ✔ Yes | Choosing Beginner-Friendly Fabric |
| Chambray | Lightweight woven fabric | ✔ Yes | Choosing Beginner-Friendly Fabric |
| Universal Sewing Needle | General fabric sewing | ✔ Yes | Essential Sewing Tools |
| Polyester Thread | Strong construction stitching | ✔ Yes | Essential Sewing Tools |
| Measuring Tape | Taking body measurements | ✔ Yes | Measuring and Cutting |
| Fabric Shears | Accurate fabric cutting | ✔ Yes | Essential Sewing Tools |
| Iron | Pressing seams and hems | ✔ Yes | Throughout Construction |
Sew and Finish the Side Seams
Place the skirt panels with their right sides facing each other. The right side is the surface intended to show on the finished garment. Align the top, bottom, and side edges carefully, then secure each side with pins or clips.
Position the fabric under the presser foot and lower the needle near the top edge. Backstitch for a few stitches to secure the beginning of the seam, then sew with a straight stitch using the planned allowance. Guide the fabric gently without pulling it from behind or pushing it toward the needle.
Backstitch again at the lower edge. Repeat the process for the second side seam, or sew the single back seam when using one rectangle.
Finish the raw edges to reduce fraying. Options include a zigzag stitch, overcast stitch, serger, or pinking shears. A zigzag finish is practical when using a standard machine. Keep the stitches close enough to protect the edge without causing it to curl.
Press the seams open for a flat result, or press both allowances toward the back when your finishing method works better that way. Use a temperature suitable for the fabric. Flat, well-pressed seams make the waistband and hem easier to construct accurately.
Create and Finish the Elastic Waistband
Finish the upper raw edge before making the casing if the fabric frays easily. A zigzag or overcast stitch will keep loose threads from building up inside the waistband.
Fold the upper edge toward the wrong side by approximately 6 mm or ¼ inch and press. Fold it again deeply enough to hold the elastic with a small amount of clearance. For example, 32 mm elastic may require a finished casing slightly wider than 32 mm.
Pin or clip the fold evenly around the skirt. Stitch near the lower folded edge, leaving an opening of approximately 5 cm or 2 inches.
Attach a safety pin to one elastic end and feed it through the casing. Hold the opposite end outside the opening or pin it securely to the fabric. Work the casing over the elastic instead of pulling forcefully.
Before joining the ends, confirm that the elastic is not twisted. Overlap the ends by approximately 2–3 cm and stitch them together using several rows of zigzag stitching or a secure rectangular pattern.
Distribute the gathers evenly and try on the skirt. Adjust the elastic when necessary, then close the casing opening. To reduce twisting, stitch vertically through the waistband at each side seam.
Check the Fit, Hem the Skirt, and Press
Try on the skirt before marking the final hem. Check whether the waistband feels secure without digging into the body. Walk, sit, and bend slightly to confirm that the skirt has enough ease through the hips.
Examine the side seams in a mirror. They should hang reasonably straight rather than pulling toward the front or back. If the lower edge appears uneven, ask someone to help mark the hem while you stand naturally.
For a double-fold hem, turn the raw edge toward the wrong side by approximately 1 cm and press. Fold it again by the remaining hem allowance and press carefully. A seam gauge helps keep the fold consistent.
Pin the hem at regular intervals and stitch close to the upper folded edge. Sew slowly and avoid stretching the fabric, particularly when sections are slightly off the straight grain.
If the skirt is very full, the upper edge of a deep hem may be wider than the lower edge. In that situation, use a narrower hem or ease the fullness carefully.
Finish by pressing the side seams, waistband, and hem. Use a pressing cloth when working with dark, delicate, or heat-sensitive fabric. A final press gives the skirt a cleaner, more professional appearance.
Related Articles
Quick Answer About How to Sew a Skirt: A Beginner’s Guide
The easiest method for learning how to sew a skirt is to make a gathered design with an elastic waistband. Begin by measuring your waist, fullest hip, and desired finished length. Cut one wide rectangle or two equal panels from stable woven fabric. The combined width should fit comfortably over your hips while providing enough extra fabric for gathers.
Sew the fabric into a tube by joining the side seams with the right sides facing each other. Finish the raw edges to reduce fraying and press the seams flat. Fold the top edge into a casing, leaving a small opening for the elastic. Thread the elastic through, join its ends securely, and close the opening.
Try on the skirt before hemming so you can confirm the fit and length. Turn the lower edge toward the wrong side twice and stitch it in place. Finish by pressing the waistband, seams, and hem.
This elastic-waist method avoids zippers, buttons, darts, and shaped waistbands. It allows a beginner to concentrate on accurate cutting, straight stitching, seam finishing, elastic insertion, and basic garment fitting.
The Easiest Skirt Style for a Beginner
A rectangular gathered skirt is usually easier to construct than a pencil skirt, fitted A-line skirt, pleated skirt, or lined design. Its pieces consist mainly of straight edges, which makes measuring and cutting more manageable. The waistband relies on elastic rather than a zipper or button closure, so the fit does not need to be as exact as it would with a rigid waistband.
This style also introduces several useful garment-making skills without overwhelming a beginner. You learn how to work with right sides together, maintain a consistent seam allowance, finish raw edges, press seams, create a casing, insert elastic, distribute gathers, and sew an even hem.
For readers who want to explore additional beginner-friendly skirt styles and construction ideas, this beginner skirt-making guide provides useful insights that complement the techniques covered here.
For a first project, choose a knee-length or midi-length skirt. These lengths provide enough fabric for correcting a slightly uneven hem while remaining easier to handle than a full-length garment. Avoid extremely full fabric widths during your first attempt because heavy gathering can make the waistband bulky.
Stable cotton or linen-blend fabric will make the project easier. Slippery, stretchy, or highly draped materials can shift during cutting and sewing, making accurate construction more difficult.
| Sewing Stage | Main Task | Key Elements | Beginner Tip |
|---|---|---|---|
| Fabric Preparation | Wash, dry, and press fabric | Prewashing, pressing, fabric grain | Always prepare fabric before cutting to reduce shrinkage. |
| Measuring | Take body measurements | Waist, hips, skirt length | Keep the measuring tape level and avoid pulling it tight. |
| Fabric Cutting | Cut skirt panels | Seam allowance, grainline, selvage | Double-check measurements before making the first cut. |
| Side Seam Construction | Join skirt panels | Straight stitch, backstitch, seam finishing | Maintain a consistent seam allowance throughout. |
| Waistband Creation | Sew elastic casing | Elastic, casing, safety pin | Ensure the elastic stays flat while threading it through the casing. |
| Hem Finishing | Complete the bottom edge | Double-fold hem, pressing | Press before stitching for a cleaner professional finish. |
The Basic Construction Sequence
A clear construction sequence prevents you from completing one stage before preparing something needed later. Read through the entire process before cutting, even when the project appears simple.
The basic sequence is:
- Measure the waist, fullest hip, and desired skirt length.
- Select, prewash, dry, and press the fabric.
- Calculate the panel width and cutting length.
- Mark the fabric grain and cut one or two rectangles.
- Sew the side seams with the right sides together.
- Finish the raw seam edges and press them.
- Finish and fold the upper edge to create an elastic casing.
- Insert the elastic and confirm that it is not twisted.
- Join the elastic ends and close the casing opening.
- Try on the skirt and check the length.
- Fold, press, and sew the hem.
- Give the finished garment a final press.
Keeping these steps in order makes the project easier to control. For example, checking the skirt length after inserting the waistband gives a more accurate result than measuring the hem while the fabric is still lying flat.
If you’d like to compare another beginner-focused workflow, this step-by-step skirt tutorial offers a helpful overview of the sewing process alongside the method explained in this guide.
Frequently Asked Questions About How to Sew a Skirt: A Beginner’s Guide
Beginners often encounter questions that are not obvious from the basic construction sequence. Fabric quantity, machine settings, elastic behavior, pattern use, and hand-sewing options can all affect the finished result. Understanding these issues before starting makes the project easier to plan and reduces avoidable mistakes.
The rectangular elastic-waist method is intentionally flexible. It does not require exact fitting through the waist because the elastic adjusts to the body. However, the skirt still needs enough width to pass over the hips, and the fabric must form comfortable gathers without becoming excessively bulky.
Fabric choice also changes the project. Lightweight woven cotton is generally easier to gather and hem than thick denim. Stretch knit fabric requires different stitches and handling, so beginners should not apply woven-fabric instructions without modification.
Another common concern is whether a pattern is necessary. The rectangular design can be calculated directly from body measurements, but commercial patterns provide shaped pieces, tested proportions, and detailed instructions. Both methods are useful, depending on the desired style.
Machine problems should be addressed through testing rather than guesswork. Thread the machine correctly, insert a suitable needle, and sew on scraps before touching the garment pieces. When a seam puckers or skips stitches, check the setup before assuming the fabric is unsuitable.
The answers below explain the most common beginner questions in greater detail and clarify when a simple solution is appropriate and when a different technique may be required.
Is a Skirt Easy to Sew for a Complete Beginner?
A gathered elastic-waist skirt is one of the easiest garments for a complete beginner because the pattern pieces are simple and the fitting requirements are forgiving. Most construction involves straight cutting, straight seams, an elastic casing, and a basic hem.
The project is easier when you choose stable woven fabric and avoid additional details such as pockets, lining, tiers, buttons, or zippers. Each extra feature introduces another technique and creates more opportunities for errors.
A fitted skirt is more challenging. Pencil skirts and shaped A-line designs may include darts, a zipper, a waistband, facings, vents, or lining. These features require more precise measurements and sewing.
Before beginning, practise sewing straight lines on scrap fabric. Learn how to backstitch, maintain a seam allowance, wind and insert the bobbin, and remove stitches with a seam ripper.
The first skirt may not be perfectly even, but it can still be wearable. Treat the project as a structured learning exercise. Completing a simple garment builds confidence and makes more advanced patterns easier to understand later.
Can I Sew a Skirt Without a Pattern?
Yes. A simple gathered skirt can be made from one or two rectangles calculated from your measurements. The hip measurement determines the minimum width, while the desired length determines how long the pieces should be. Additional fabric is included for gathering, seam allowances, the elastic casing, and the hem.
This method works because the fabric is not shaped closely to the body. The elastic draws the upper edge inward, creating gathers around the waist. It is therefore much more forgiving than a fitted skirt.
A commercial pattern becomes useful when the design includes shaped side seams, darts, a curved waistband, pockets, panels, pleats, or a zipper. Patterns also provide tested sizing, fabric layouts, cutting lines, and construction instructions.
When sewing without a pattern, write down every calculation and label the top and bottom edges after cutting. Make a small sample casing with scrap fabric to confirm the elastic and fold measurements.
The rectangular method is ideal for learning basic construction, but it does not replace pattern drafting when you want a tailored silhouette. Consider it a foundation that can later lead to more structured skirt designs.
How Much Fabric Do I Need to Sew a Skirt?
Fabric quantity depends on the wearer’s hip measurement, skirt length, desired fullness, fabric width, print direction, and number of panels. A basic gathered skirt may require approximately 1.5 to 2.5 metres or yards, but this range is only a starting estimate.
Wider fabric may allow both skirt panels to sit side by side, reducing the required length. Narrow fabric may require each panel to be cut separately. A long or very full skirt will need more material than a knee-length version.
Directional prints, stripes, checks, and large motifs may also increase fabric requirements because the pieces must be positioned carefully. Matching a prominent pattern across side seams may require extra width.
Before purchasing, calculate the panel dimensions and create a simple cutting plan based on the fabric width. Include seam allowances, casing allowance, hem allowance, and possible shrinkage.
When uncertain, purchasing a small additional amount is safer than discovering that the fabric is too short after prewashing. Extra material can be used for pockets, a matching headband, belt loops, or testing stitches and seam finishes.
What Stitch Should I Use to Sew a Skirt?
For a skirt made from stable woven fabric, use a standard straight stitch for the structural seams. A stitch length of approximately 2.5 mm is a useful starting point for cotton, chambray, lightweight linen, and similar fabrics.
Test the stitch on a folded scrap before sewing the garment. The test should use the same number of fabric layers as the actual seam. Check both sides for balanced tension, skipped stitches, puckering, or loose loops.
Use a zigzag or overcast stitch to finish raw edges when you do not have a serger. The zigzag should cover the fabric edge without pulling it into a tight tunnel.
Stretch fabrics require a different approach. A narrow zigzag, stretch stitch, or serger may be necessary so the seam can expand without breaking. The elastic-waist tutorial in this article is designed primarily for woven fabric.
Backstitch at the beginning and end of structural seams unless the instructions say otherwise. Avoid using an extremely short stitch because it can become difficult to remove and may weaken delicate fabric by creating too many needle holes.
Can I Sew a Skirt Entirely by Hand?
Yes, a simple skirt can be sewn entirely by hand, although the process will take longer than machine sewing. Hand construction is most practical with lightweight or medium-weight woven fabric that is easy to pierce and control.
Use a backstitch for the side seams because it creates a stronger line than a basic running stitch. Keep the stitches small and consistent. For raw edges, use an overcast or whip stitch to reduce fraying.
The waistband casing can be sewn with a backstitch or small running stitches, but make sure the line is strong enough to withstand the tension of the elastic. A slip stitch or hemming stitch can secure the lower hem with minimal visibility from the right side.
Use high-quality thread and avoid cutting a very long length, which can tangle. A hand-sewing needle appropriate to the fabric will make the work easier.
Pressing remains important even when sewing by hand. Fold and press the casing and hem before stitching. Hand sewing requires patience, but it can produce a durable, neat garment when the stitches are secure and evenly spaced.
Why Is My Elastic Waistband Twisting?
Elastic usually twists because the casing is much wider than the elastic, the elastic turned during insertion, or the waistband has not been anchored at key points. Twisting can also occur when the elastic is very soft or when the skirt contains heavy gathers.
Before joining the ends, run your fingers around the entire casing and confirm that the elastic lies flat. The safety-pin end should face the same direction as the unsecured end. If one end has rotated, pull part of the elastic back out and correct it before stitching.
The casing should provide only a small amount of clearance. It must be wide enough for the elastic to move through, but not so wide that the elastic can flip easily.
After joining the ends and distributing the gathers, stitch vertically through the waistband at the side seams. Stretch the elastic while sewing so the fabric remains evenly distributed. These short anchor lines help prevent movement without stopping the waistband from expanding.
If the elastic continues to twist, consider replacing it with a firmer woven or non-roll waistband elastic designed to remain flat under tension.
Conclusion
Sewing a simple skirt teaches a valuable combination of measuring, cutting, machine control, fitting, and finishing. The project is manageable enough for a beginner, yet it introduces techniques that appear repeatedly in more advanced garment patterns.
The most important decisions happen before construction. Choose a stable woven fabric, prewash it, measure the body accurately, and calculate enough width for the skirt to pass over the hips. Include allowances for seams, the elastic casing, and the hem before cutting.
During construction, maintain a consistent seam allowance and press after each major step. Finish raw edges to control fraying, and test the elastic before closing the casing. Try on the skirt before hemming because the waistband position affects the final length.
A first skirt does not need complicated details. Straight seams, a comfortable waistband, and an even hem create a useful garment and provide a strong foundation for later projects. Once the basic method feels familiar, you can introduce one new skill at a time, such as pockets, tiers, lining, or a shaped waistband.
The practical lesson in how to sew a skirt is that accuracy and patience matter more than speed. Small corrections made during construction prevent larger fitting or finishing problems later. A seam ripper, pressing iron, and willingness to test techniques on scraps are essential parts of successful garment sewing.
Key Takeaway
The easiest way to complete this guide on how to sew a skirt is to keep the first design simple. Use stable woven fabric, a rectangular gathered shape, and a comfortable elastic waistband. These choices allow you to concentrate on essential sewing skills instead of complex fitting and closures.
Measure the fullest hip carefully because the skirt must pass over that part of the body. Add enough fullness for movement and gathers, but avoid using excessive width with heavy fabric. Prepare the material before cutting and keep the grain aligned with the selvage.
During sewing, maintain the same seam allowance from beginning to end. Finish raw edges, press each seam, and test the casing before inserting the elastic. Check that the elastic lies flat and feels comfortable before closing the opening.
Hem the garment only after trying it on. This produces a more accurate finished length and gives you an opportunity to correct an uneven lower edge.
A successful first skirt is one that fits comfortably, stays together securely, and teaches you how garment construction progresses from flat fabric to wearable clothing.
Your Next Step
After completing the basic skirt, repeat the project while adding one new feature. Patch pockets are a practical next step because they can be attached to the outside of the garment without changing the side seams. In-seam pockets are slightly more advanced but introduce a technique that appears in many dresses and skirts.
You could also divide the skirt into two or three horizontal tiers. This adds gathering practice and creates a different silhouette without requiring a zipper or fitted waistband. Decorative topstitching, contrasting thread, or a deeper hem can further personalize the design.
When you are comfortable with elastic casings, move to an A-line pattern with shaped side seams. After that, consider a skirt with a separate waistband and zipper. These projects introduce more precise fitting and closure construction.
Keep notes about your measurements, fabric choice, elastic length, and any changes made during sewing. Those records will make the next version easier to plan.
Building one skill at a time is more effective than choosing a complicated pattern too soon. Each completed garment should provide a clear technique you can carry into the next project.
Comments are closed, but trackbacks and pingbacks are open.